
How to Enter an Exam Session’s Results and Fill In Your Report
As an examiner, you record the results of the exam sessions you examine in the system, close each session by confirming its results, and then fill in your examiner’s report.
You can do this for a session once Paardensport Vlaanderen has confirmed you as its examiner. That confirmation is what gives you access: you see the candidates and can record their results for that session only — being examiner of one session does not open any other.
Before you begin
You need:
- Paardensport Vlaanderen’s confirmation as examiner of the session;
- the candidates’ results for every part of every exam in the session.
Results can be entered from the session’s start date.
Step 1 — Open your profile
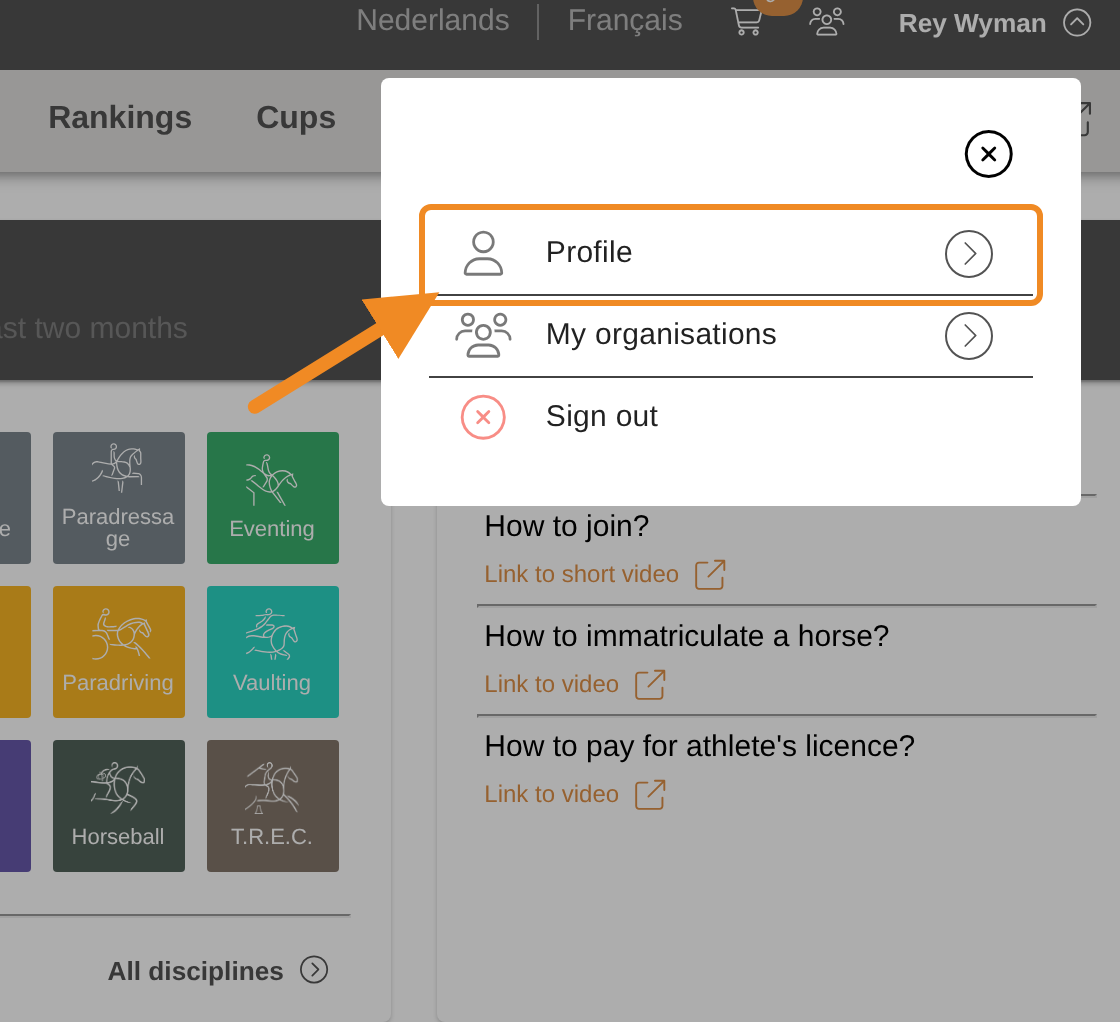
Click your name in the upper-right corner of any page and choose “Profile”.
Step 2 — Open your assignments
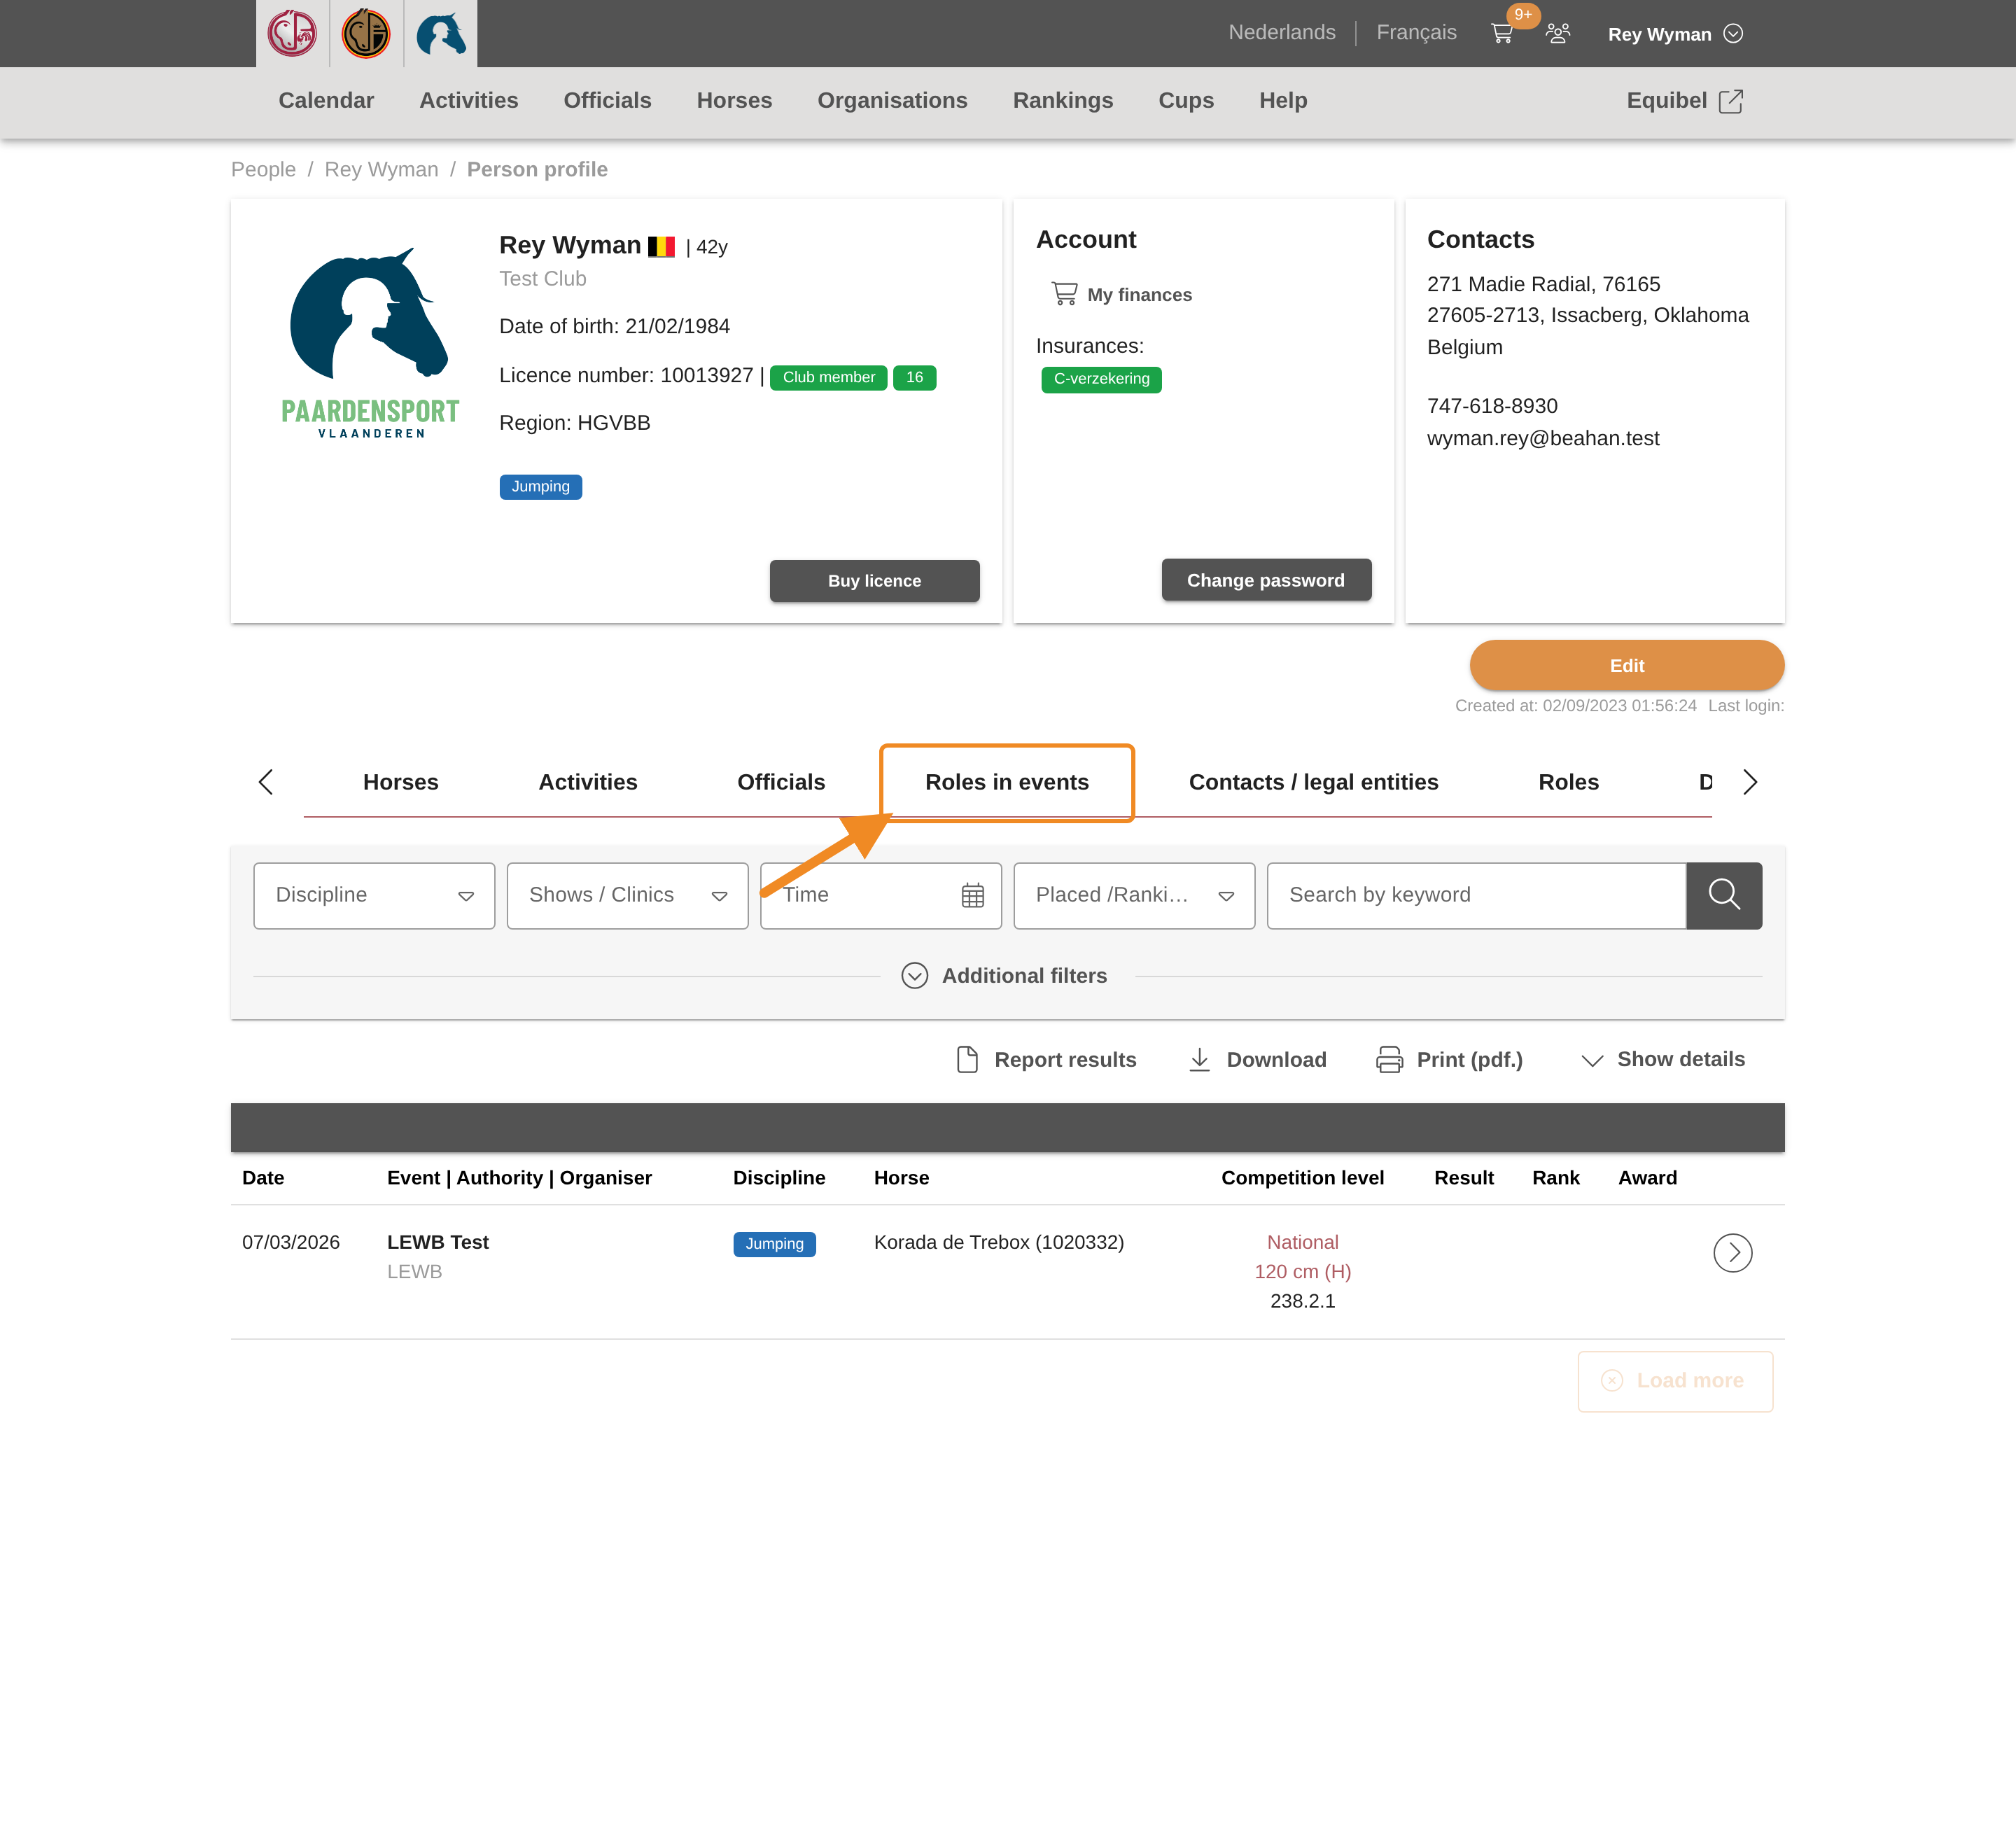
Open the tab “Roles in events”. The profile has more tabs than fit on the screen: if you don’t see this one, use the arrow on the right of the tabs.
Step 3 — Open the session
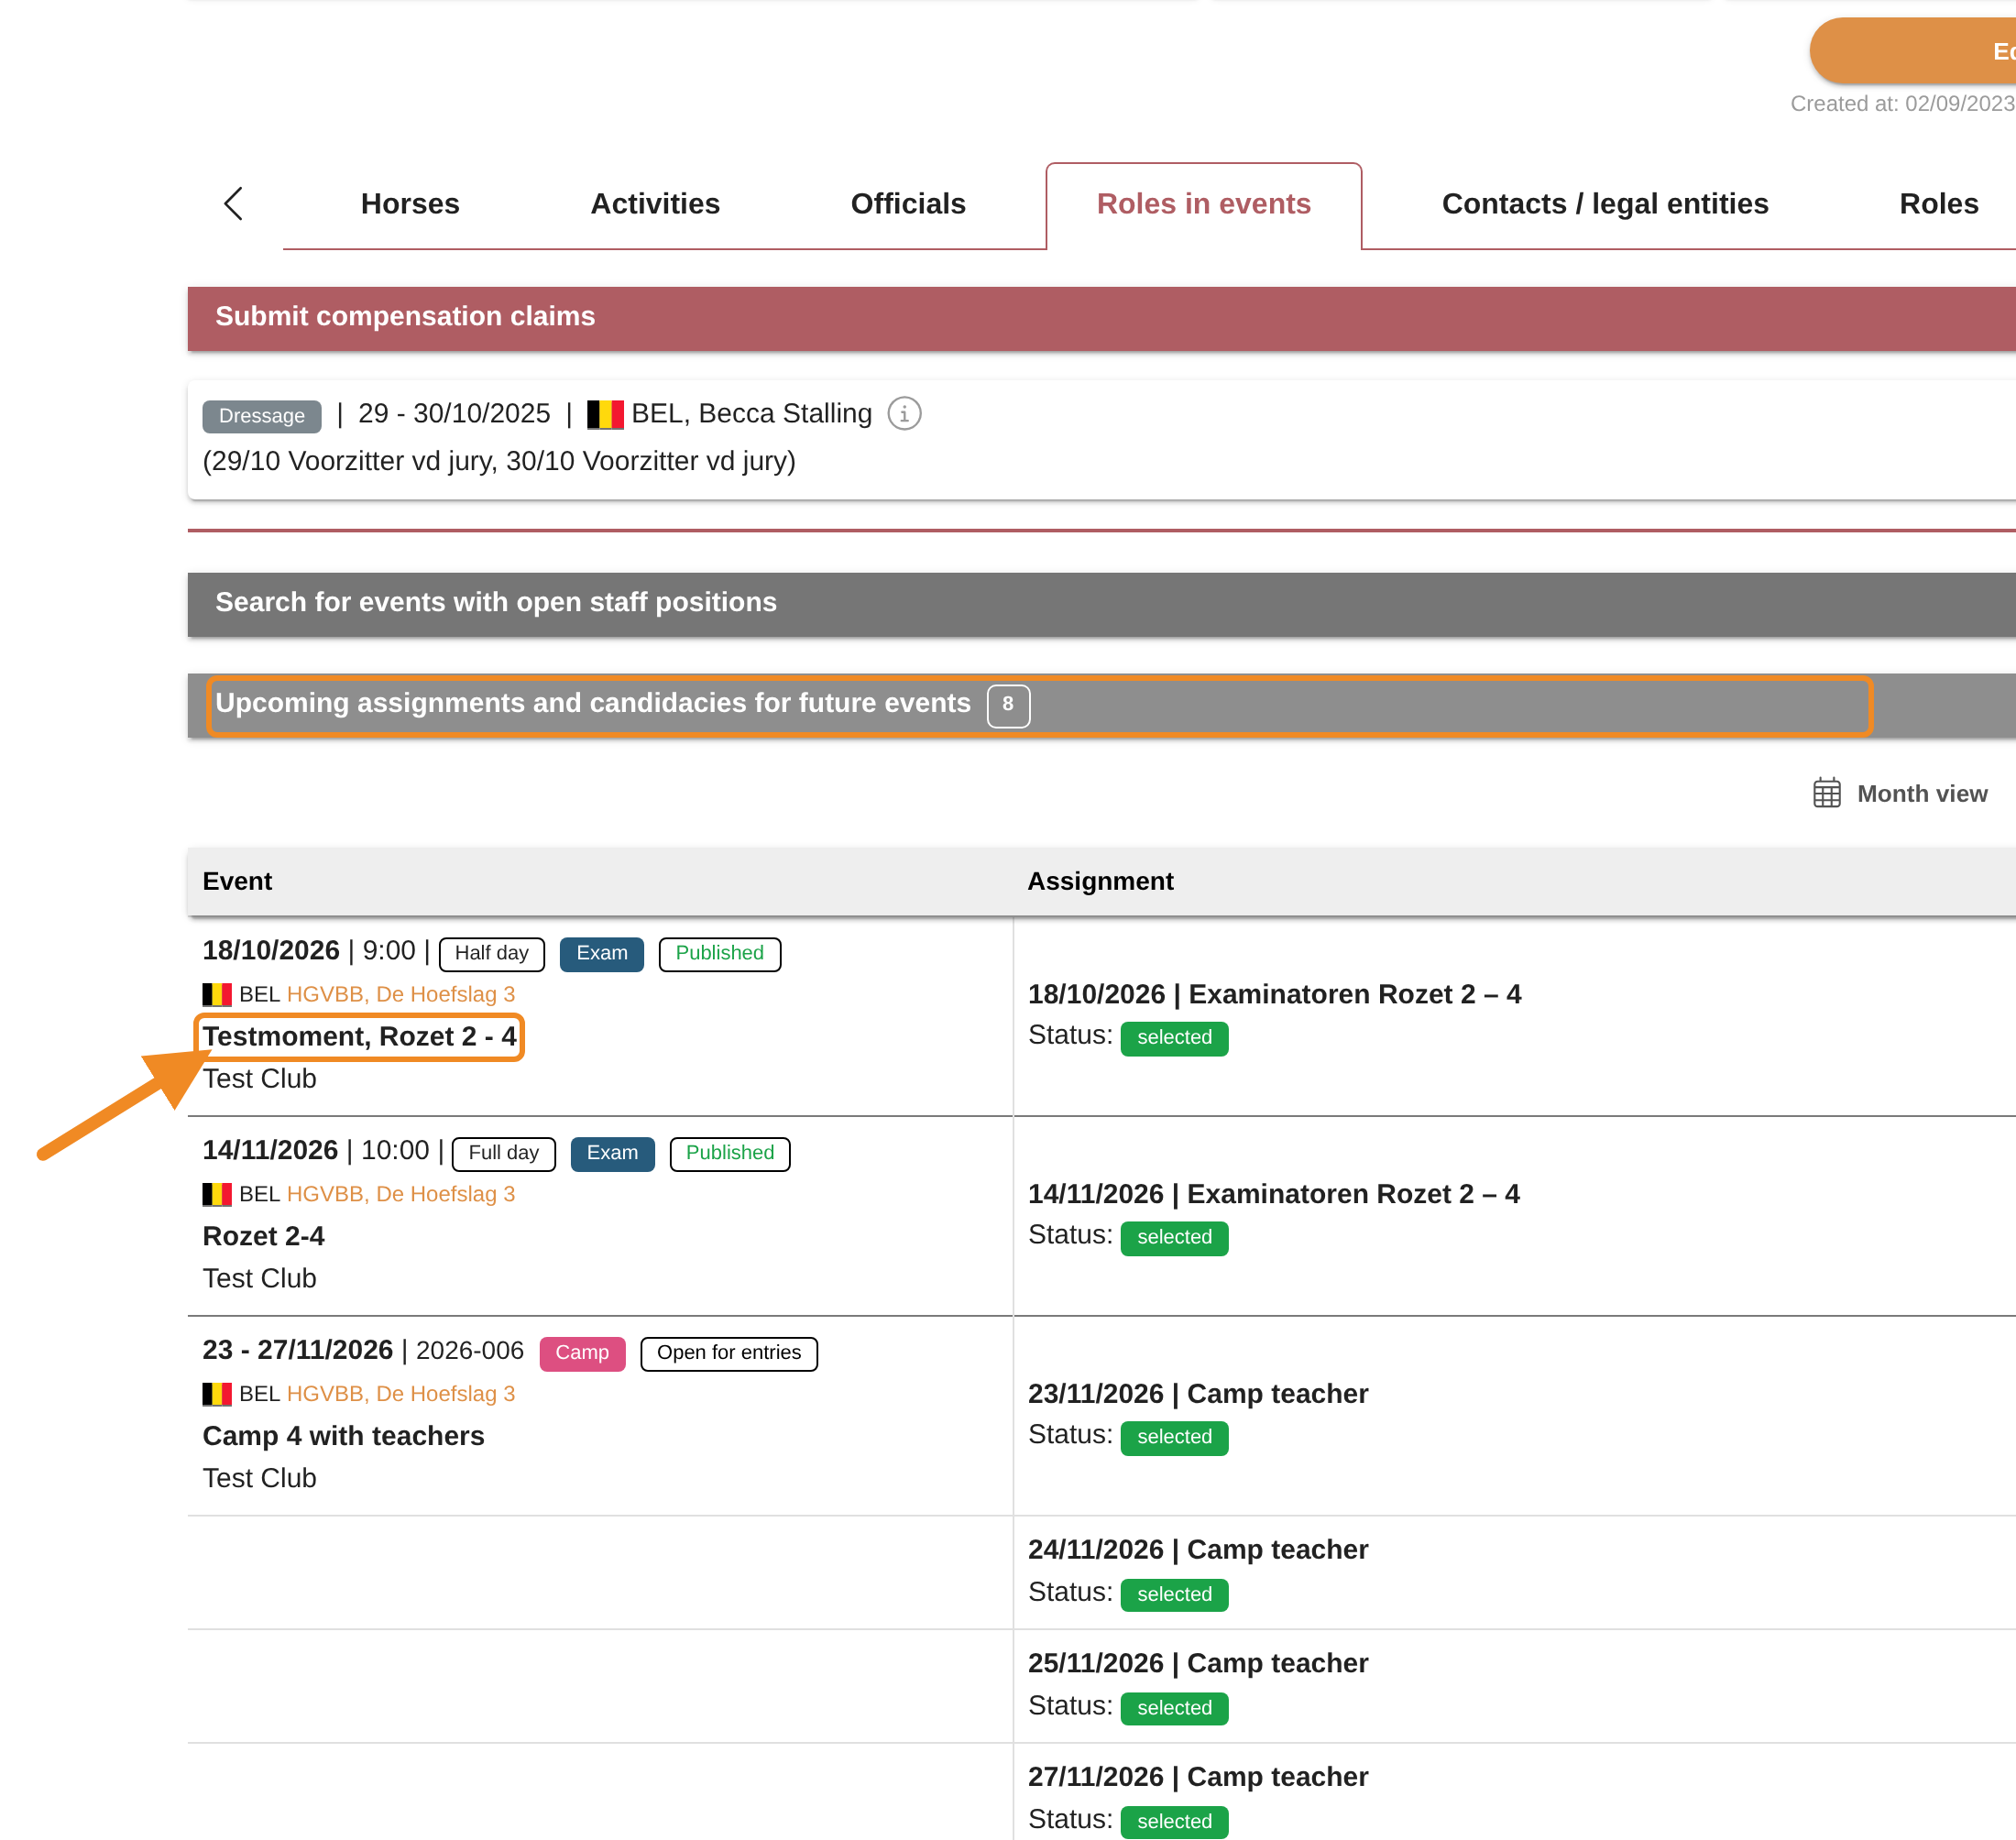
Open “Upcoming assignments and candidacies for future events”. Once Paardensport Vlaanderen has confirmed you as examiner, the session is listed there. Click its name to open the session’s page.
Step 4 — Open the Results tab
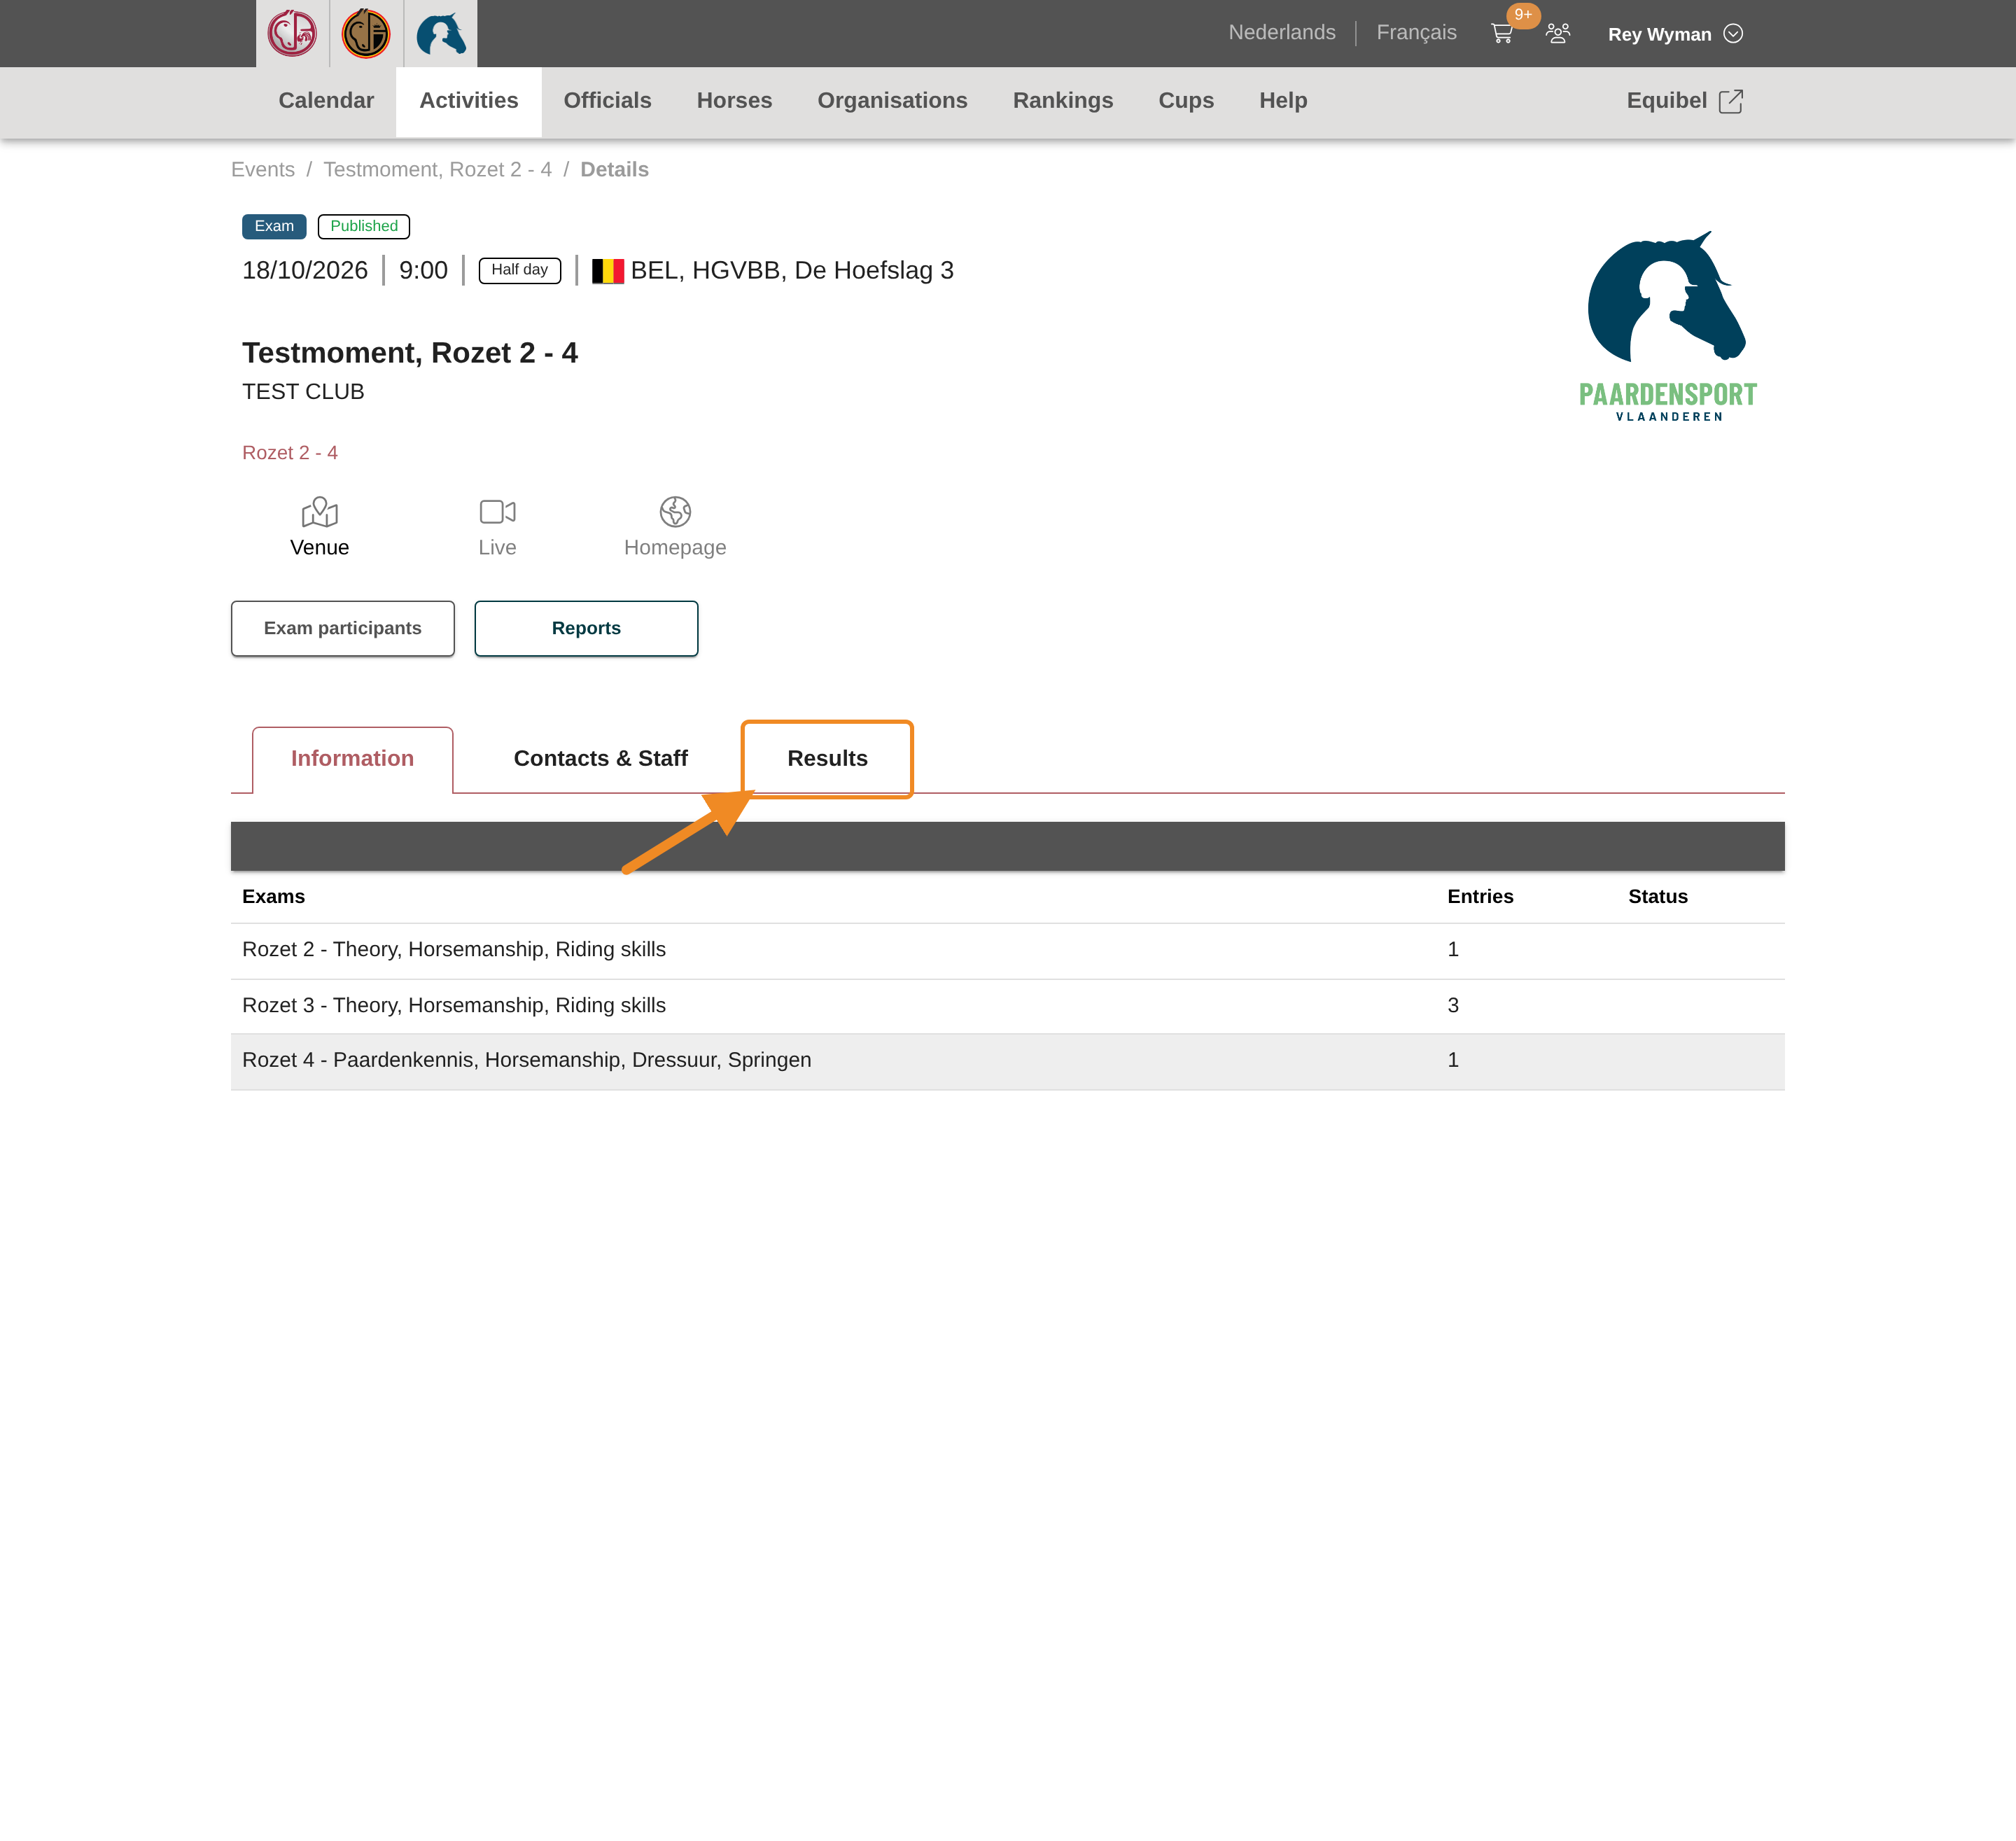
Open the “Results” tab.
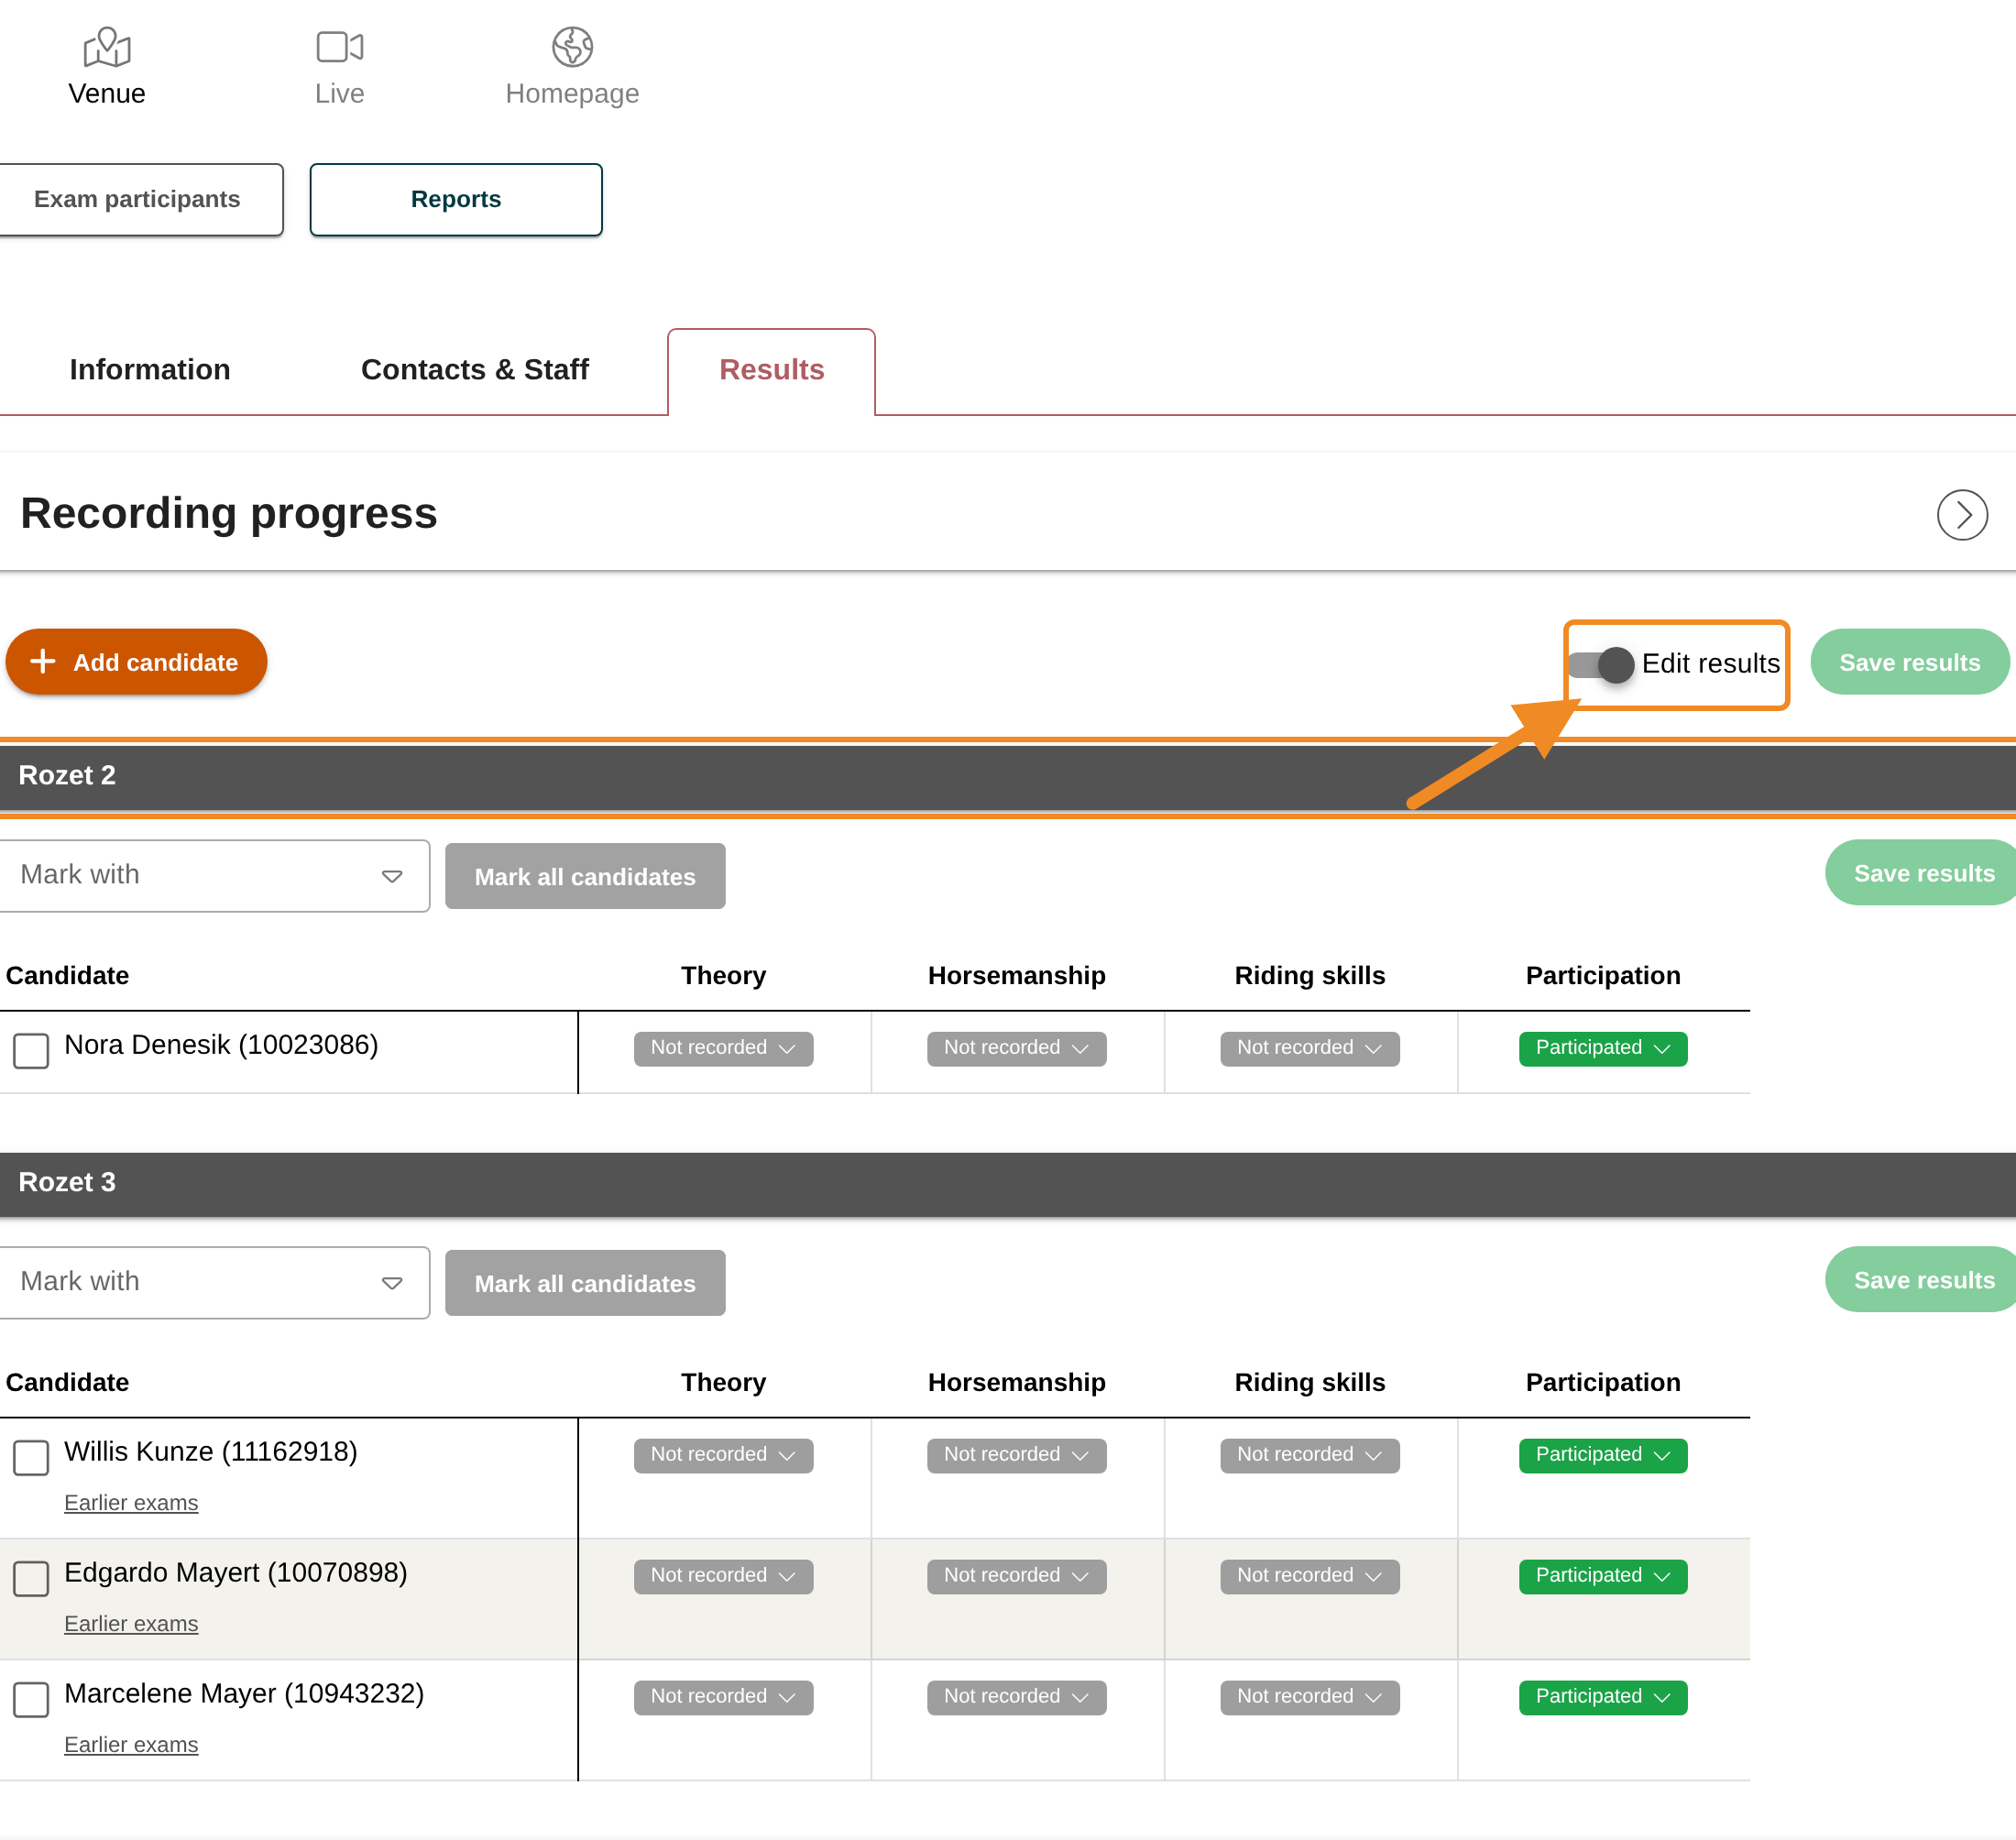
Step 5 — Check that you are editing
Check that “Edit results” is switched on. Each exam in the session has its own table: one row per candidate, one column per part of the exam, and a “Participation” column.
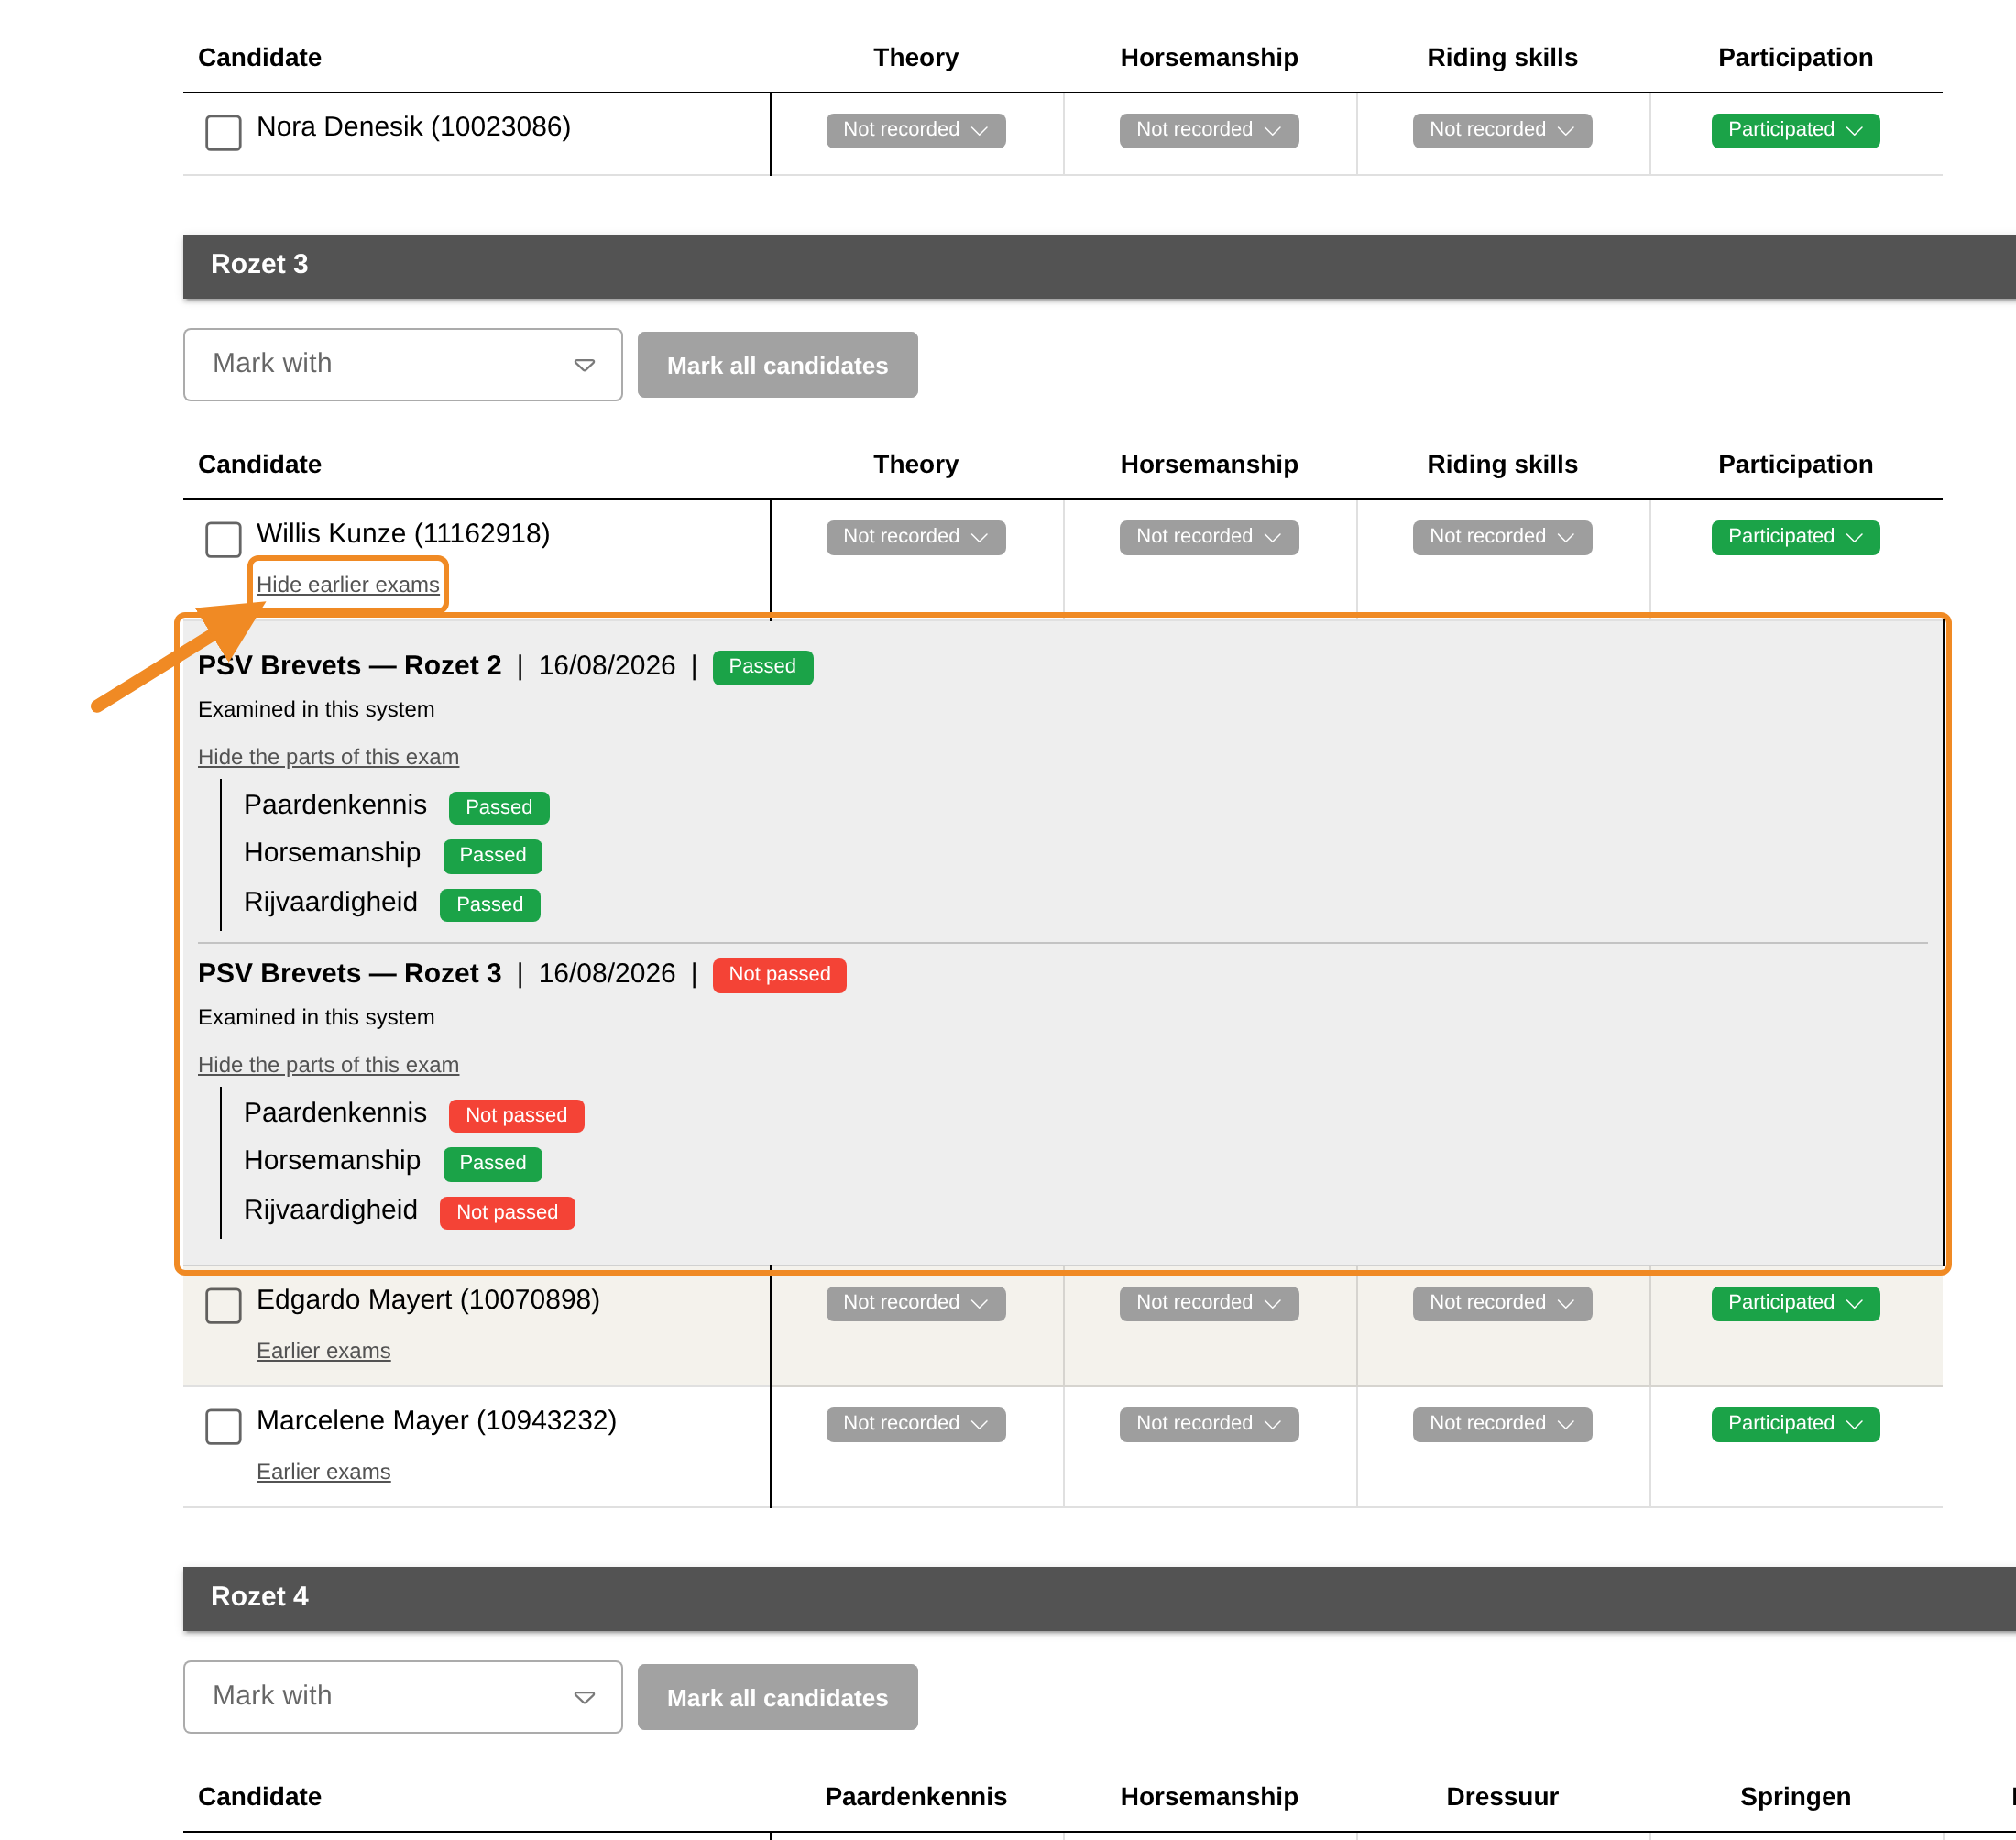
Step 6 — See a candidate’s earlier exams
To see what a candidate has taken before, click “Earlier exams” under their name. The list shows every exam on record for that person, not only this one: its name, date and outcome. Click “Show the parts of this exam” to see how each part went. Click “Hide earlier exams” to close the list.
The link appears only for a candidate who has taken an exam before.
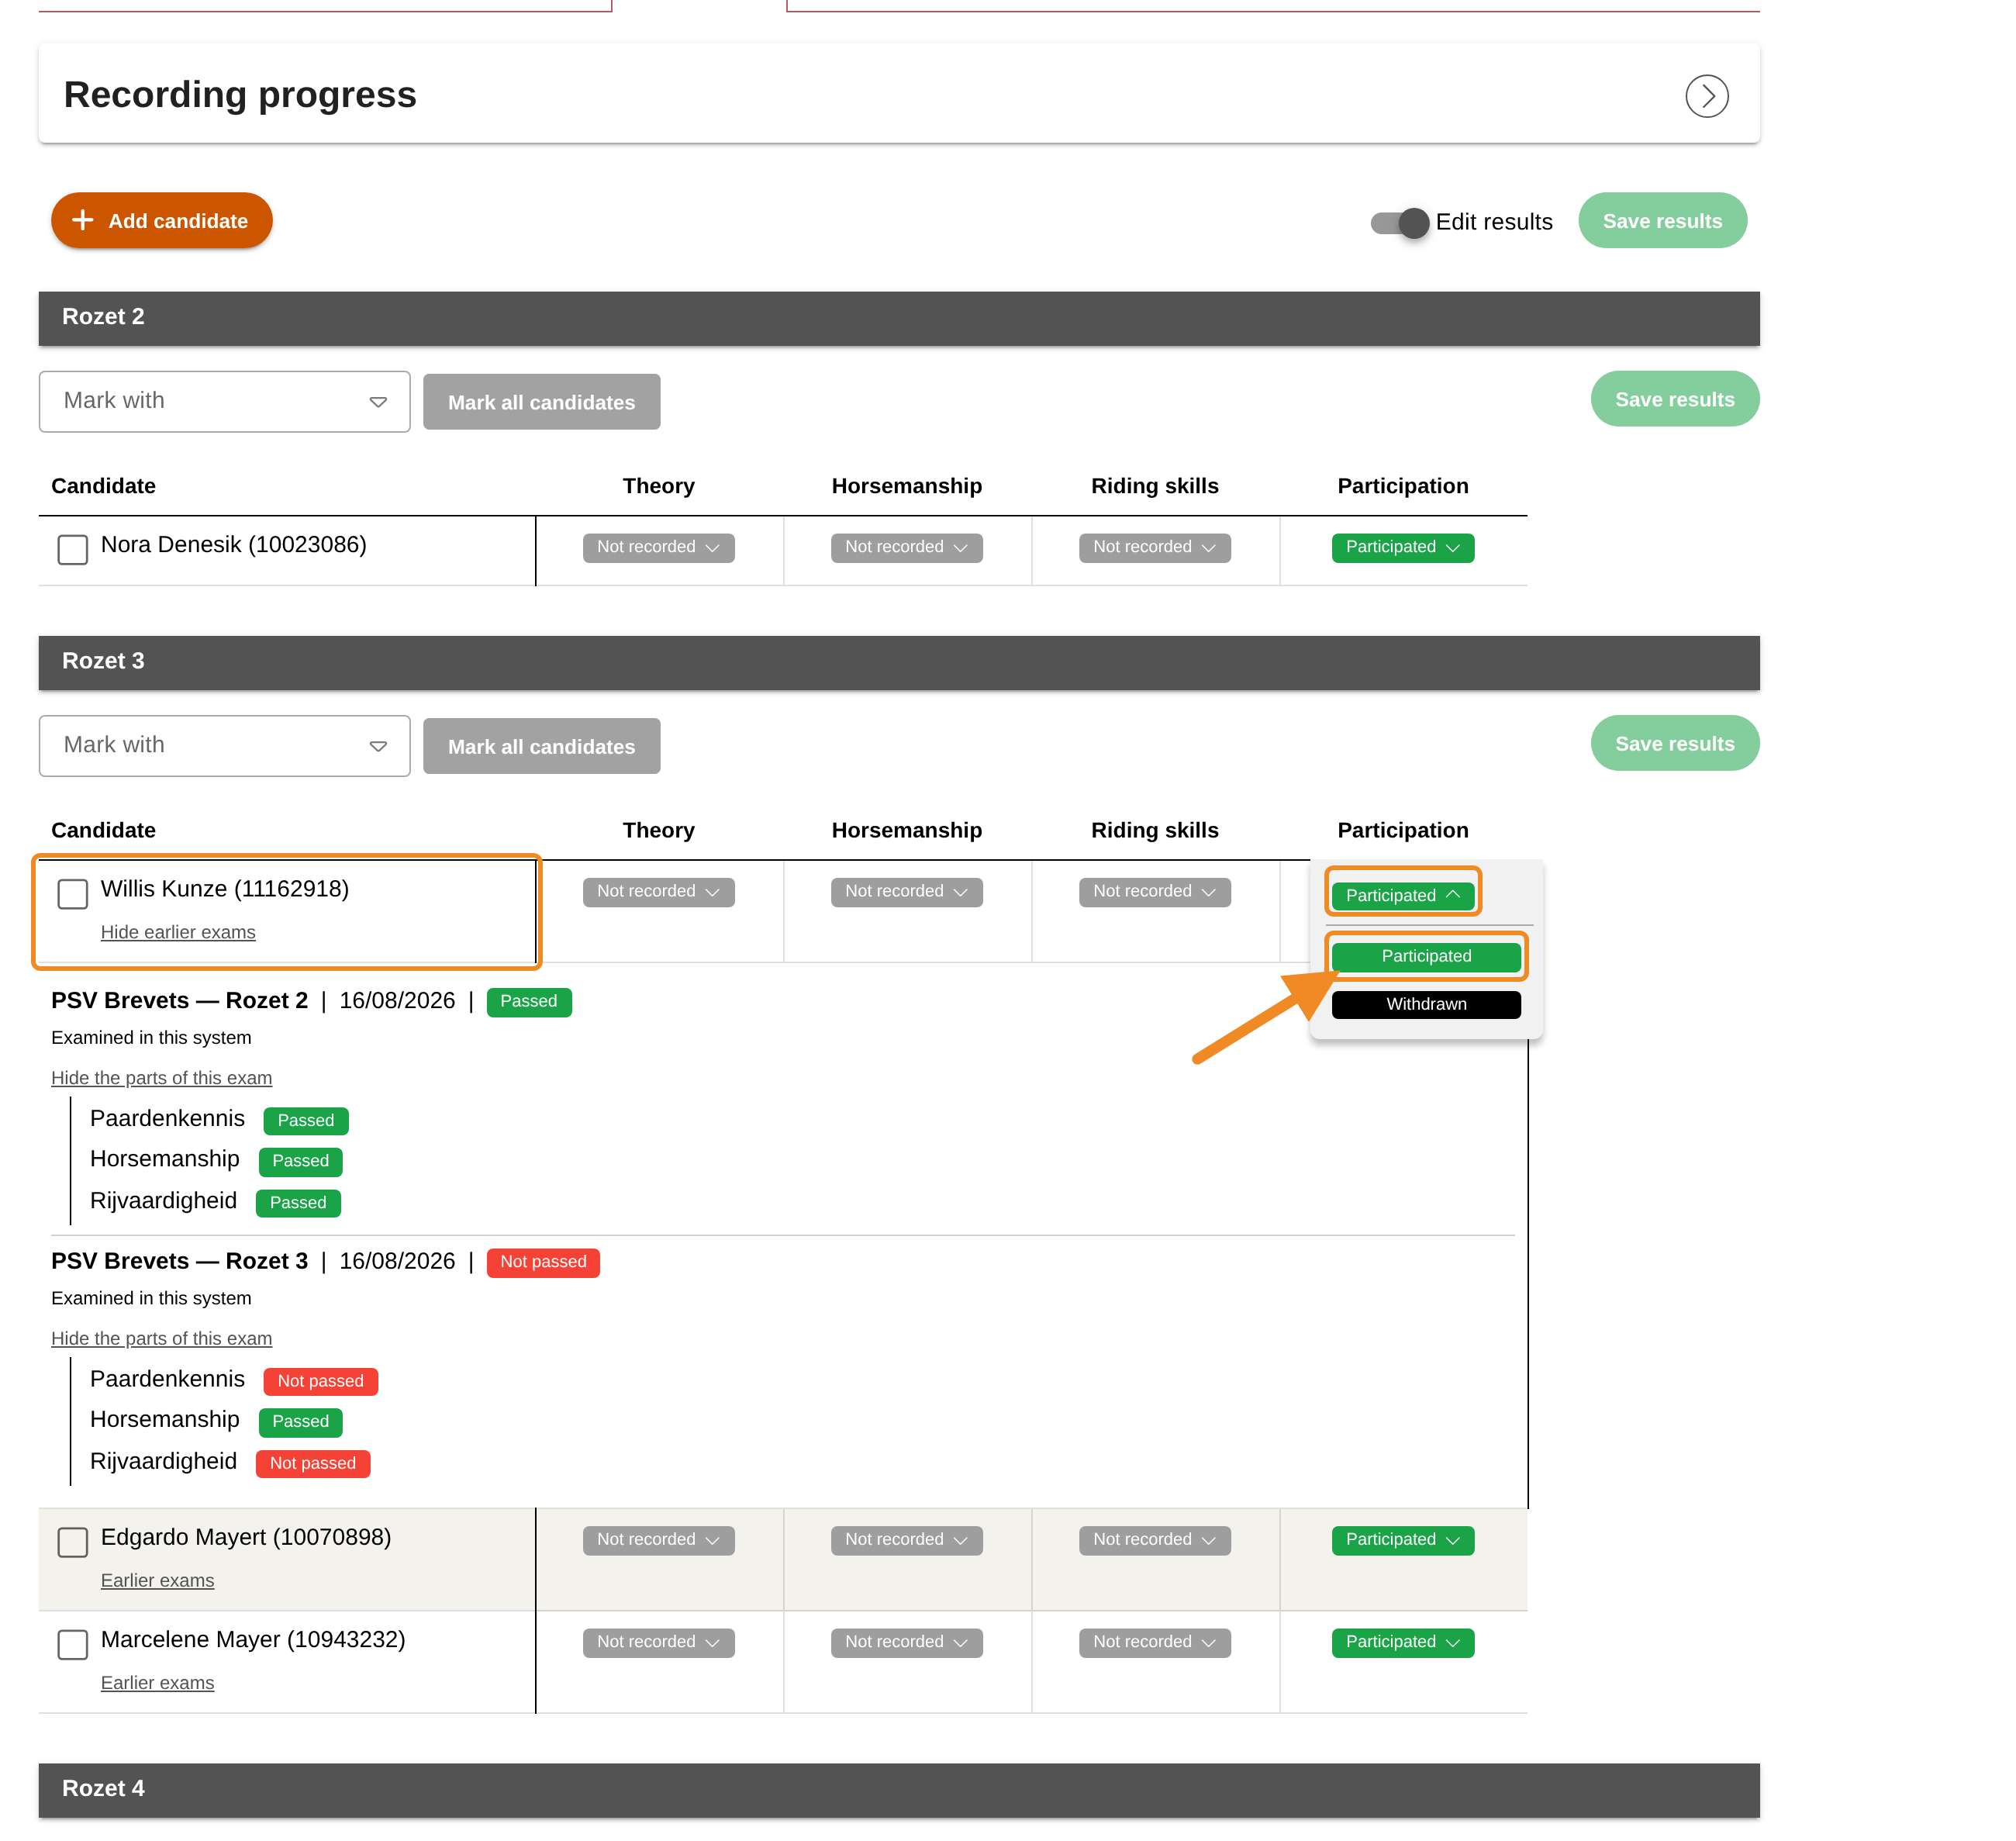
Step 7 — Record who took part
Under “Participation”, choose for each candidate:
- “Participated” — the candidate took the exam;
- “Withdrawn” — the candidate did not take it. Nothing more is recorded for them.
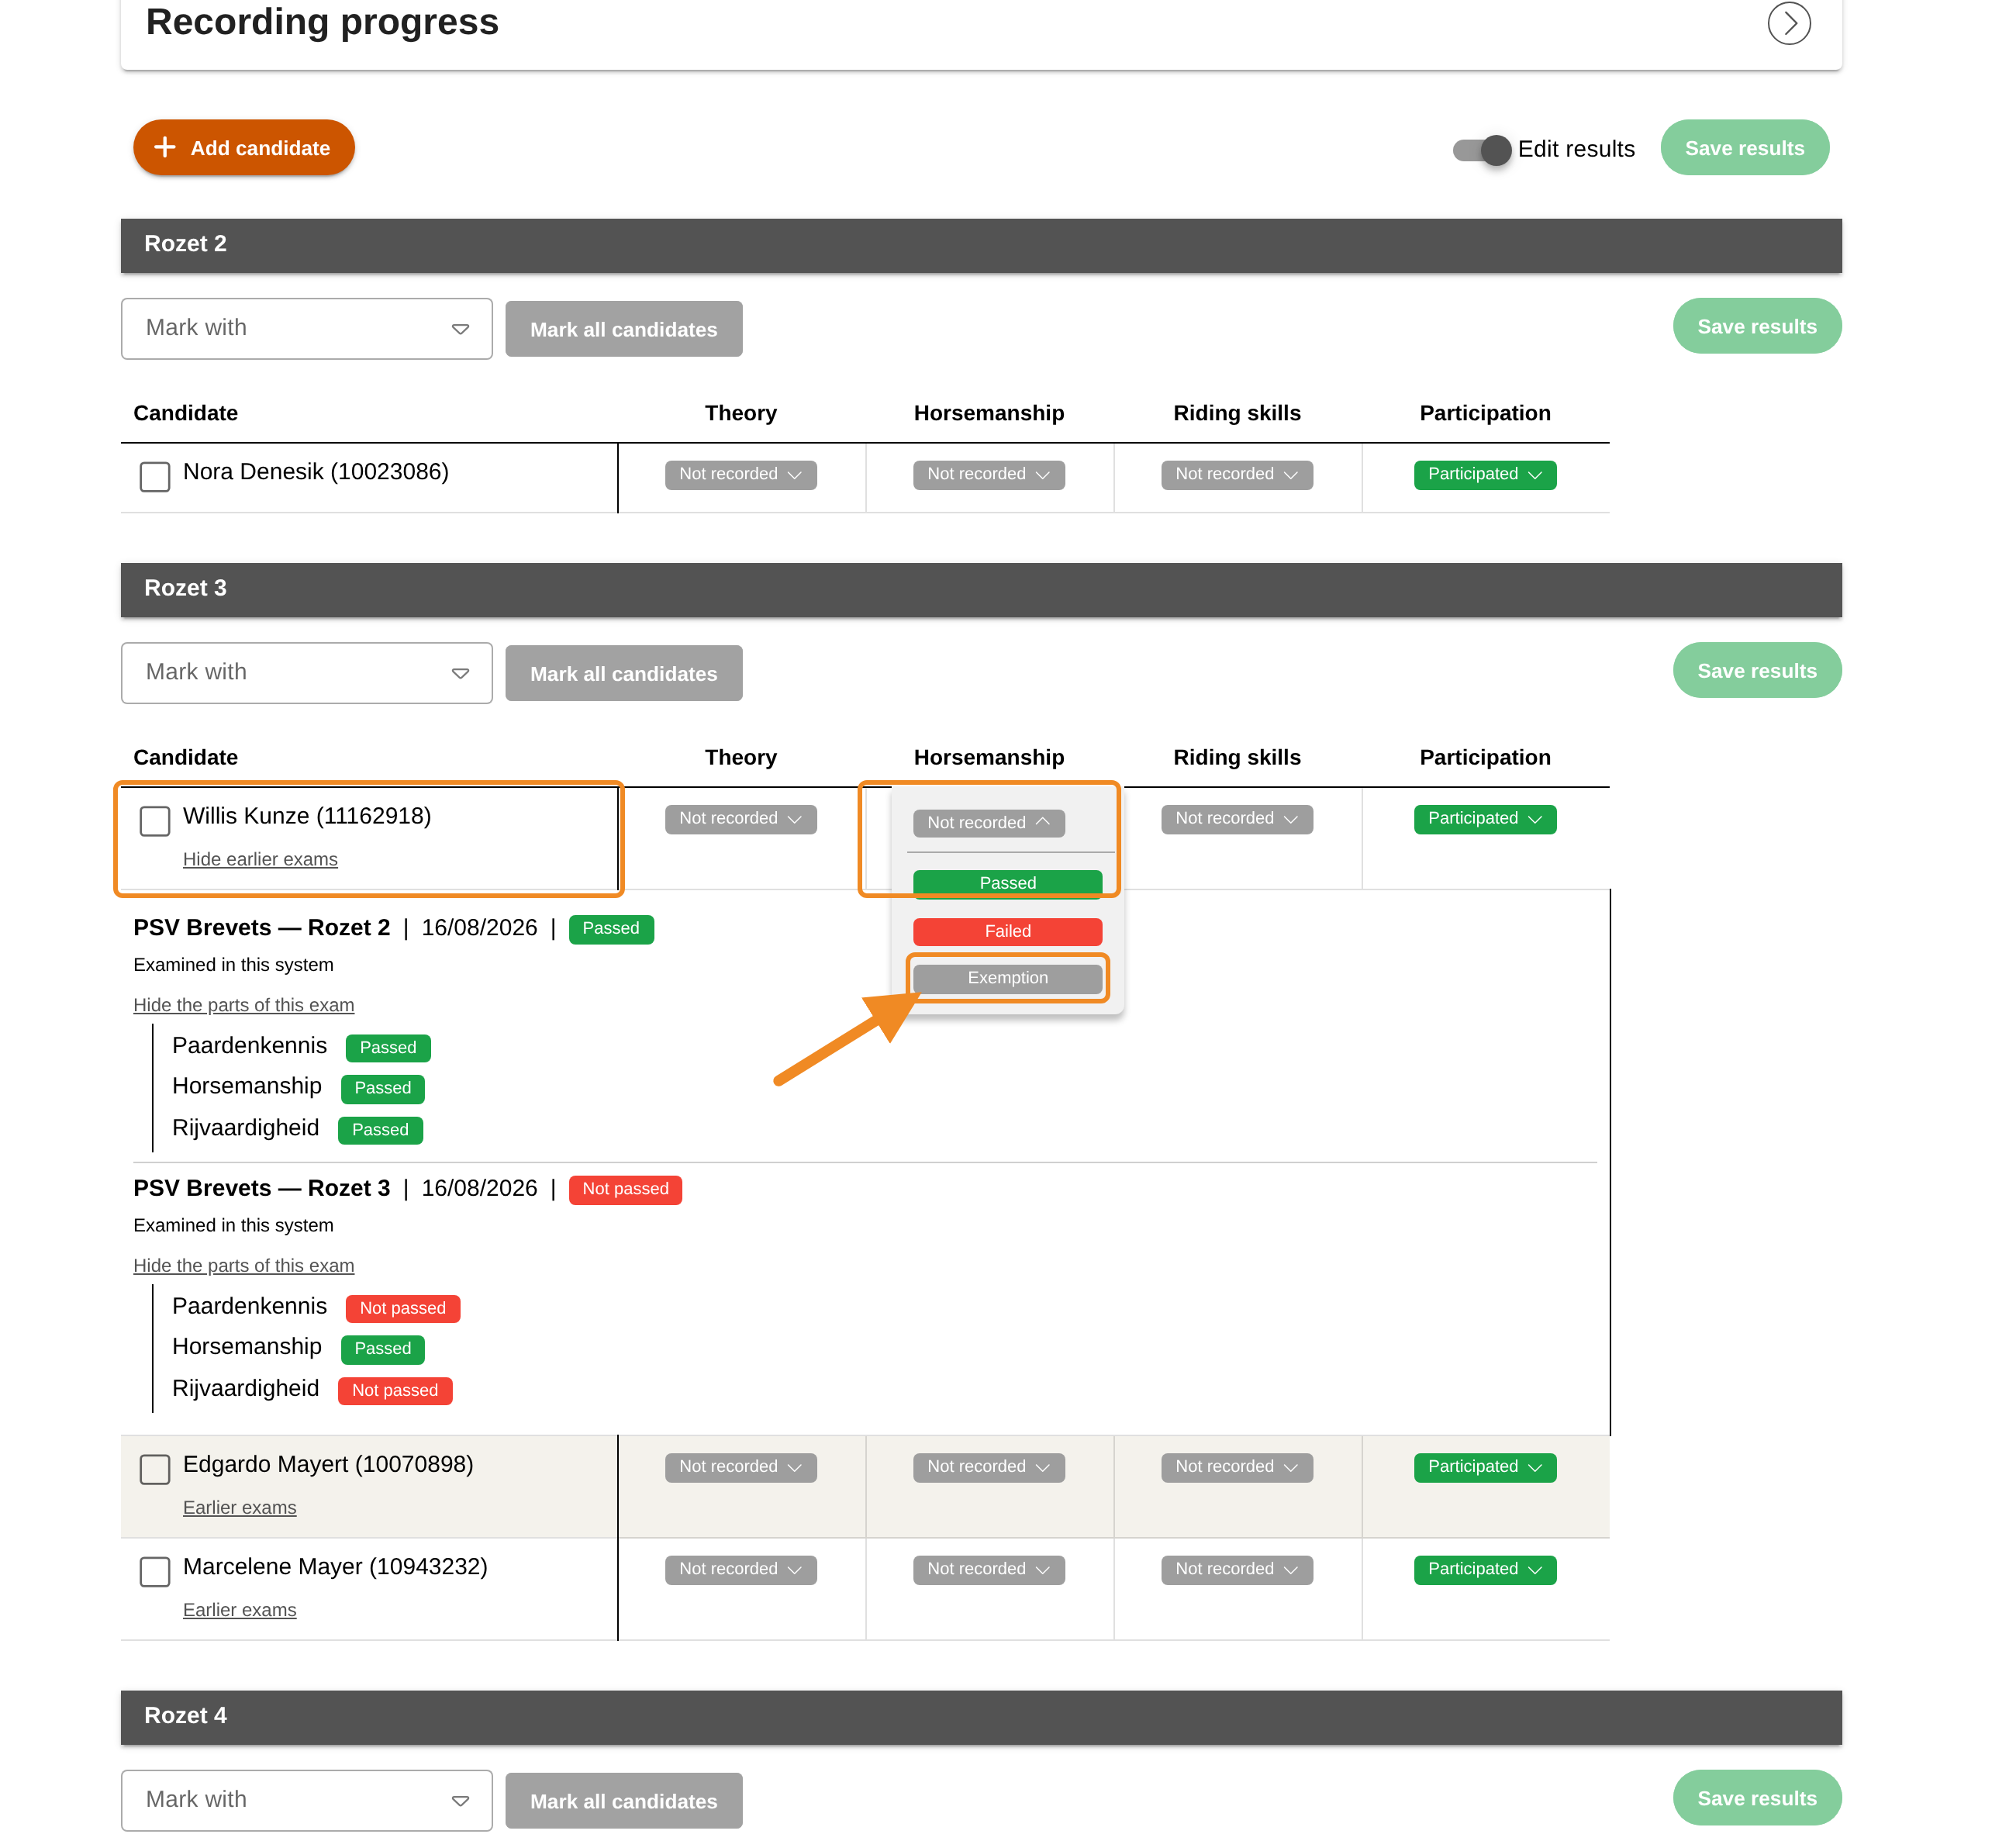
Step 8 — Record the result of each part
Click each part’s cell and choose the result: “Passed”, “Failed”, “Exemption” or “Not needed”. A cell offers only the results that fit that part. A part marked “Credited automatically” needs nothing from you.
Exemption at a resit. At Rozet 2, 3 and 4, a candidate who failed an earlier attempt at the same exam, but passed some of its parts, can be exempted from the parts they passed. Click “Earlier exams” and “Show the parts of this exam” (step 6) to see which parts they passed, and choose “Exemption” for each of those parts. The system never fills in an exemption by itself: you choose it.
Step 9 — Mark many candidates at once
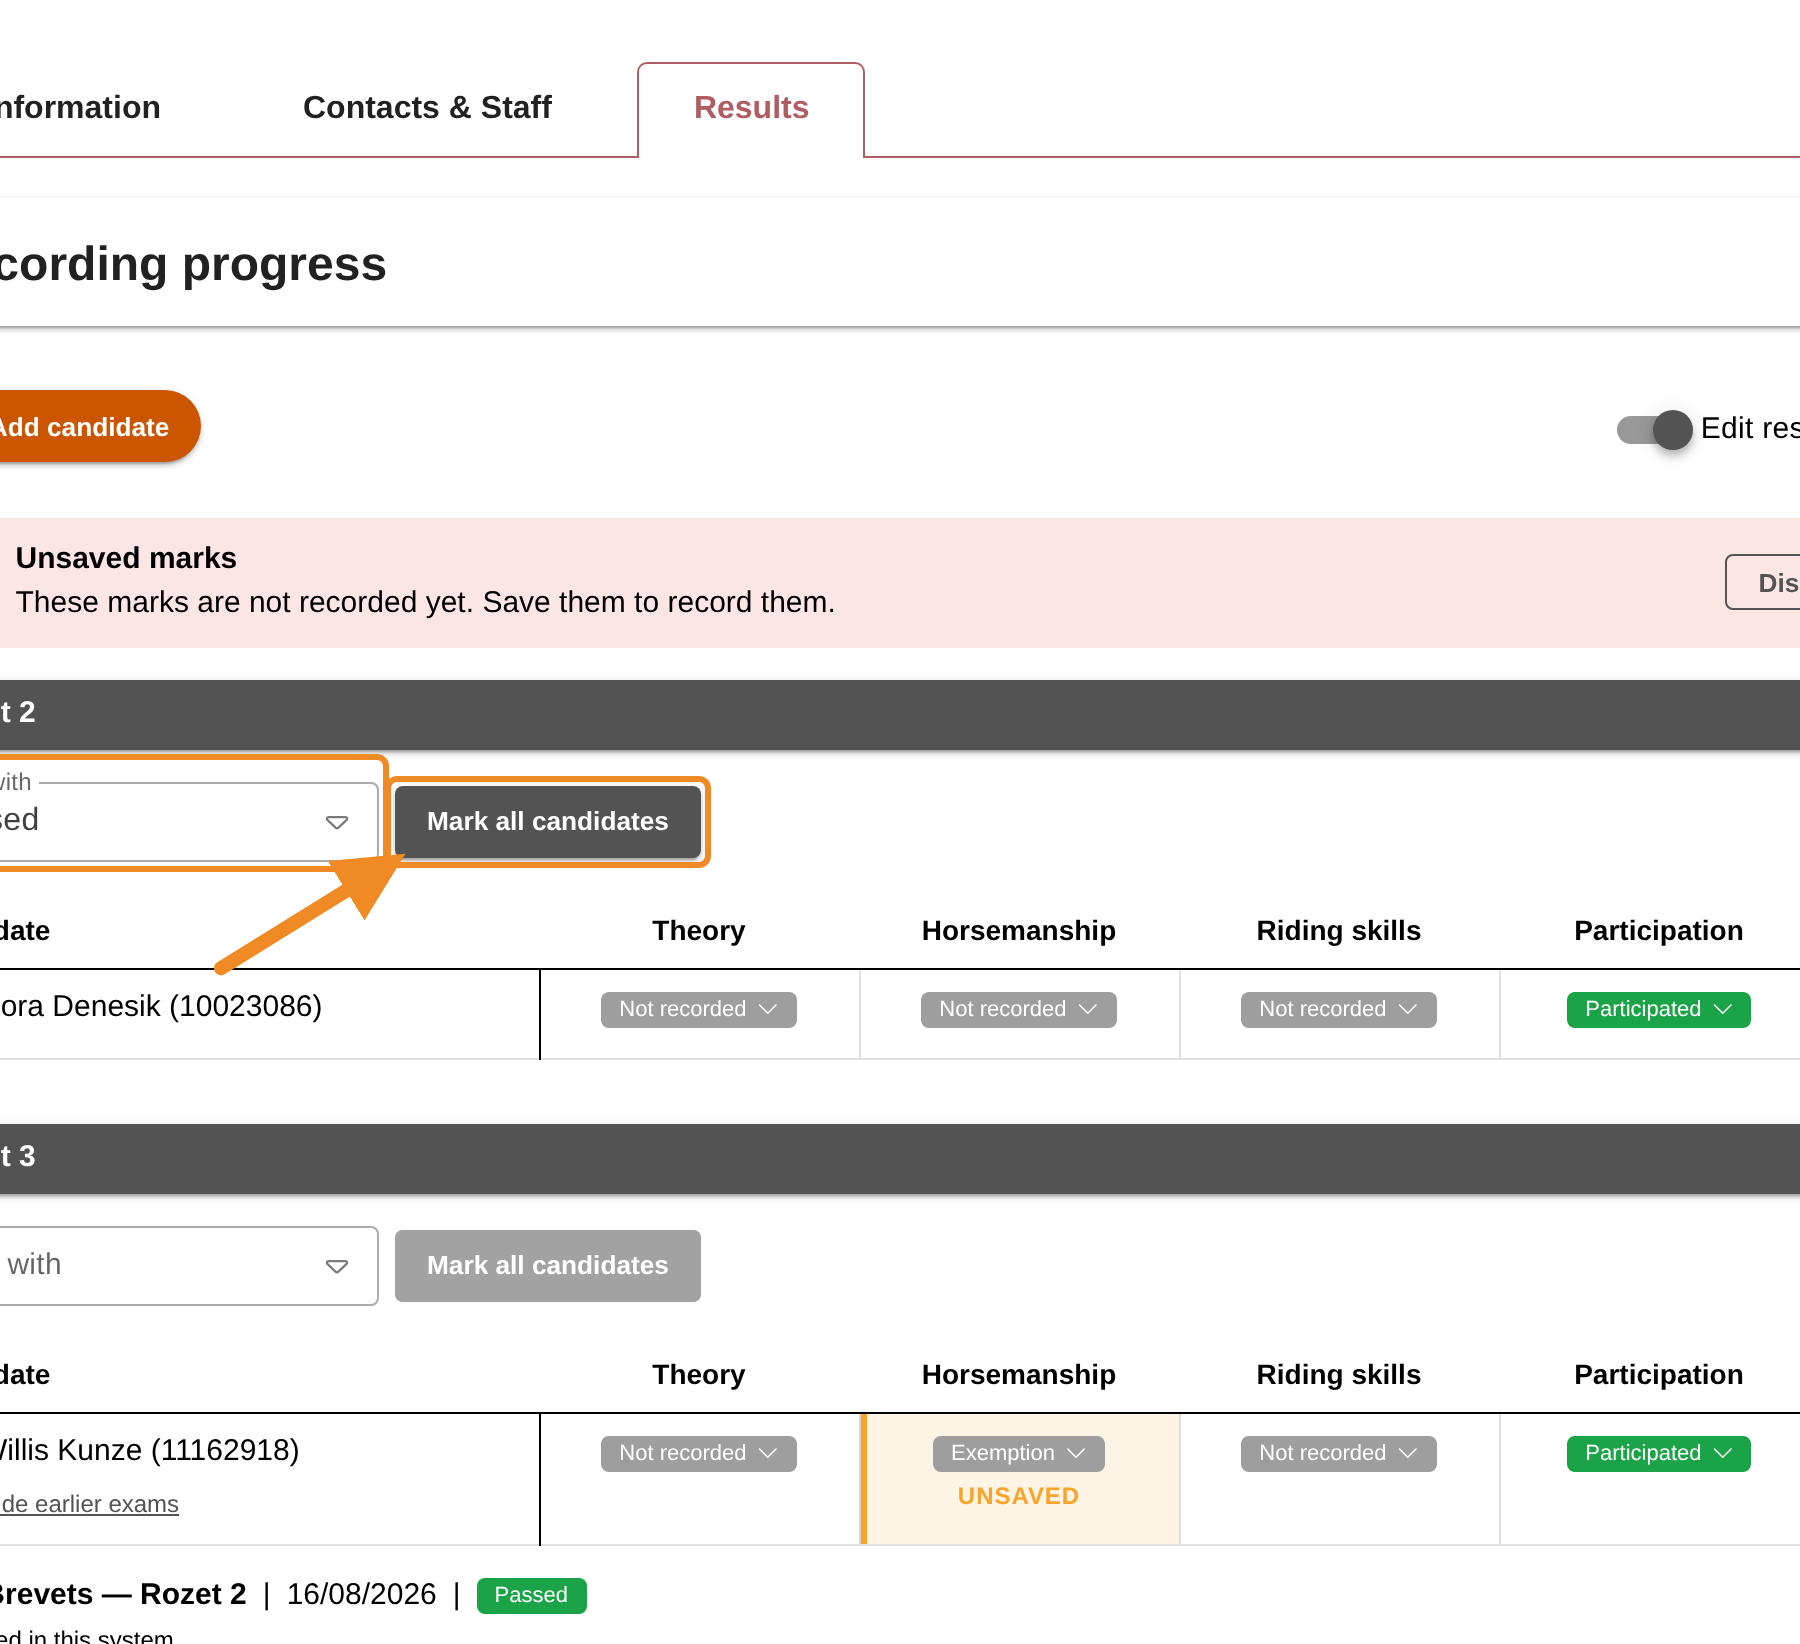
When many candidates get the same result, choose it under “Mark with” above the exam’s table and click “Mark all candidates”. To mark only some candidates, tick them first: the button then reads “Mark selected candidates”. Marking also sets those candidates to “Participated”. Change the cells that differ afterwards.
Step 10 — Save the results
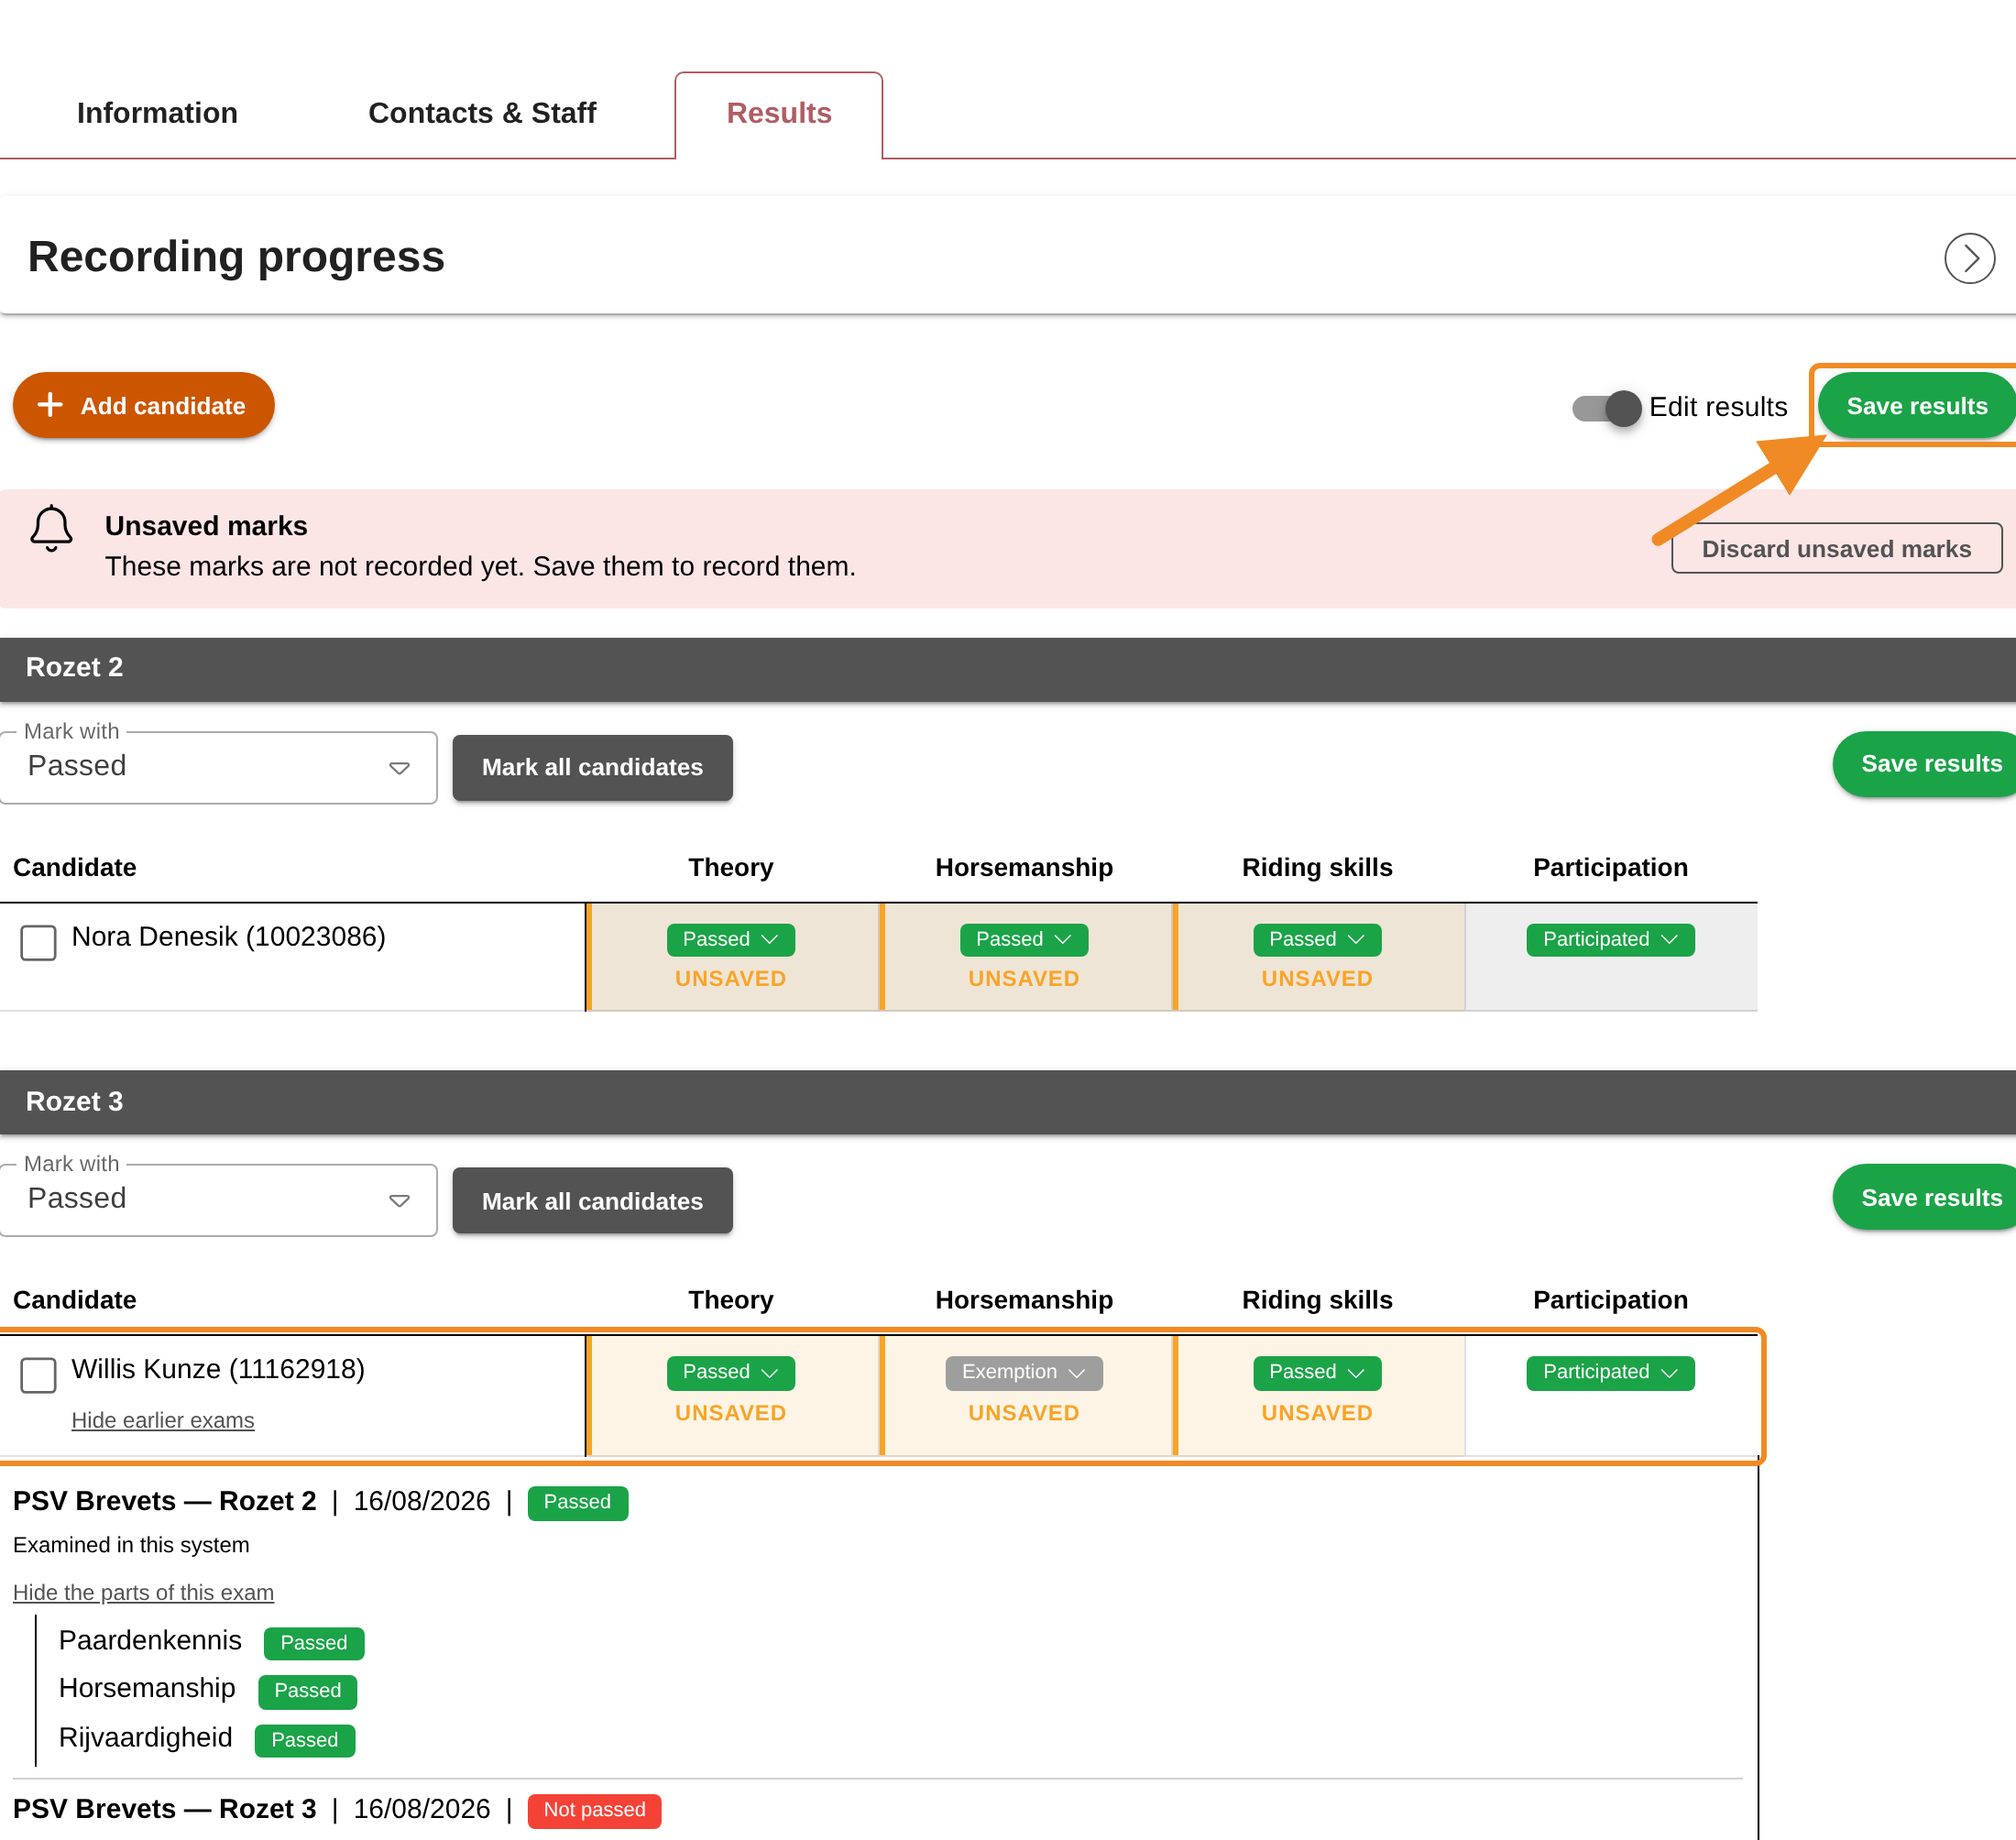
Click “Save results”. Nothing is recorded until you save: every cell you changed shows “Unsaved” until then. You can save as often as you like and come back later.
Step 11 — Check the progress and close the session
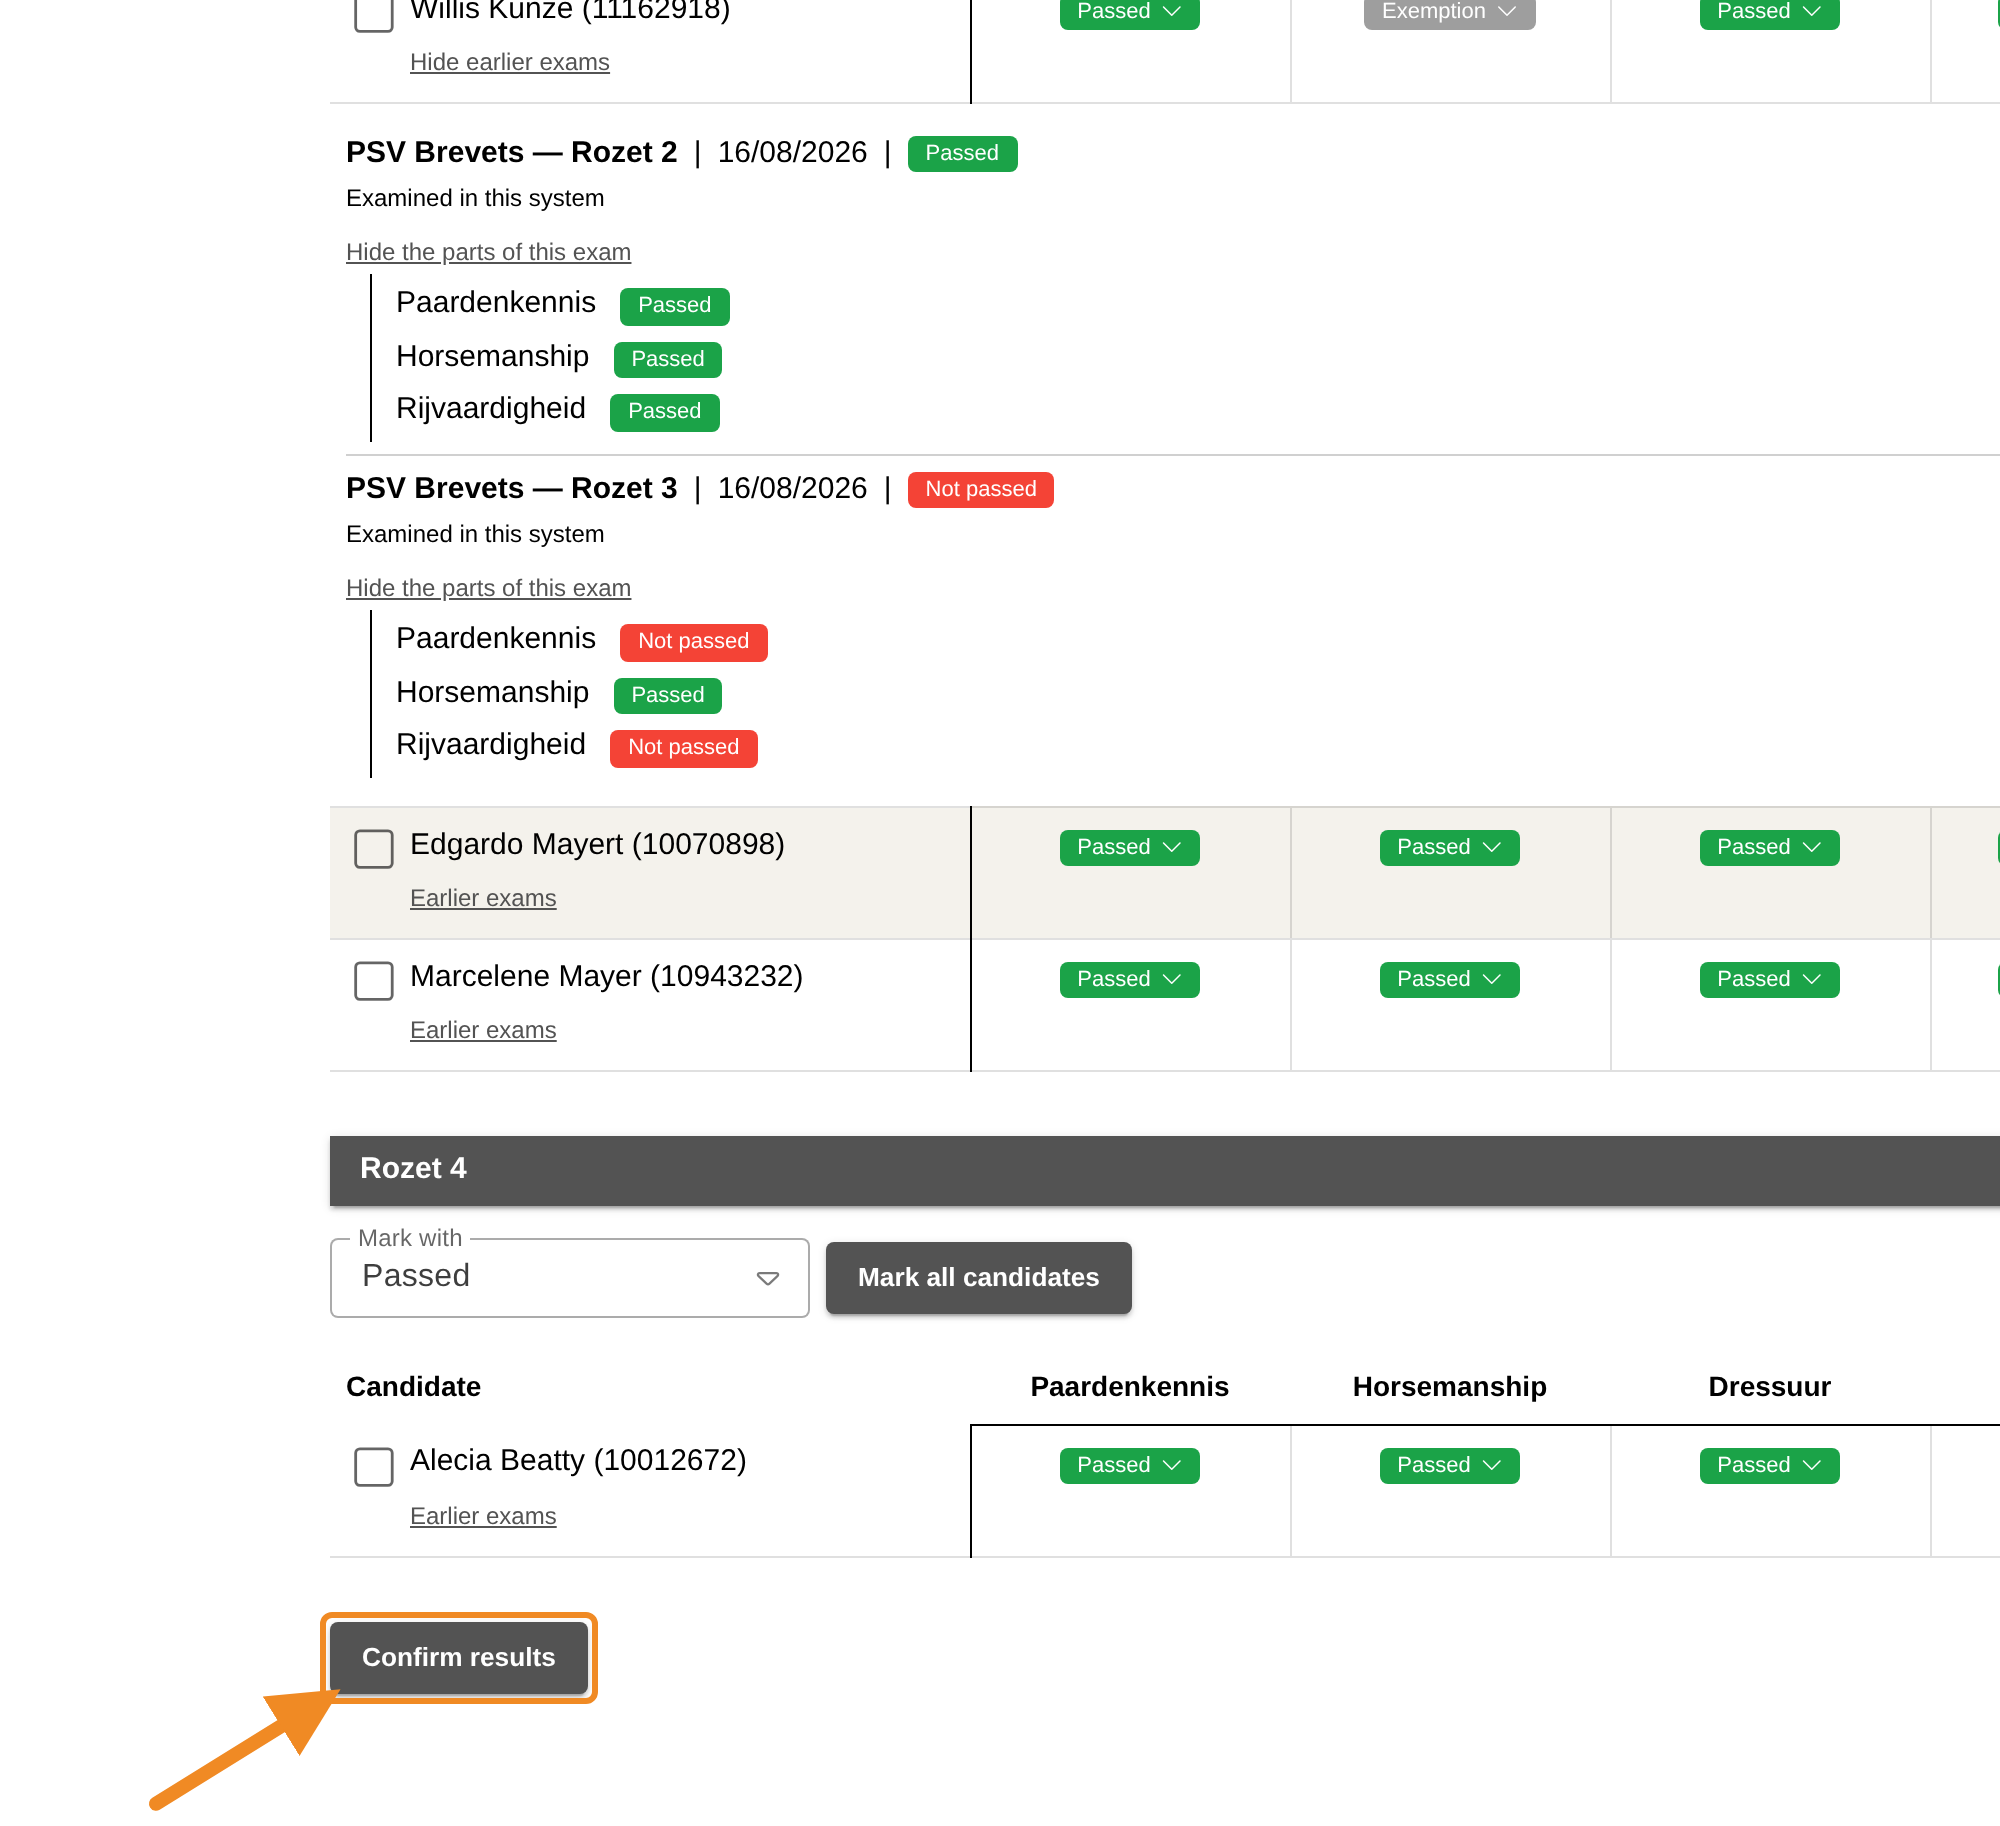
Open “Recording progress” above the tables. It shows how many candidates are still open, and why. When nothing is outstanding, click “Confirm results” at the bottom of the page. The button stays greyed out while a candidate is still open.
Step 12 — Confirm the results
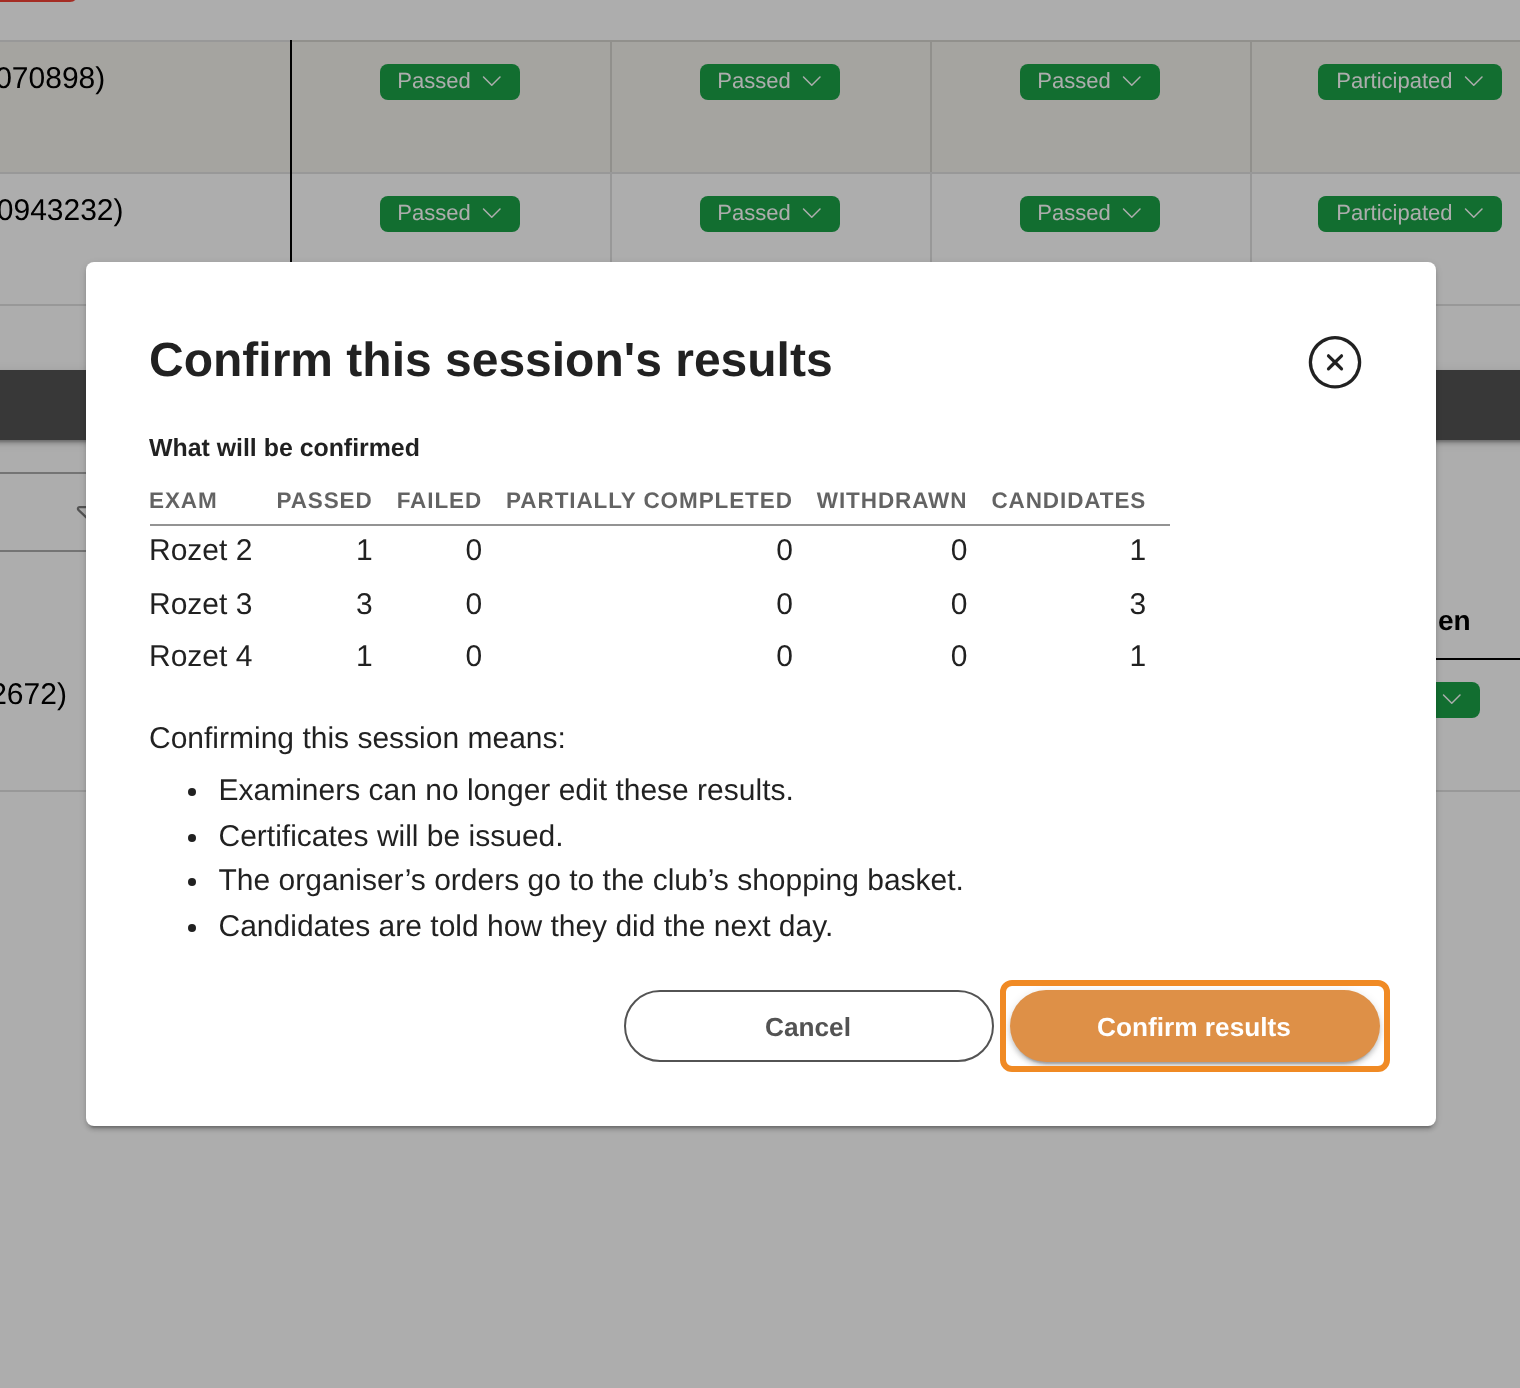
The window lists, per exam, how many candidates passed, failed, partly completed or withdrew. Check the numbers, then click “Confirm results”. Confirming closes the session:
- you can no longer change its results;
- certificates are issued;
- the candidates are told how they did the next day.
Step 13 — Open the session’s reports
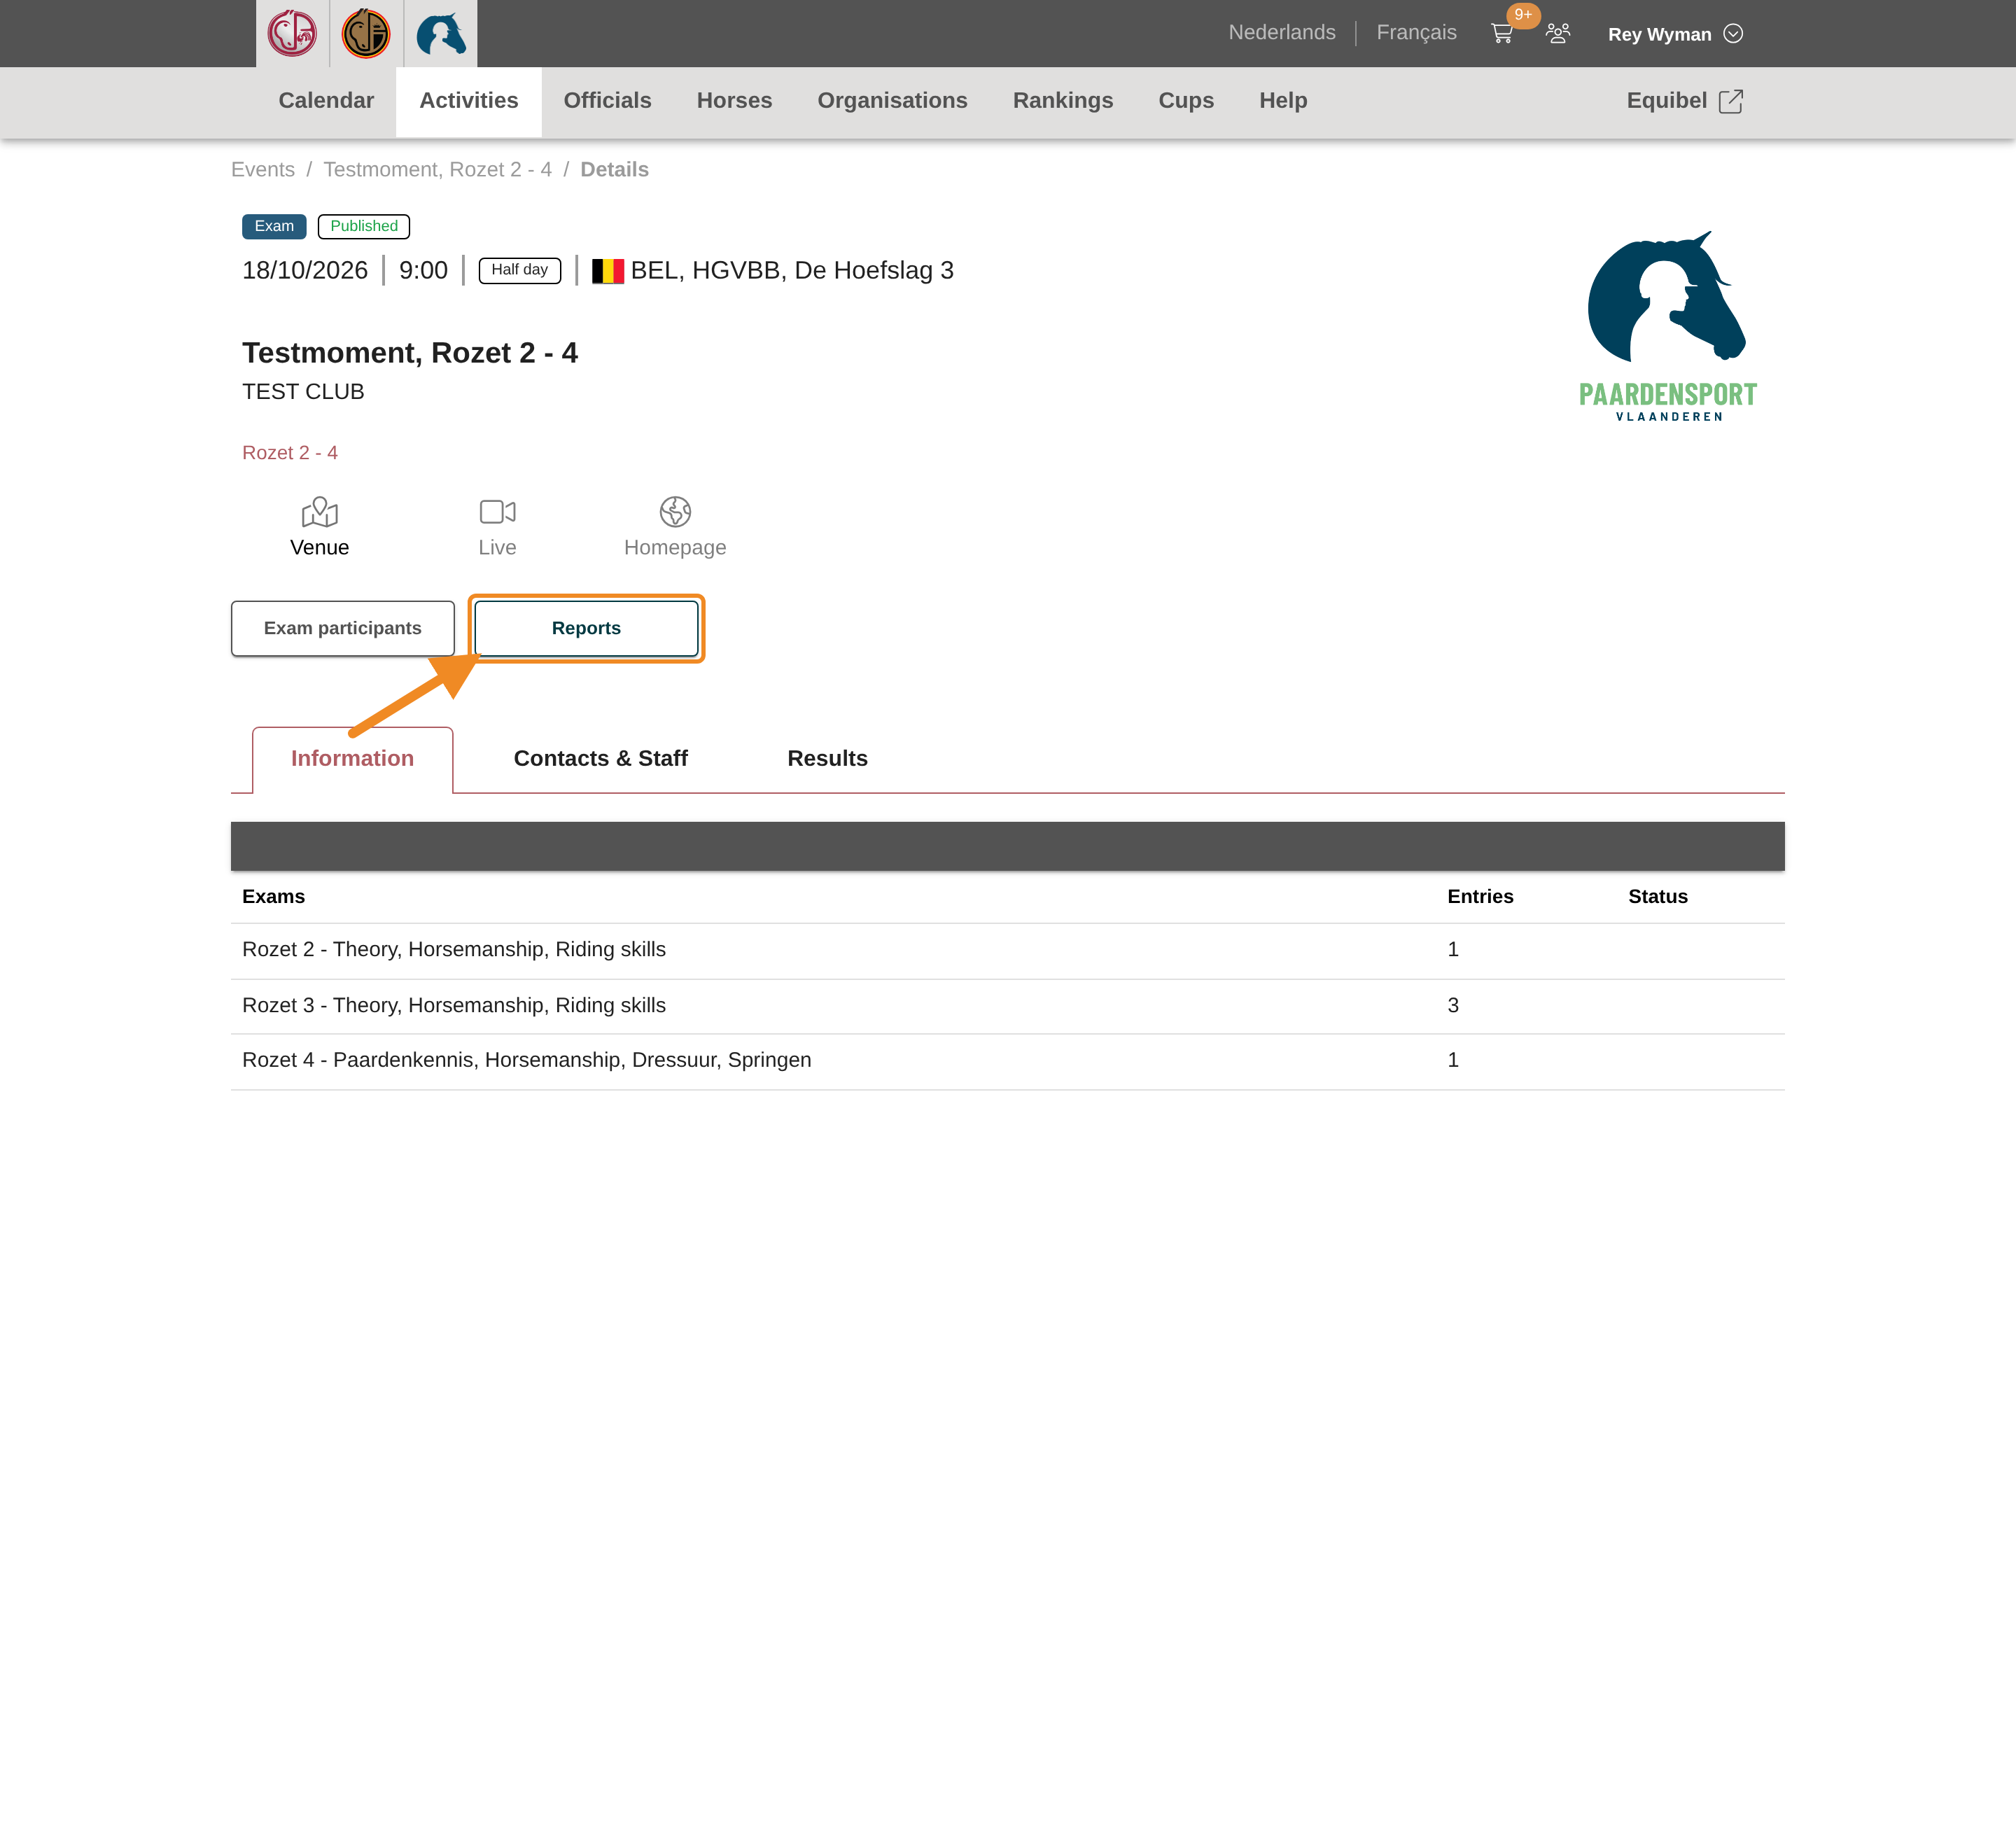
After the session, fill in your examiner’s report. Go back to the session’s page and click “Reports”. The page “Statistics and reports” opens.
Step 14 — Open the report
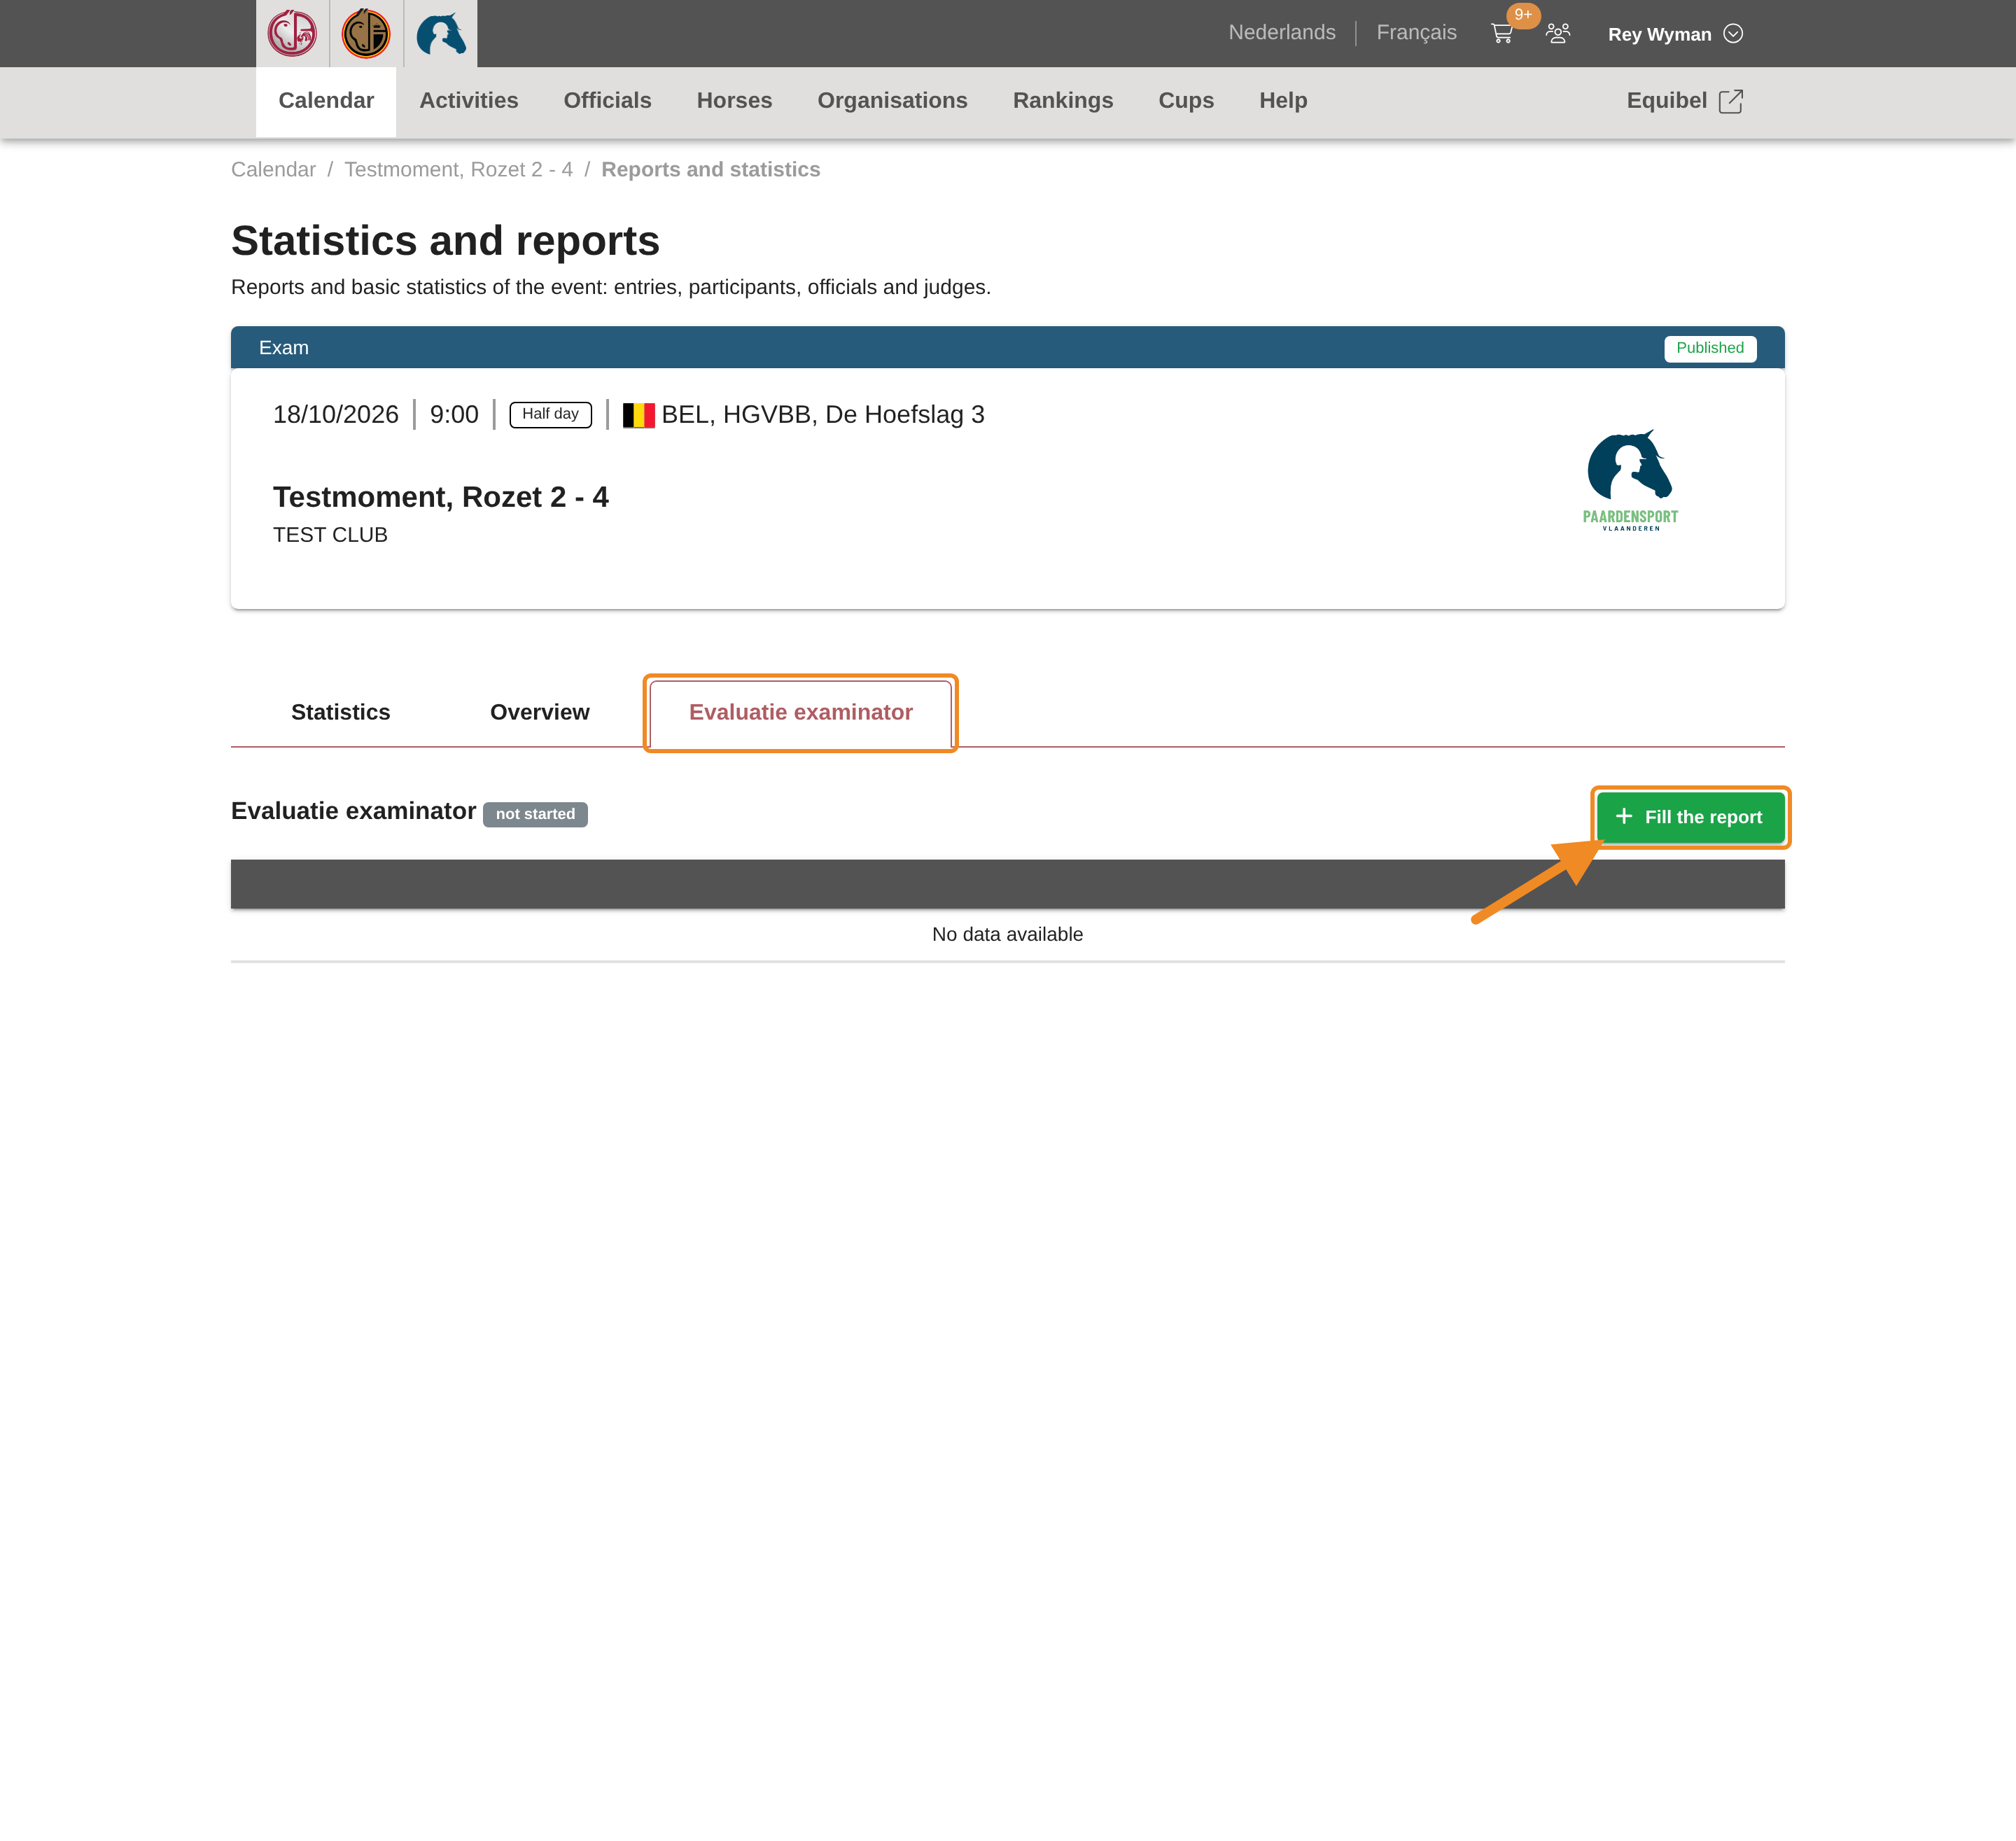
Open the tab with the report’s name and click “Fill the report”. The form opens.
Step 15 — Fill in and submit the report
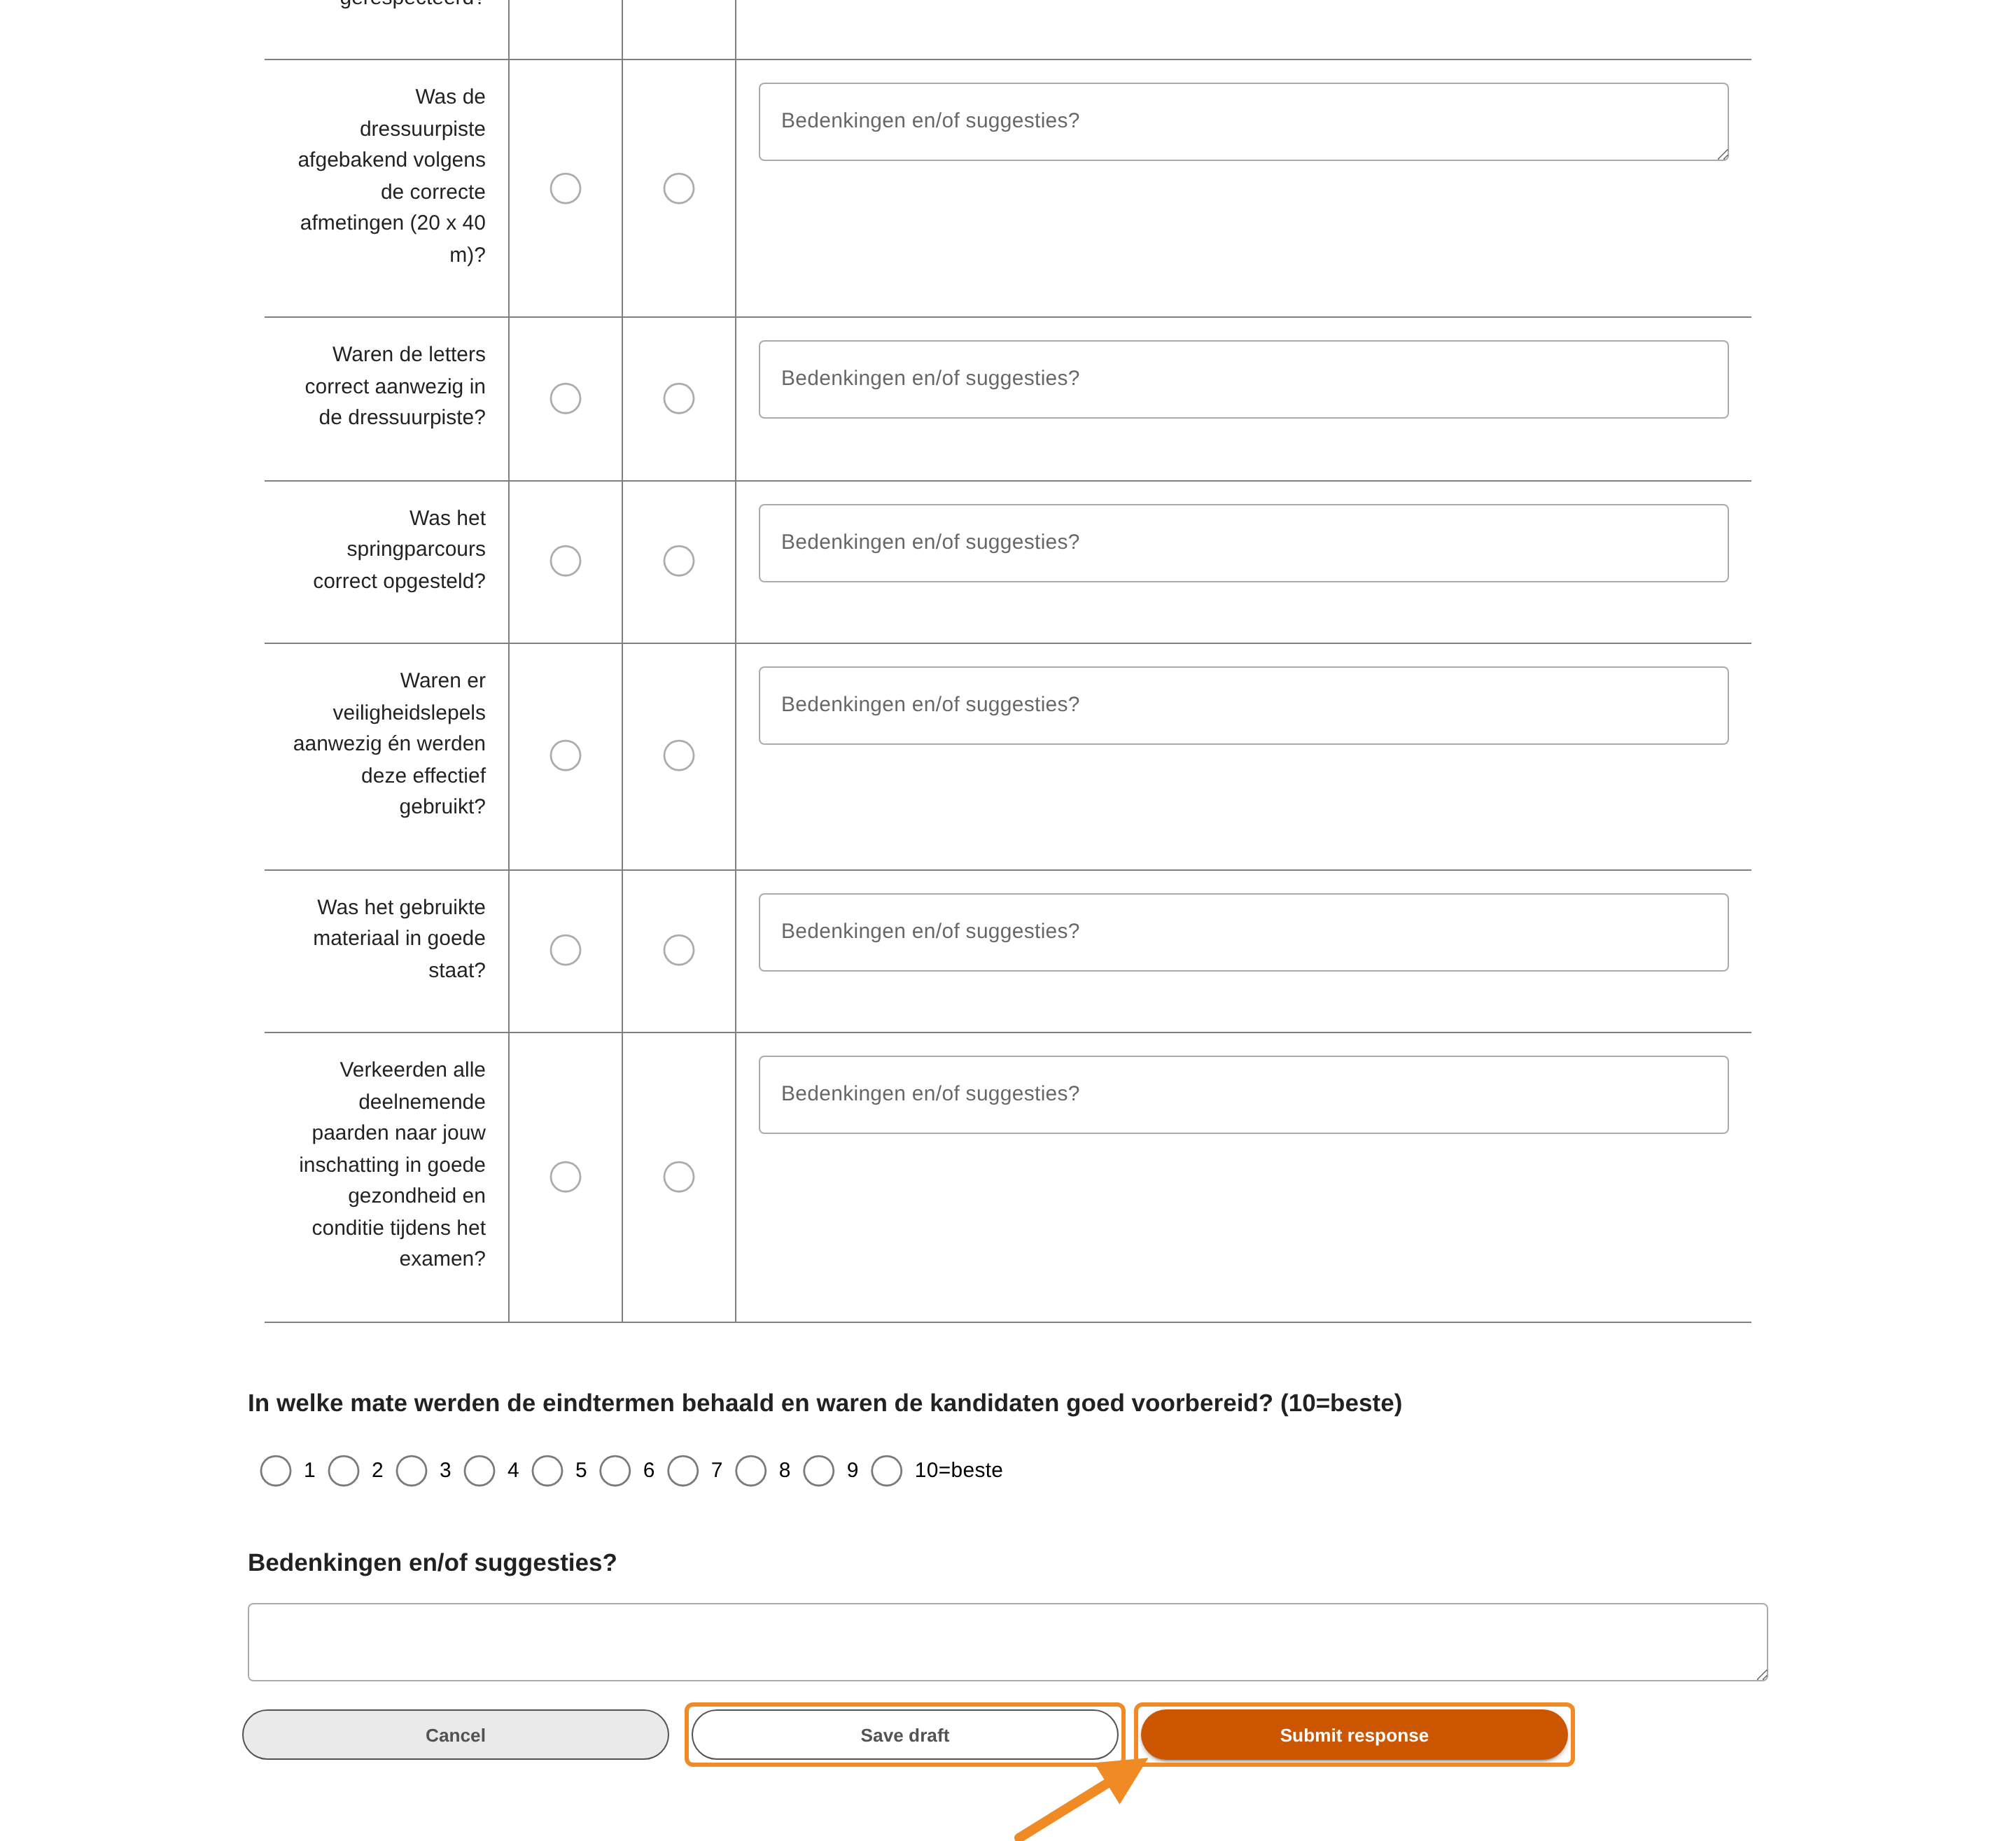
Answer the questions. Questions marked with * must be answered before you can submit. Click “Submit response” to send your report to Paardensport Vlaanderen. To finish later, click “Save draft”: your answers are kept, and the same tab offers your report again until you submit it.
Good to know
- After confirming, the Results tab shows the results read-only, with an “Outcome” column per candidate.
- A candidate who is not on the list: click “Add candidate” at the top of the Results tab to add them. This is possible until the results are confirmed.
- Reminder: if your report is still missing seven days after the session, you receive an email with a link to it.
- Back to a session after its day: the session moves from “Upcoming assignments and candidacies for future events” to “Past assignments and candidacies for events”, on the same tab of your profile. You can also find it in the calendar: “Activities” in the top menu.
If something goes wrong
| What you see | What to do |
|---|---|
| “Results can be entered from {{date}}, the session's start date. Until then the entry controls stay switched off.” | The session has not started yet. Enter the results from its start date. |
| “Confirm results” is greyed out | Open “Recording progress”: it names what is still missing. Give each candidate a “Participation”, and a result for every part of the exams they took. |
| I don’t see the “Results” tab, or the session | Paardensport Vlaanderen has not confirmed you as examiner of this session yet. Contact Paardensport Vlaanderen. |
| A result is wrong after confirming | Contact Paardensport Vlaanderen: only they can correct a confirmed session. |
Related articles: How to Request a Brevet Exam · How to Run Your Club’s Exam Session · How Examiners Hear About Exam Sessions, Apply and Get Selected