
How to Run Your Club’s Exam Session
When your club organises an exam session — a brevet or rozet exam — the system supports it from the first registration to the evaluation afterwards:
- register the participants (steps 1–16): find each person, or add them if they are not in the system yet, and tick the exams they take;
- print the exam materials for the exam day (step 17);
- after the exam, read the session’s statistics and evaluate the examiner (steps 18–22).
Before you begin
You need:
- the club administrator role for your club;
- an exam session of your club that Paardensport Vlaanderen has published;
- each participant’s name and date of birth. For someone who is not in the system yet, also their gender, an email address and their address.
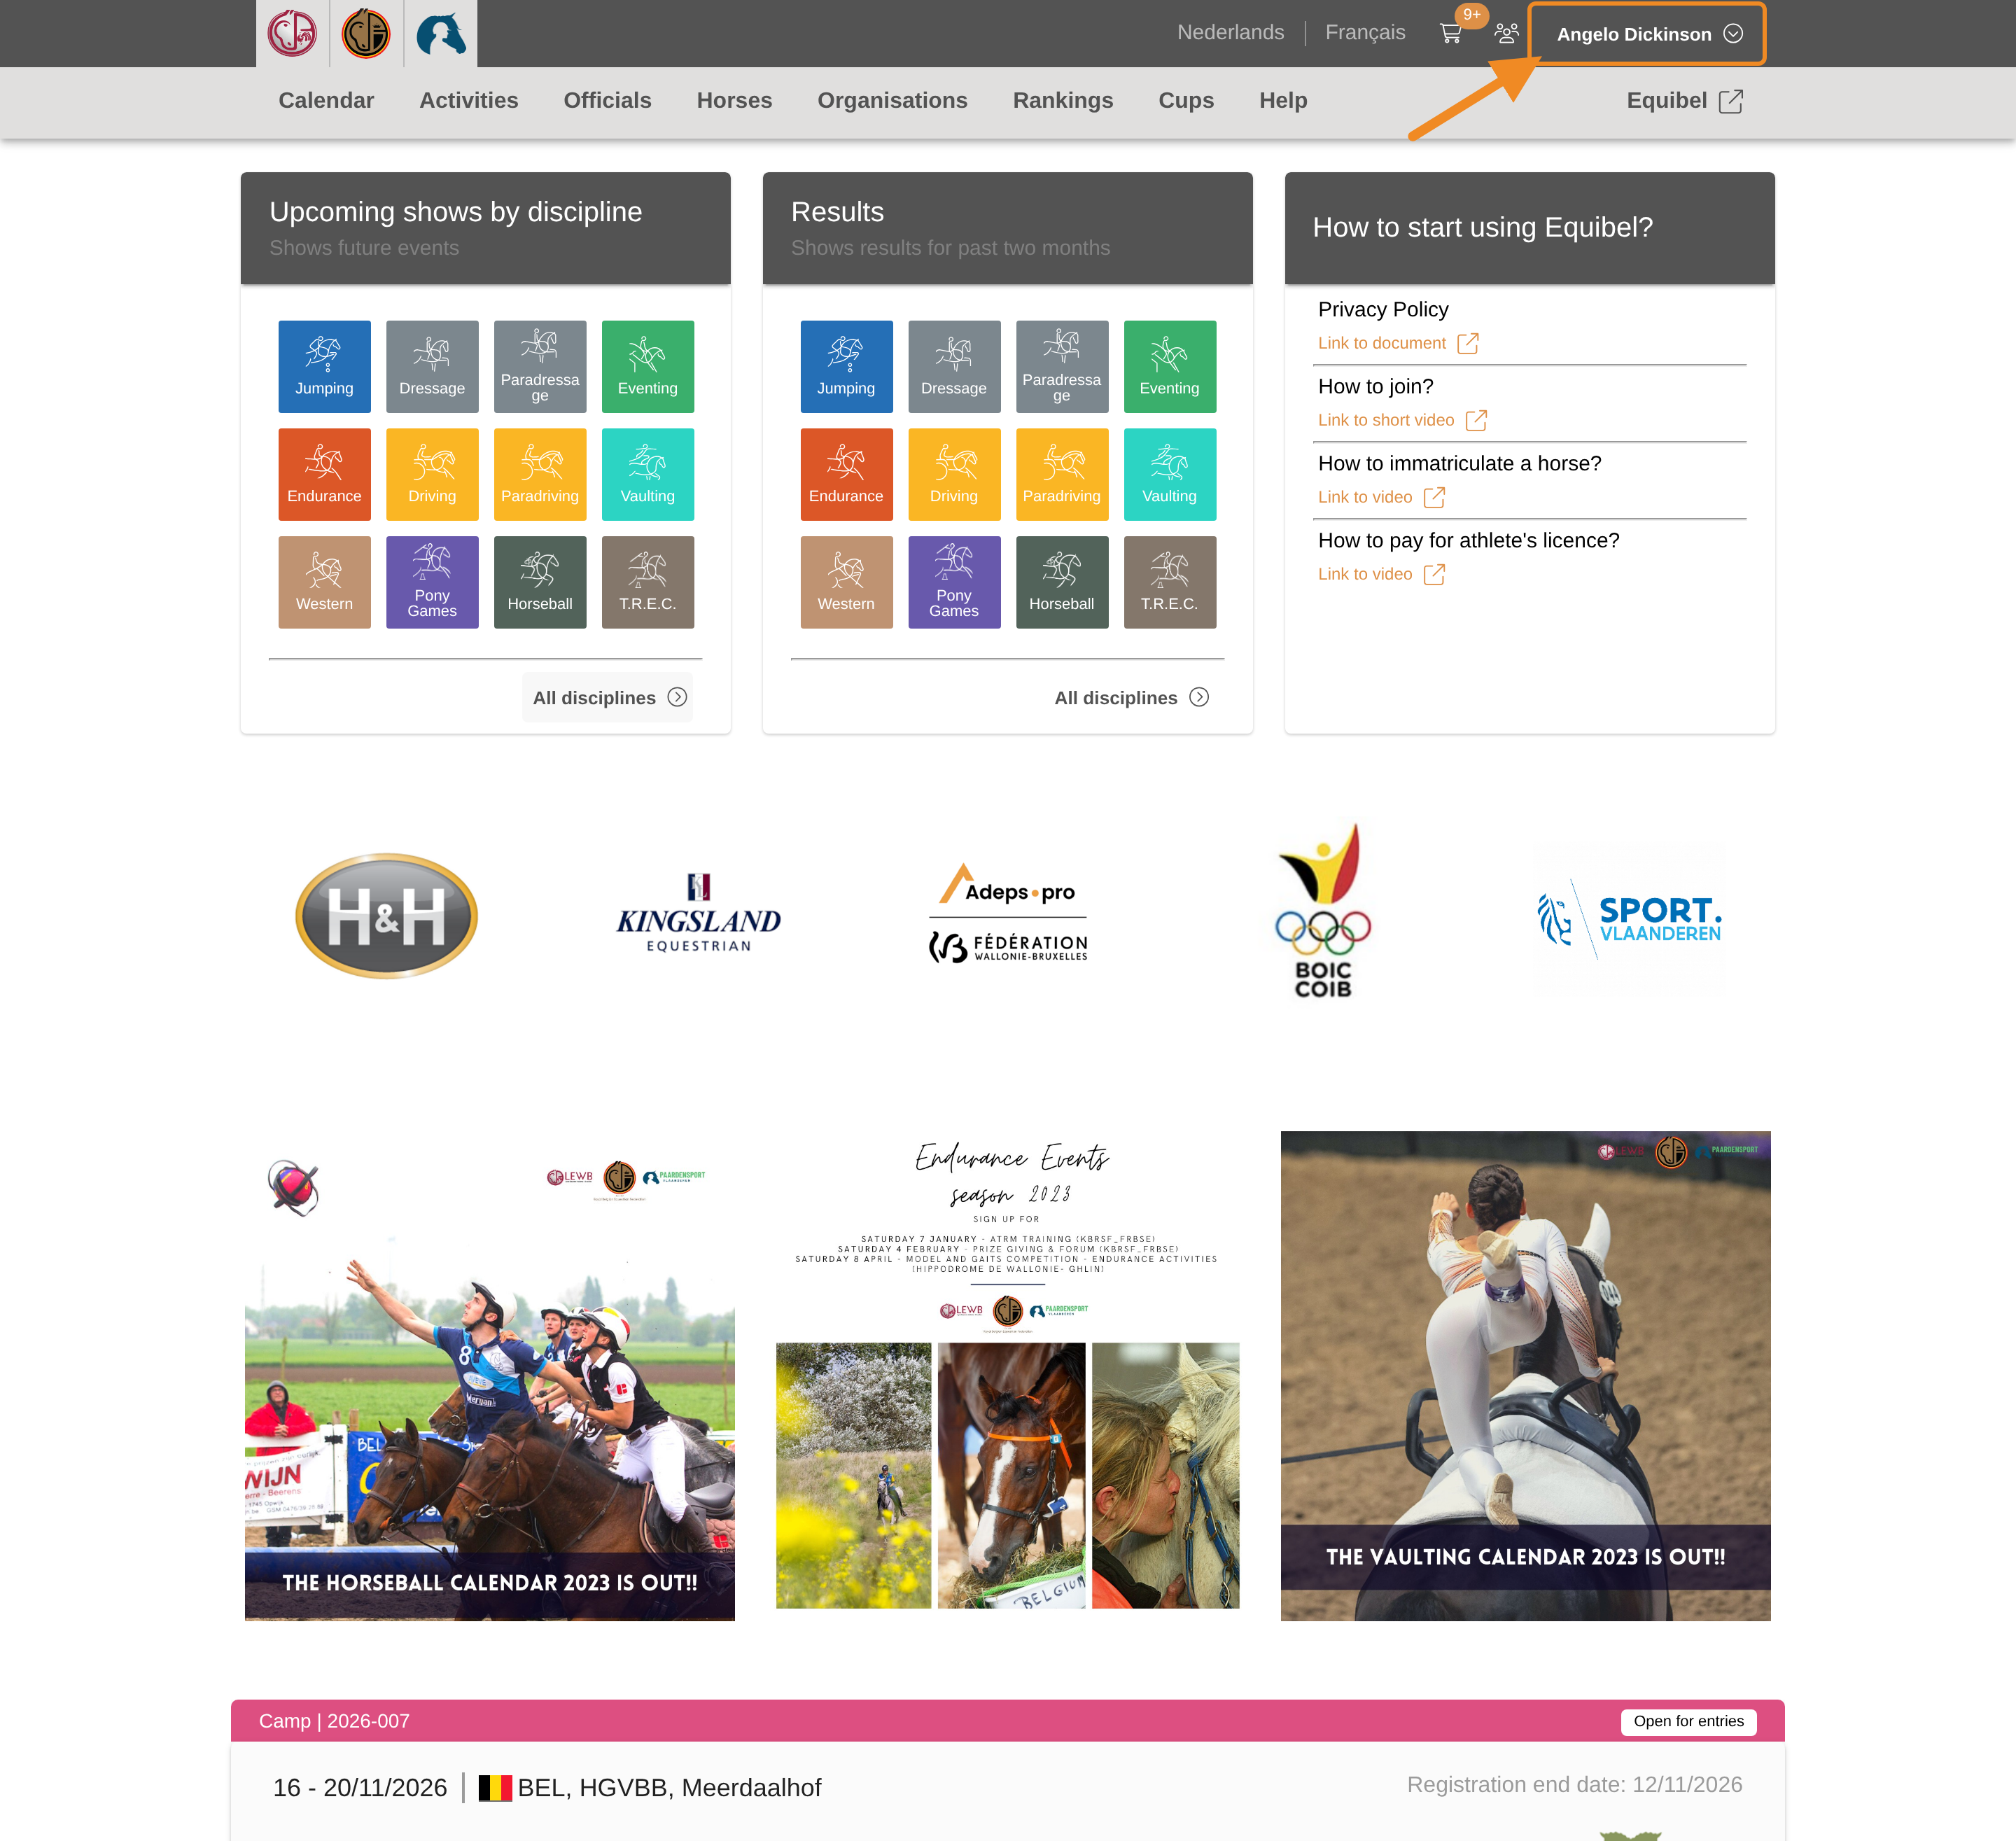
Step 1 — Open your profile menu
Click your profile button in the upper-right corner of any page.
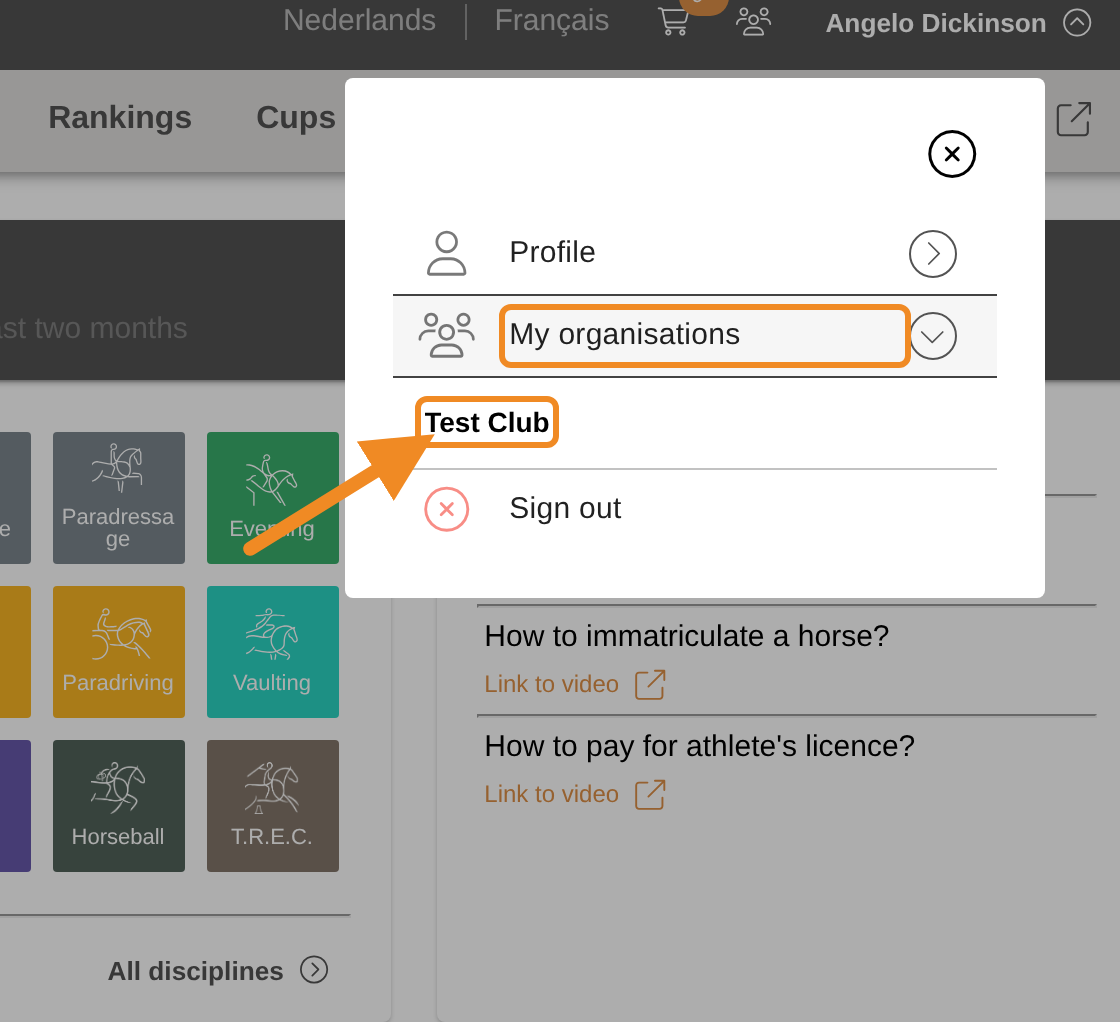
Step 2 — Open your club
Open “My organisations” and select your club.
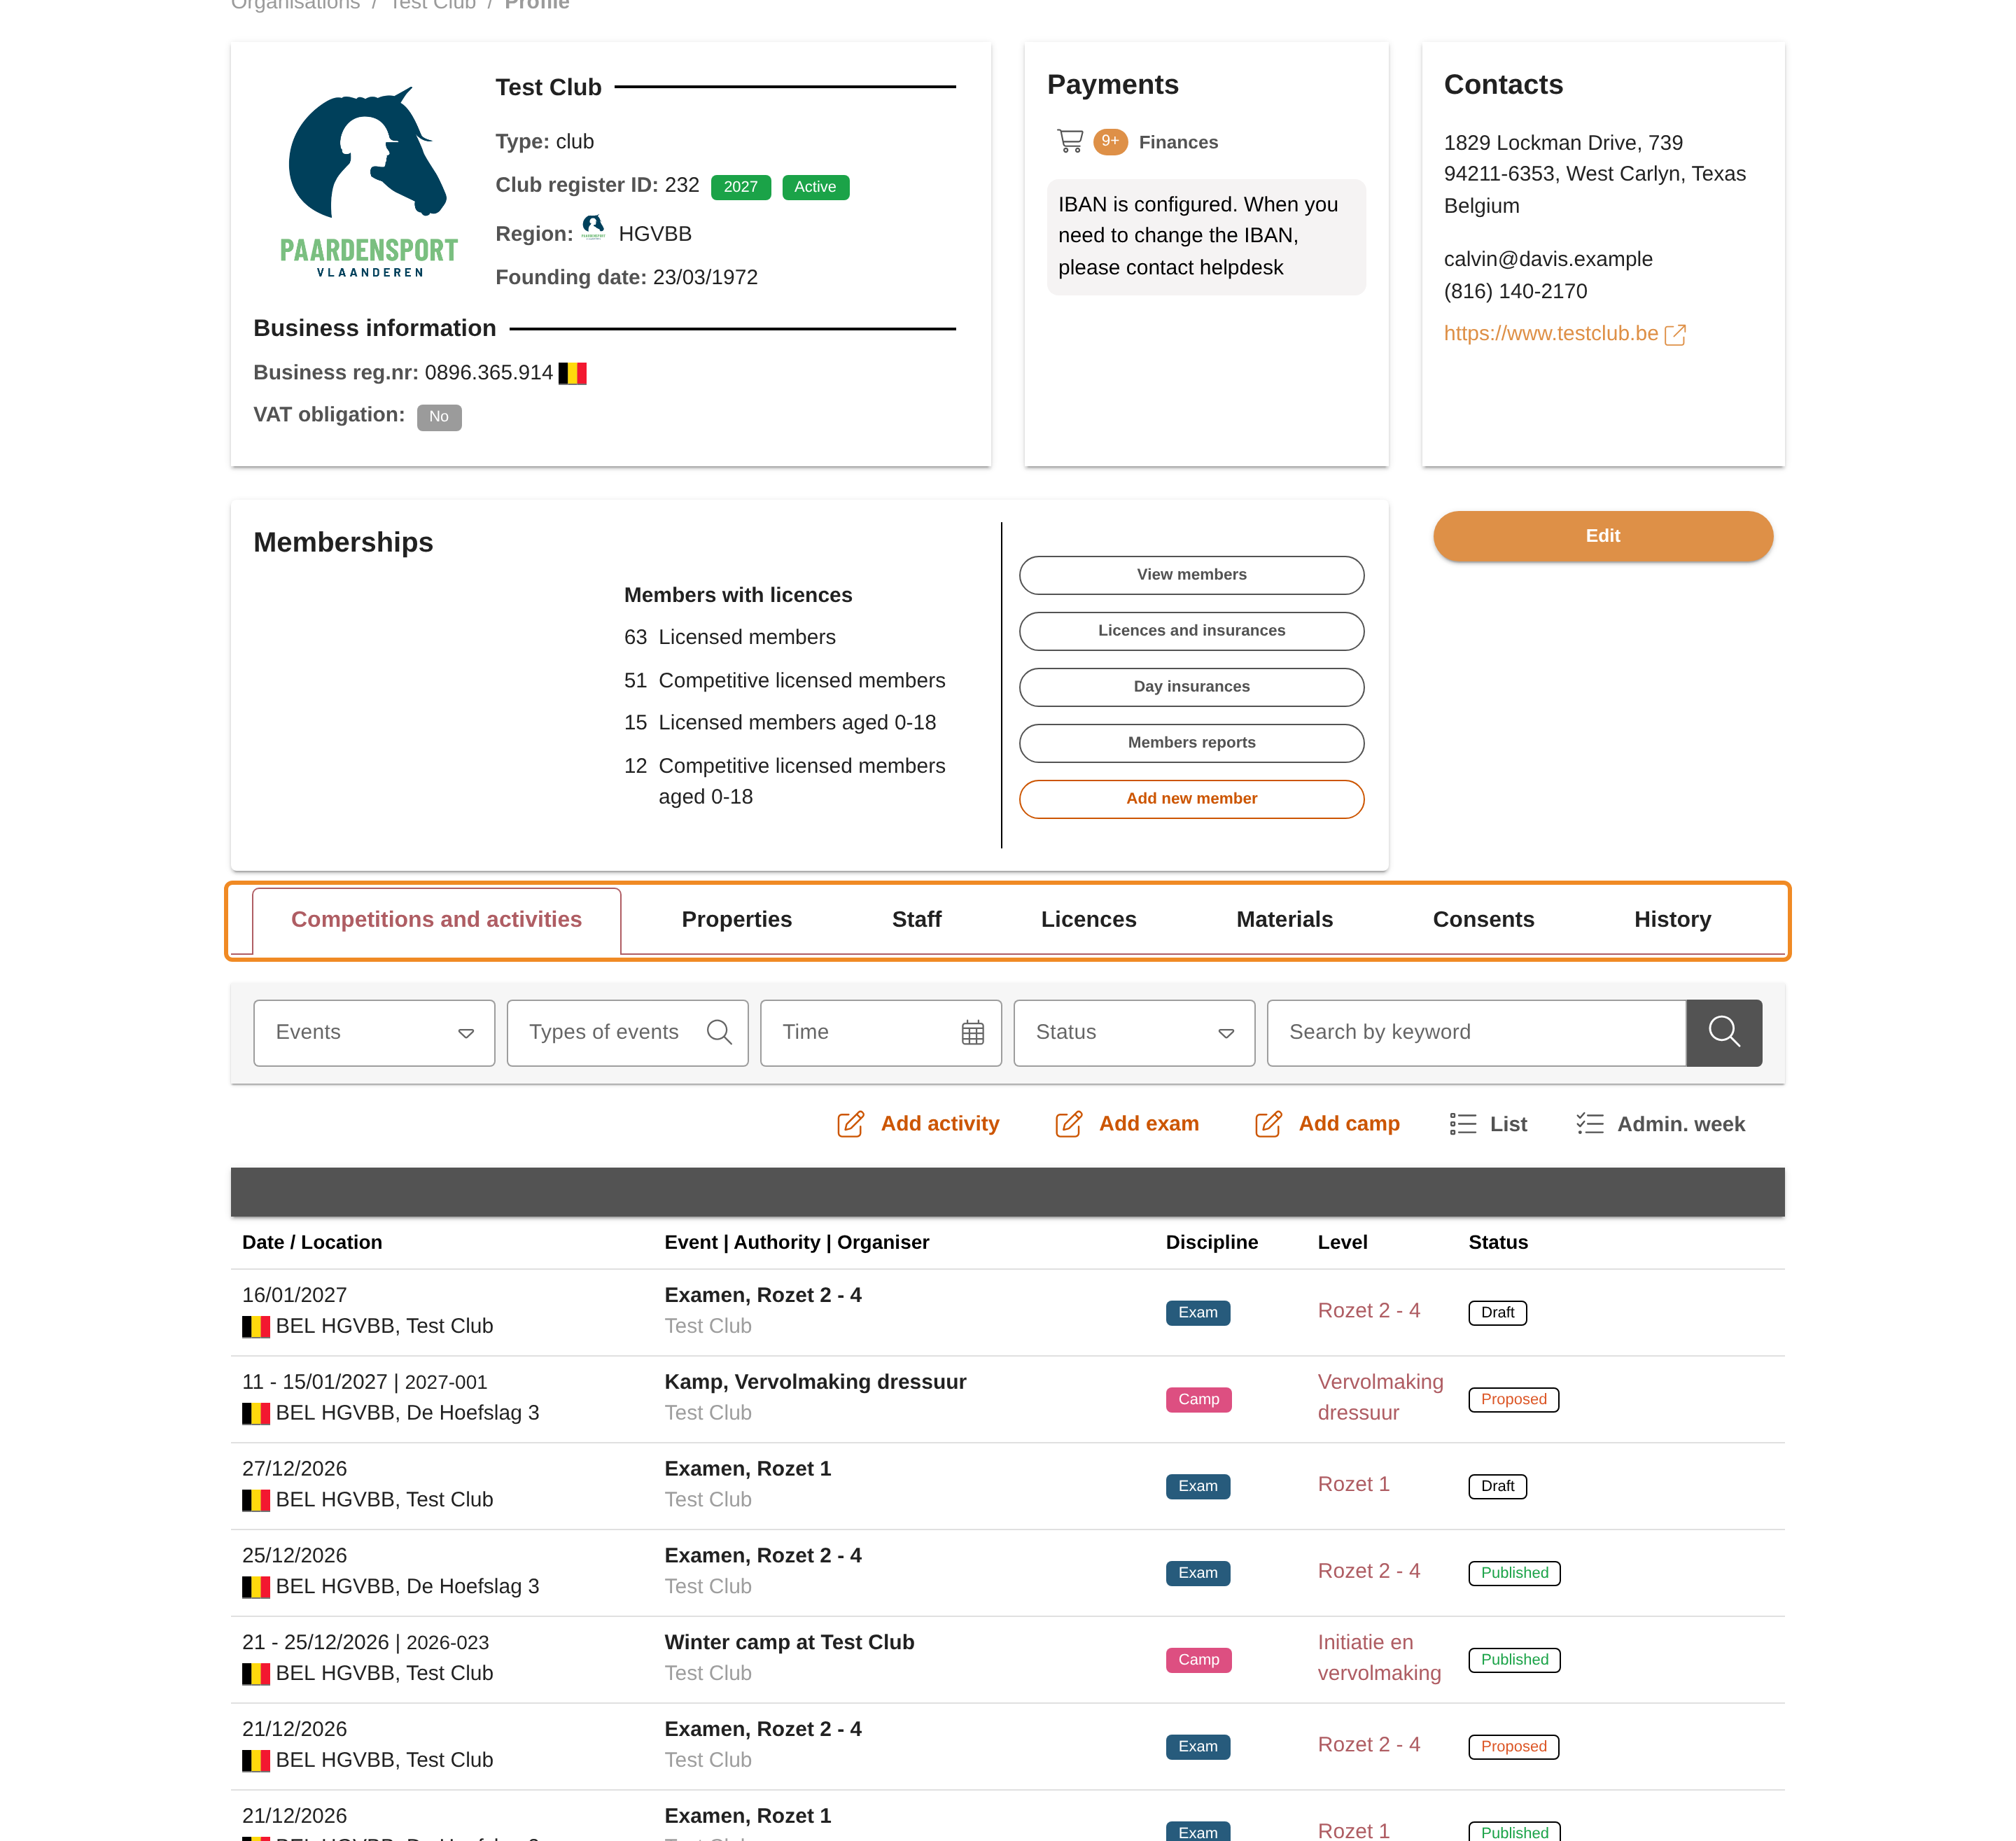
Step 3 — Find the tabs
On your club page, find the tabs below the club’s details.
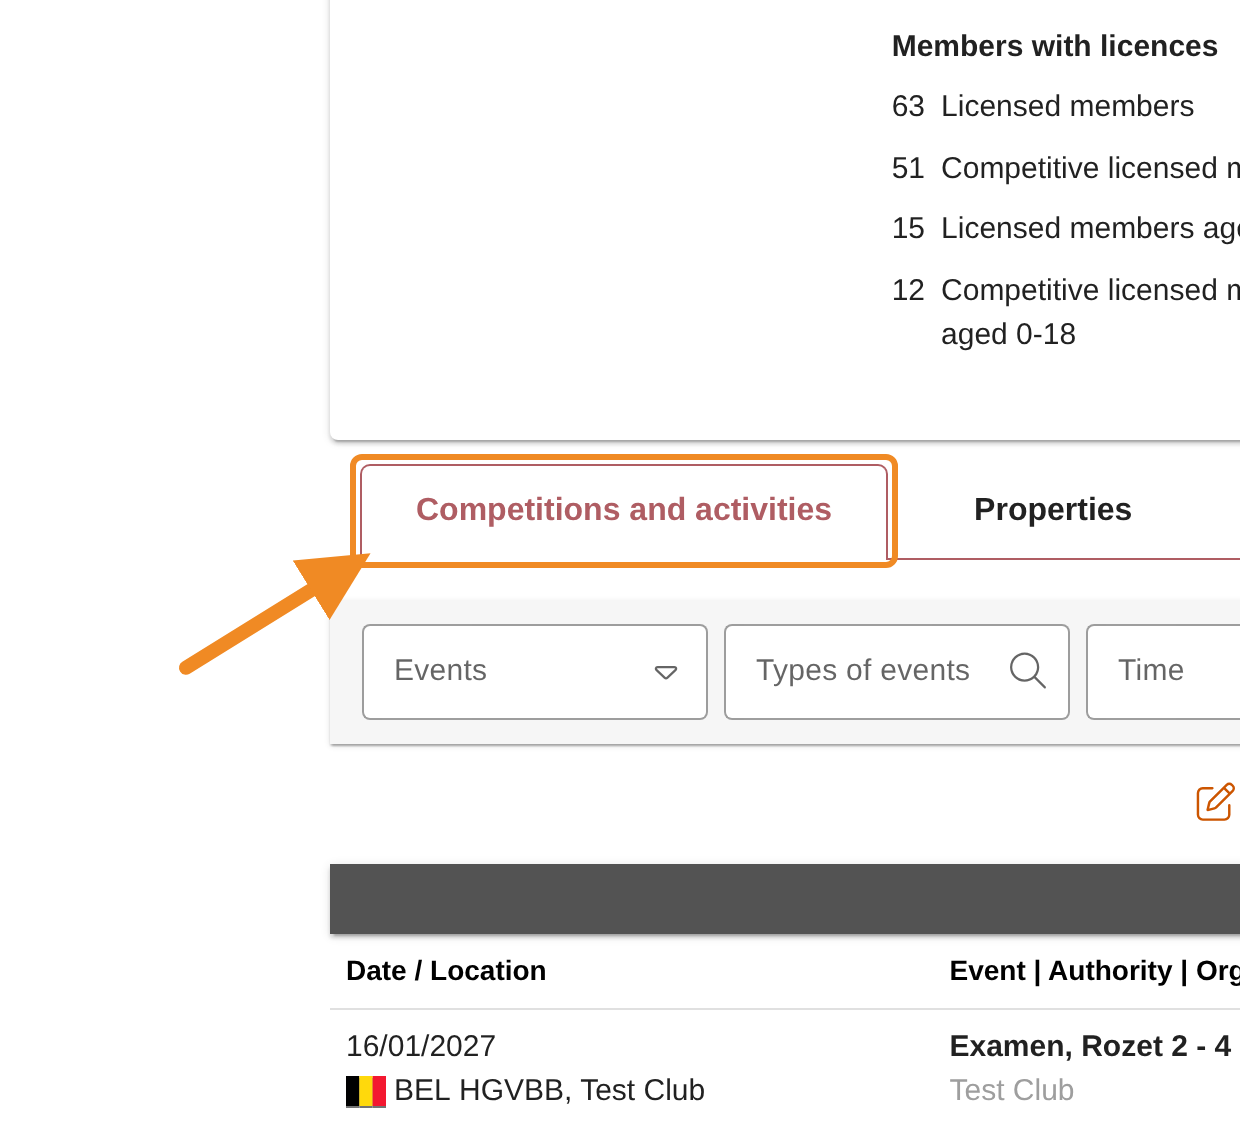
Step 4 — Open the events of your club
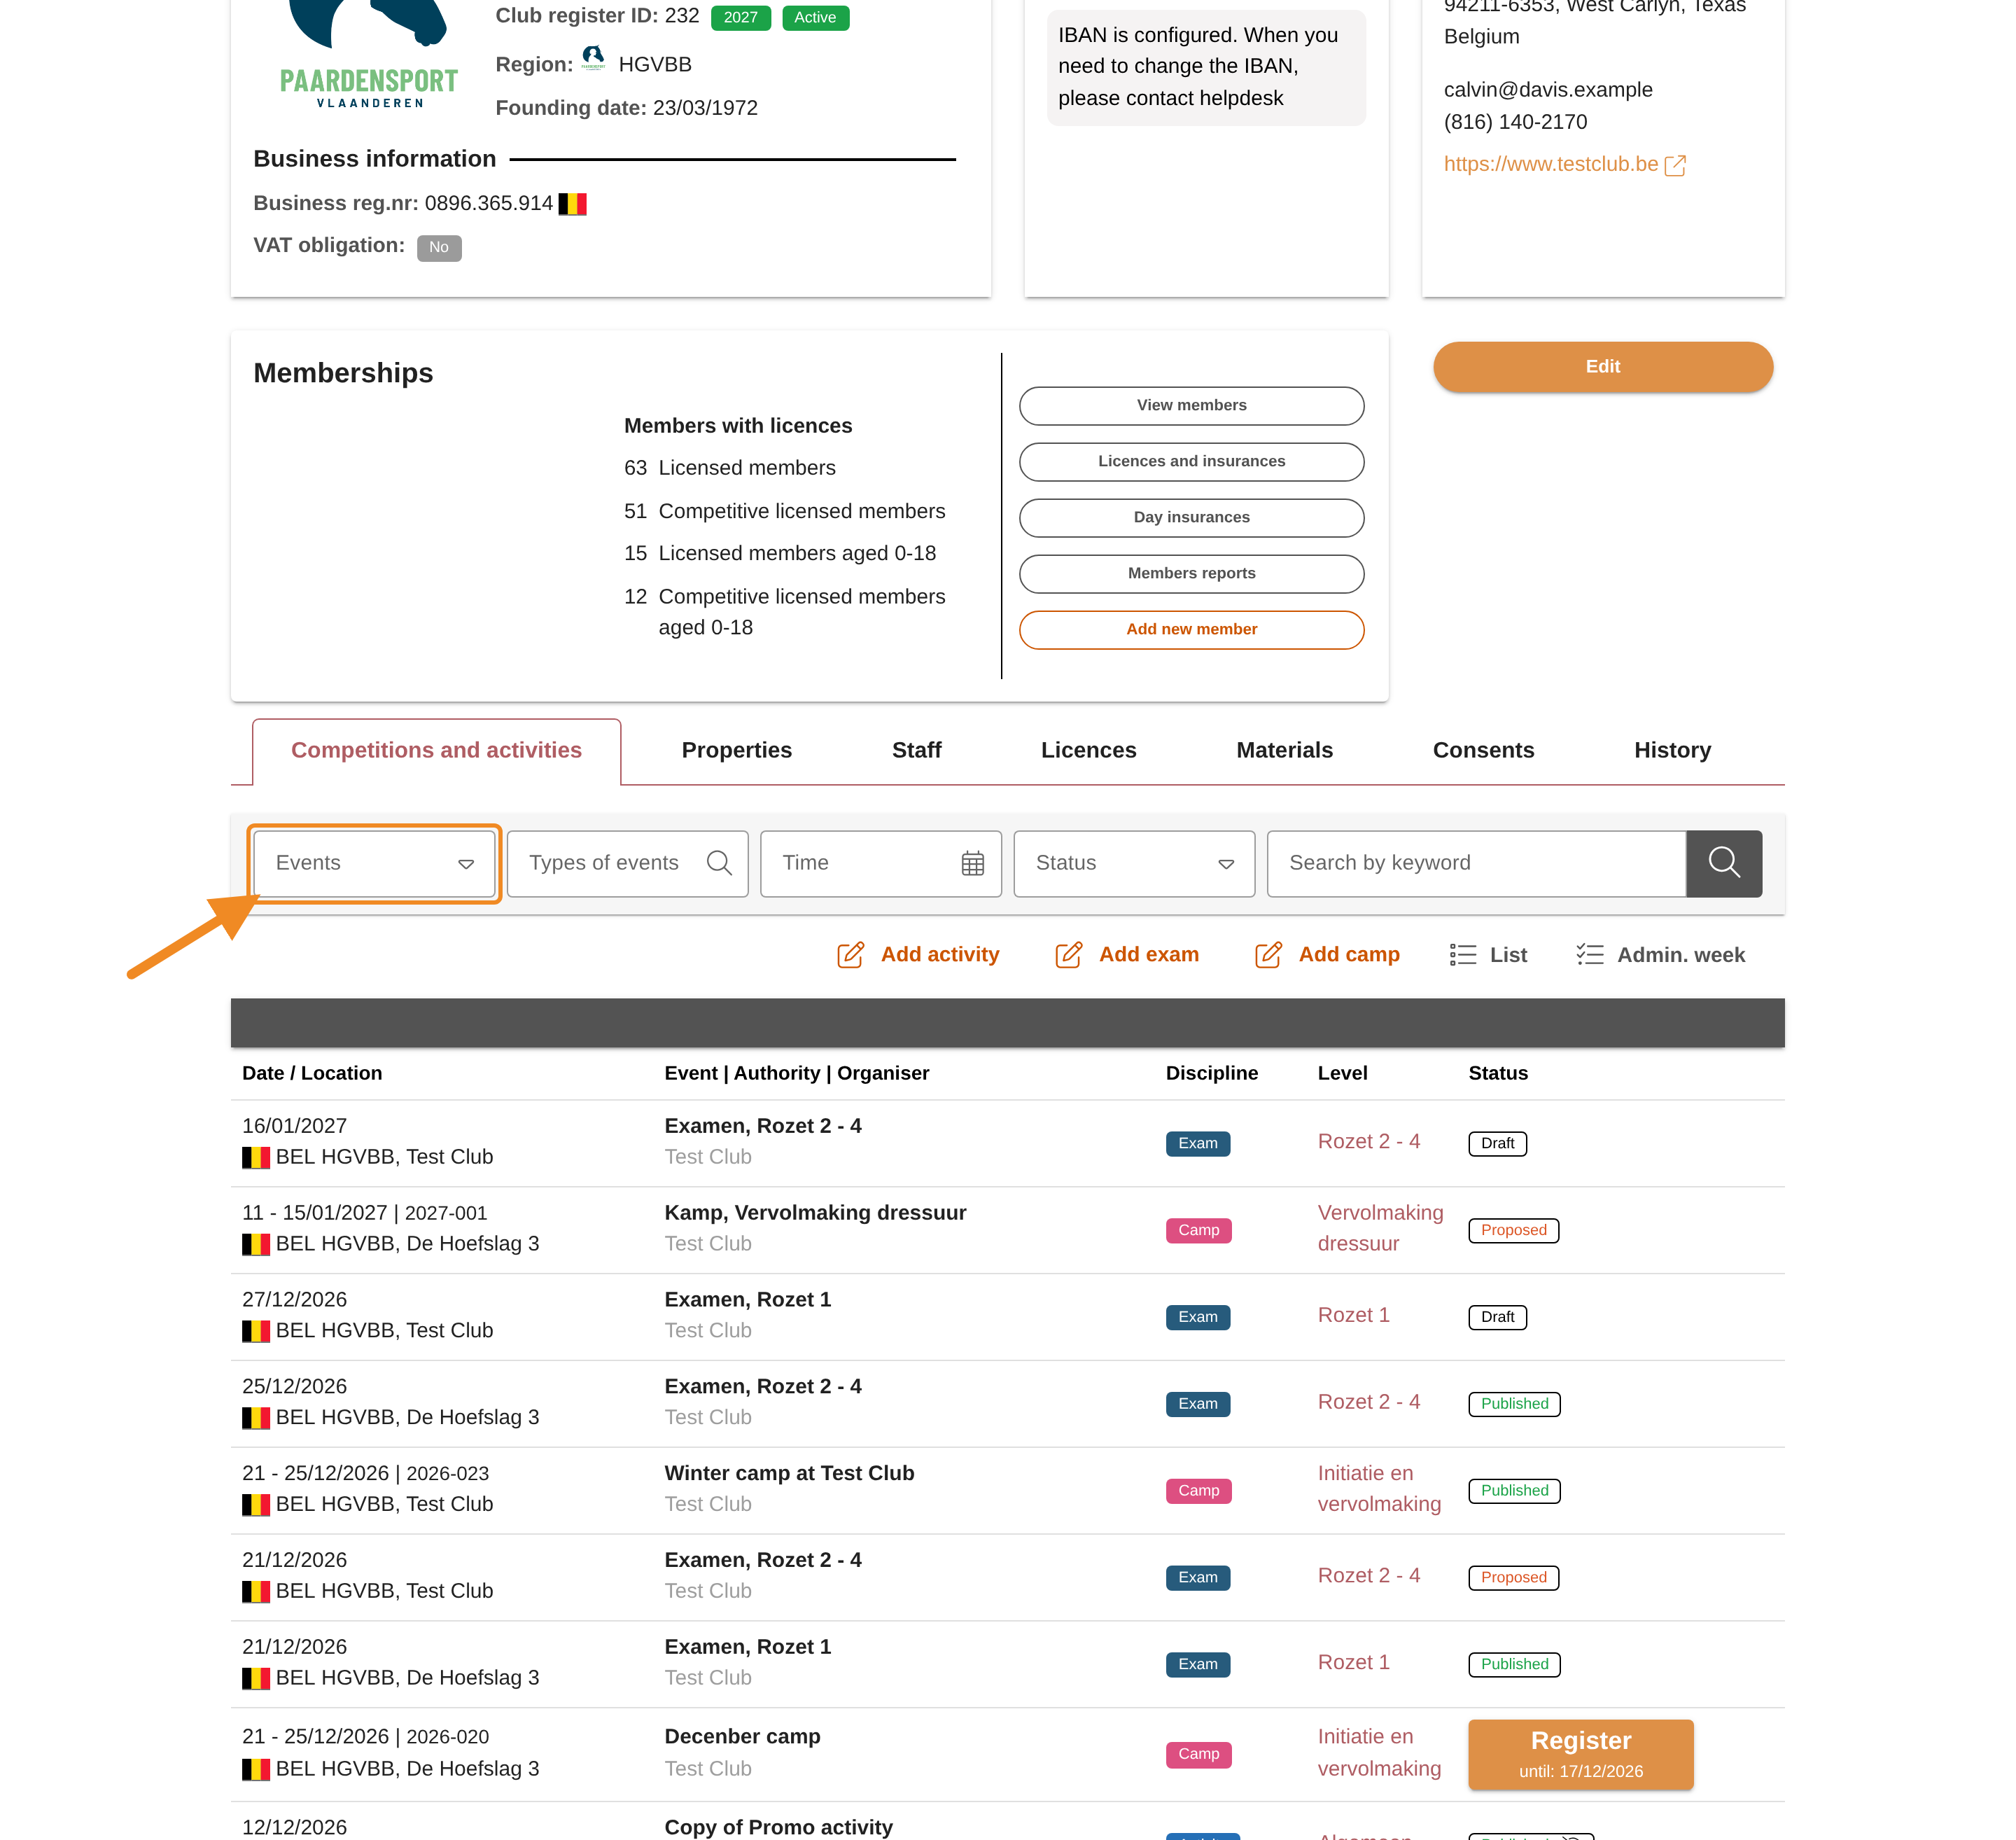
Click the “Competitions and activities” tab. It lists your club’s events, exam sessions included.
Step 5 — Open the filter
To see only your exam sessions, open the “Events” filter at the top of the tab.
Step 6 — Show only exam sessions
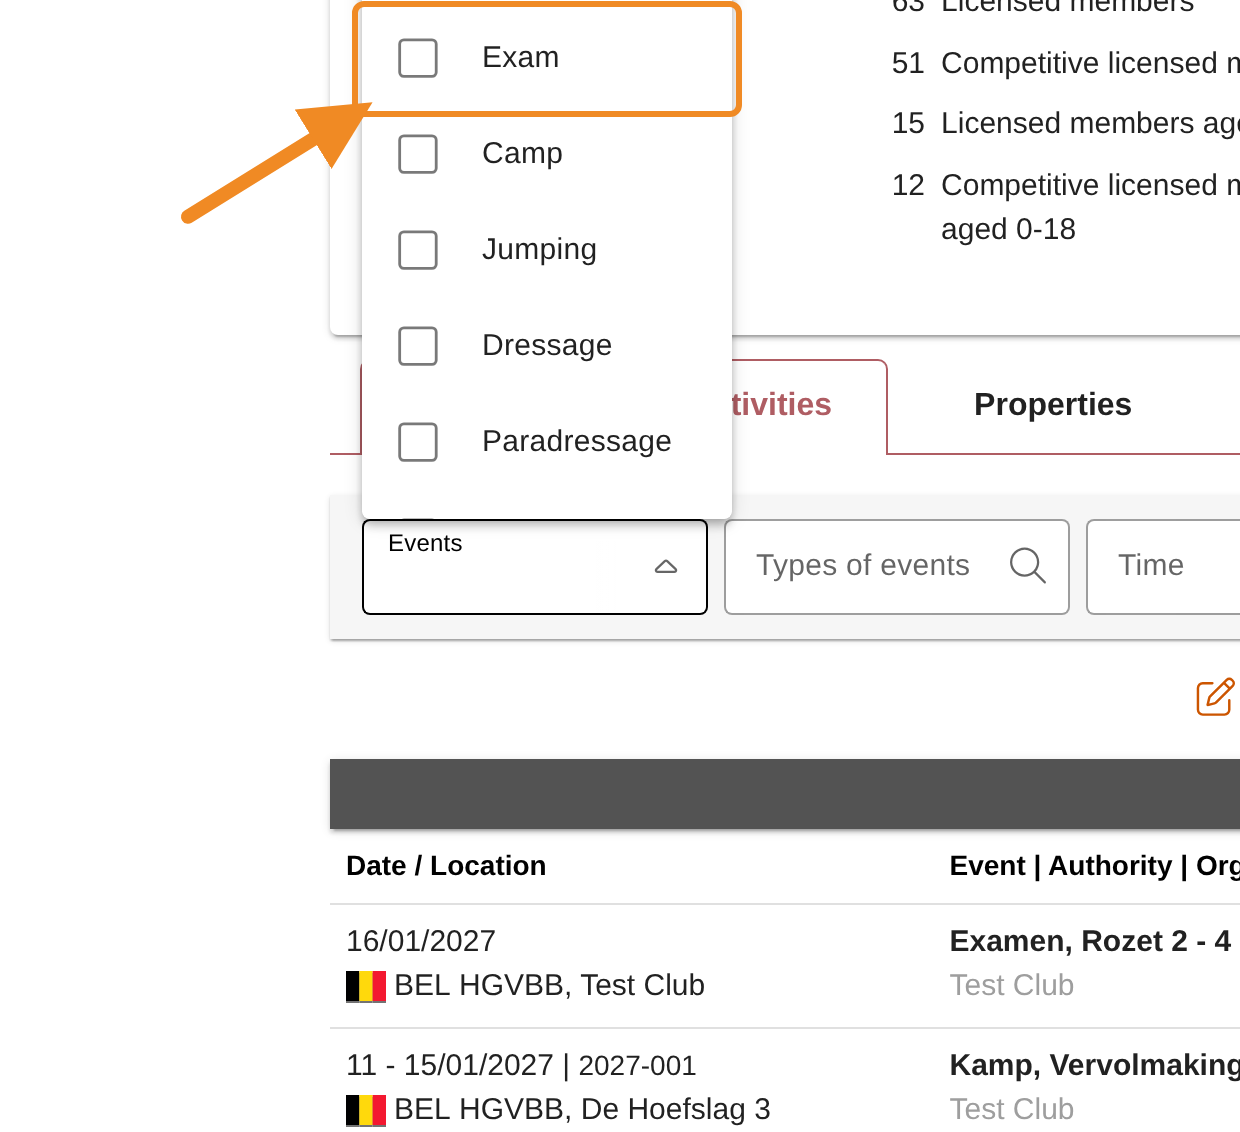
Choose “Exam”. The list now shows your club’s exam sessions only.
Step 7 — Open the exam session
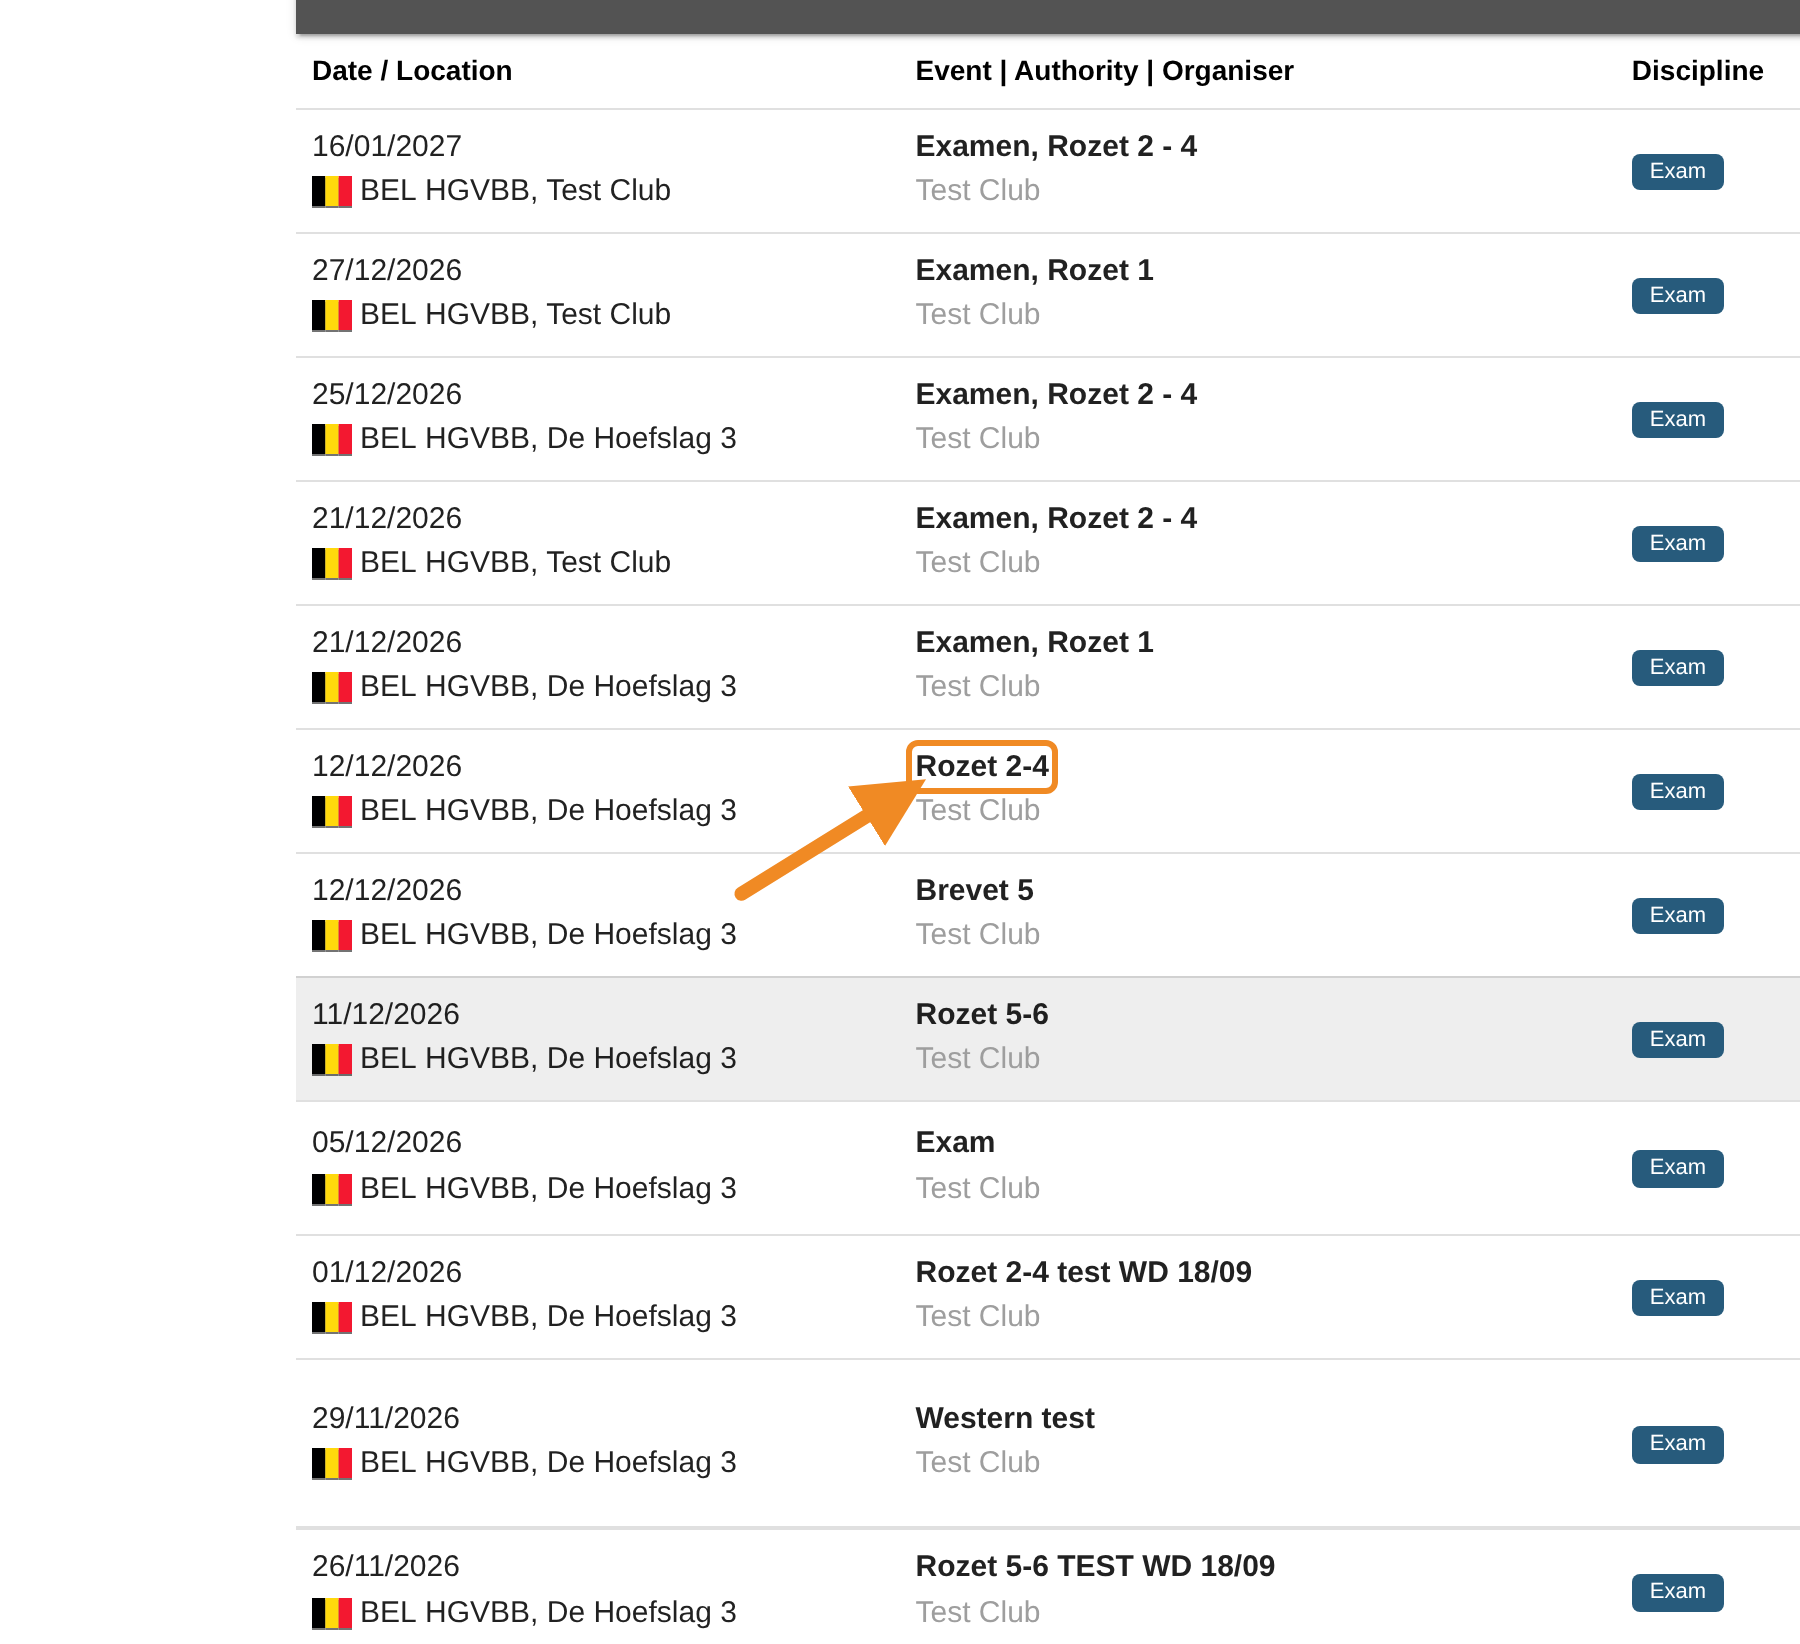
Click the name of the exam session. Its date is in the first column, and its status in the last one: you can add participants while the session is published or open for registration.
Step 8 — Open the participants
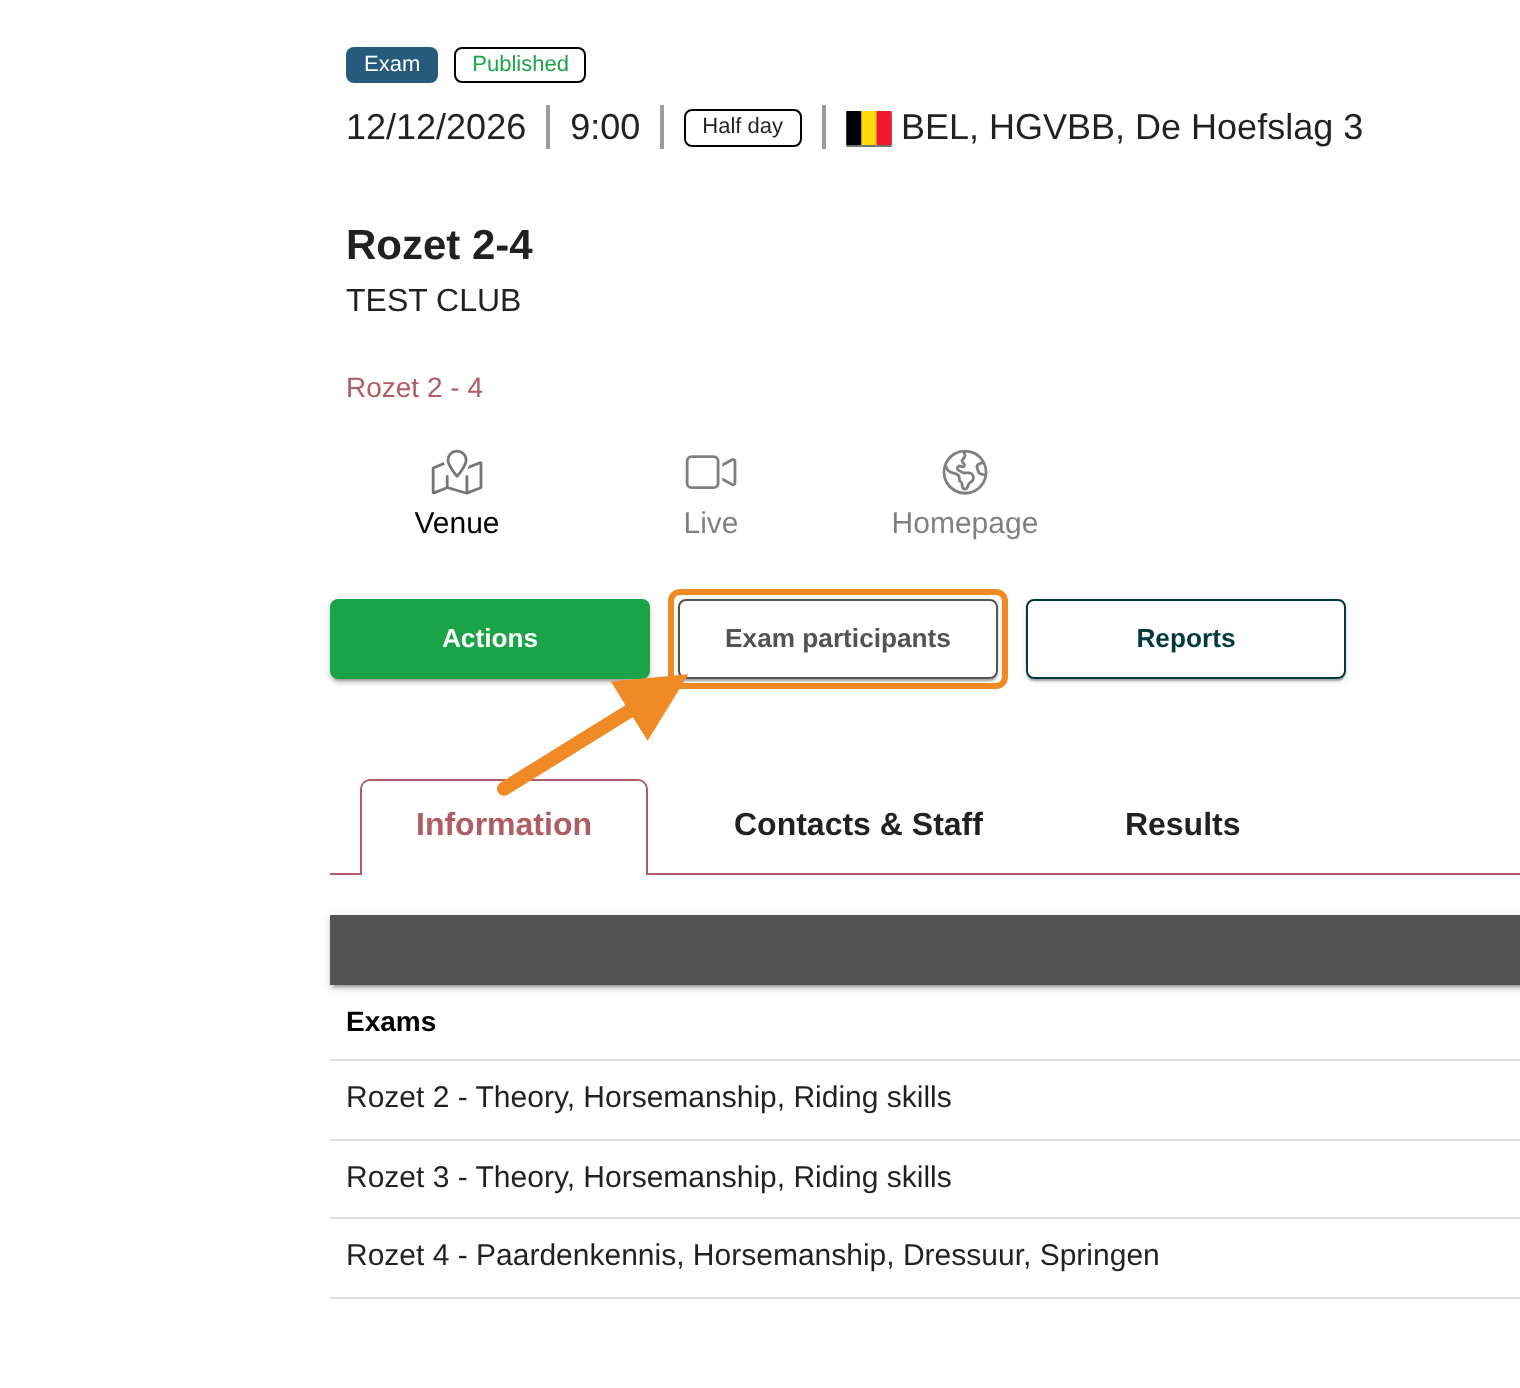
The session’s page opens. Click “Exam participants”.
Step 9 — Find the button to add a participant
The screen “Exam session participants” lists everyone registered so far. Above the list, on the right, you see how many places are used. The button to add a participant is above the list.
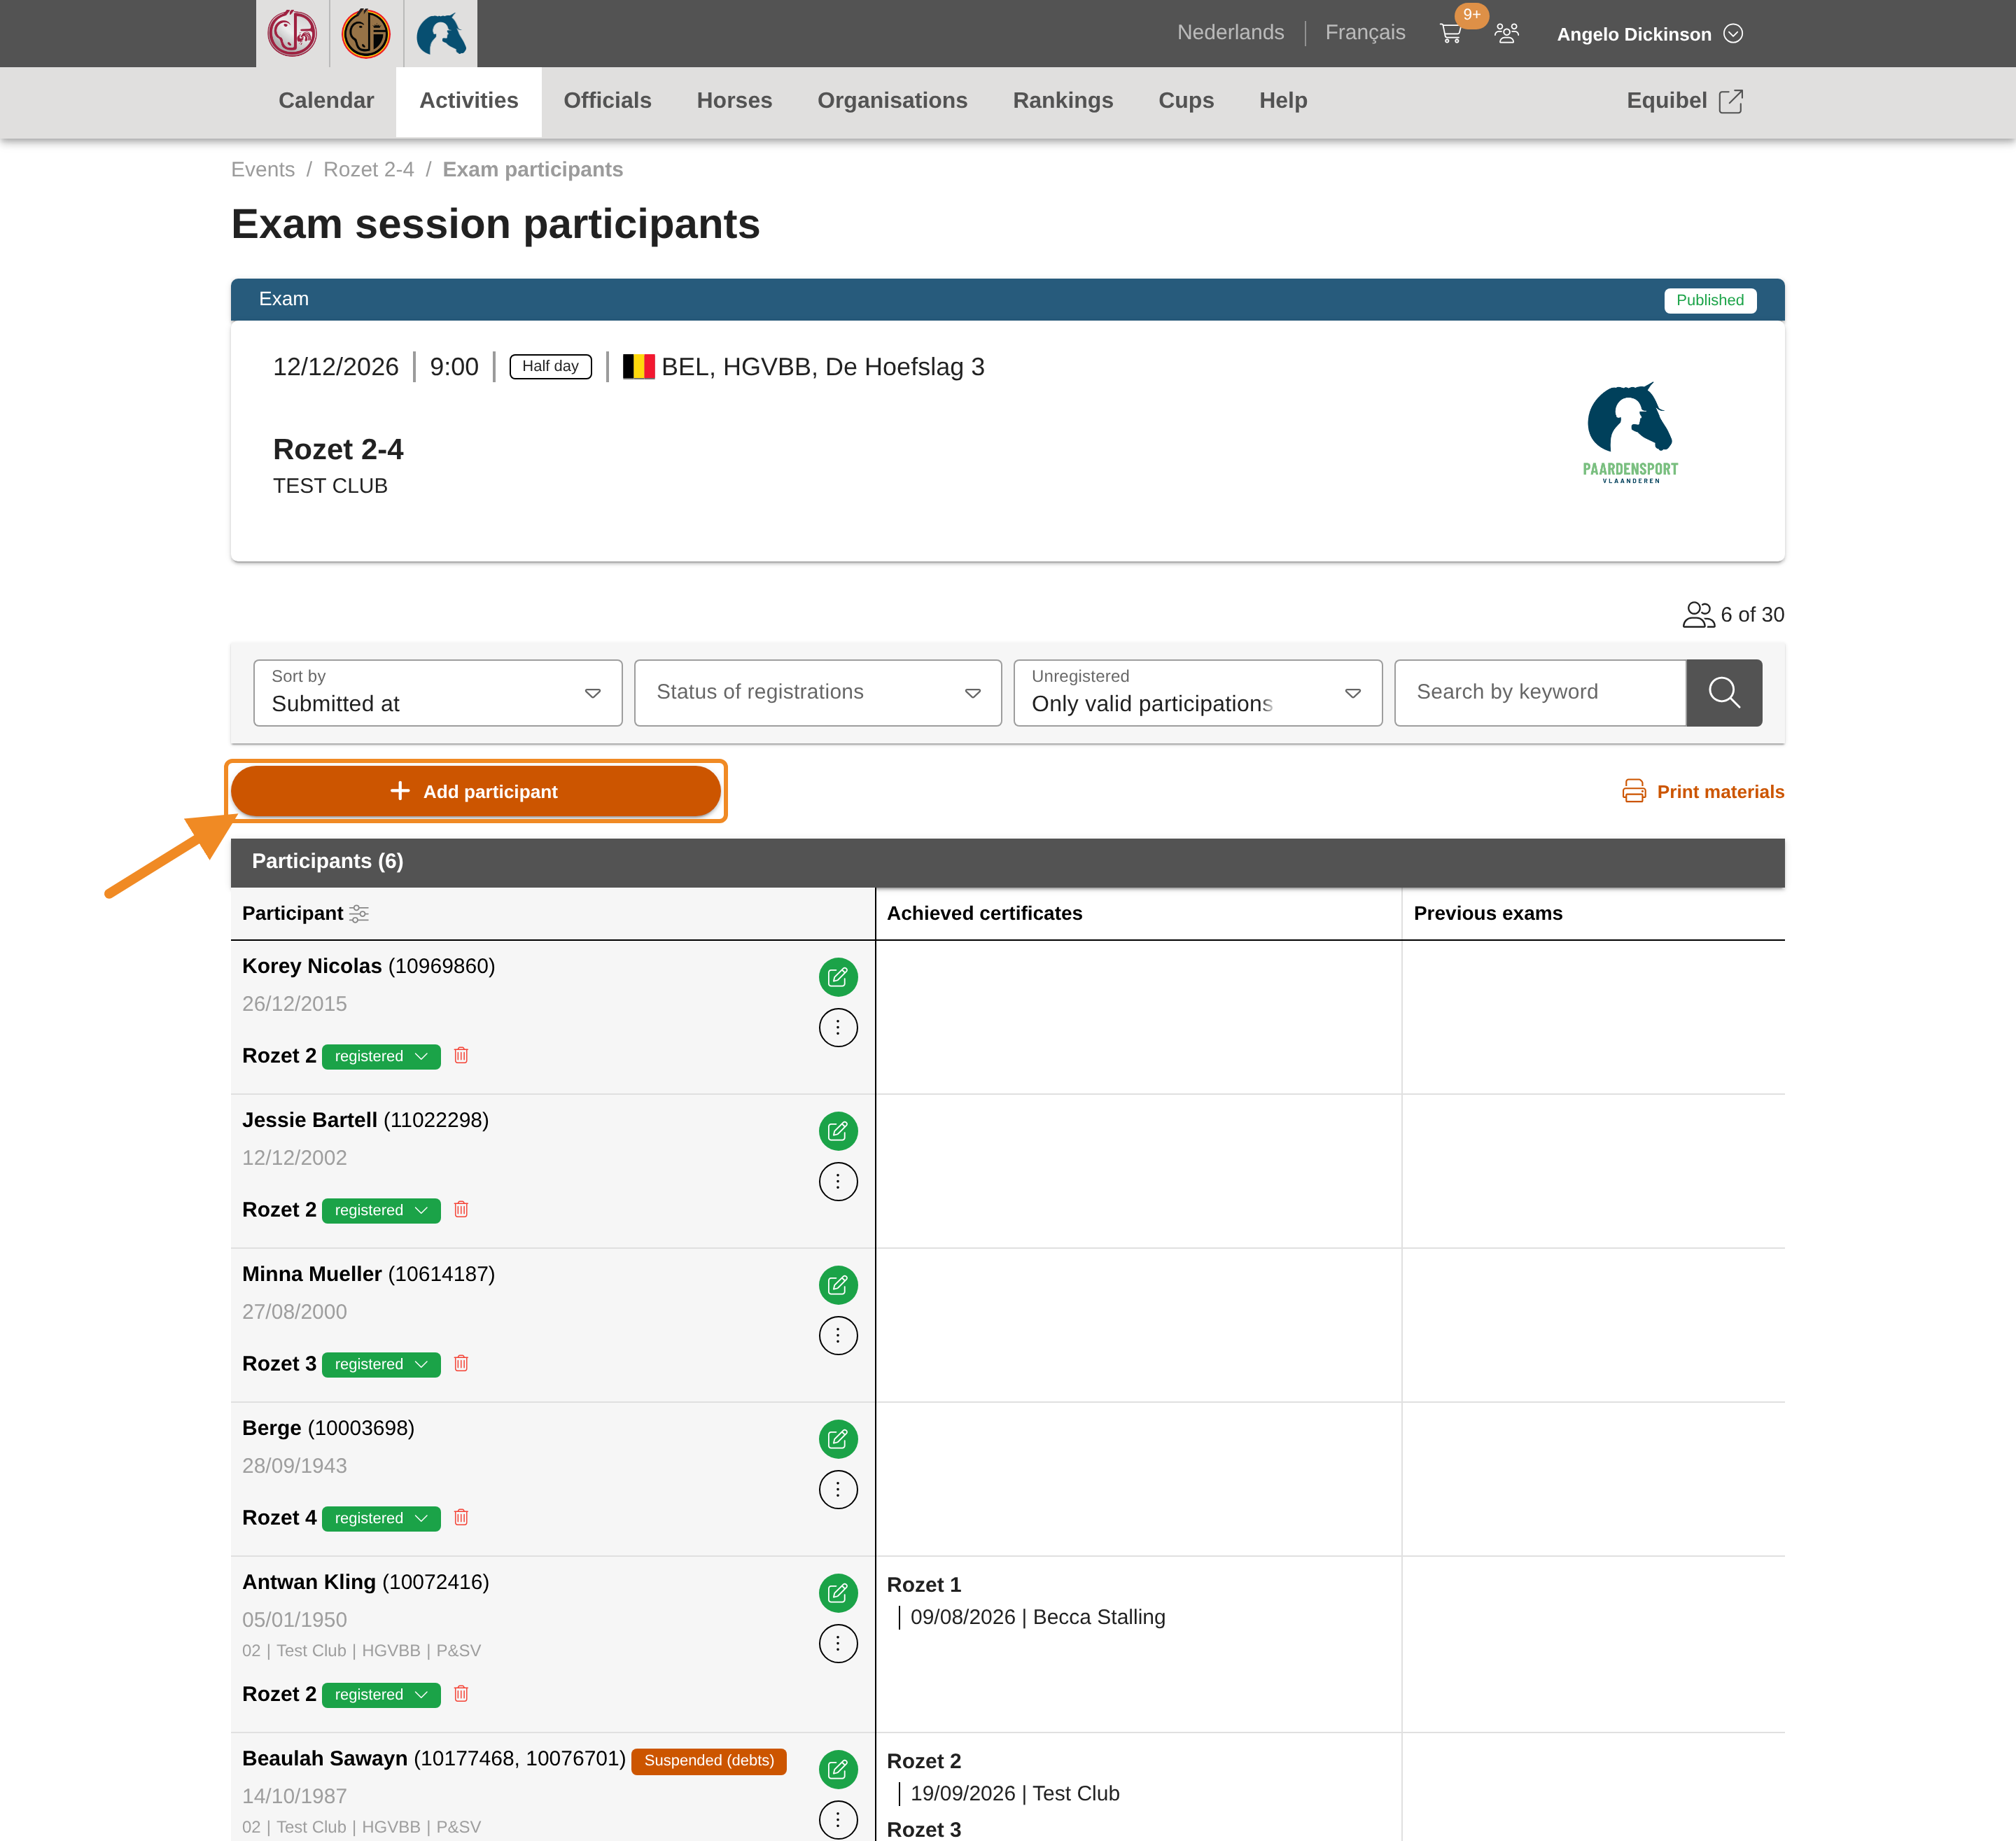
Step 10 — Add a participant
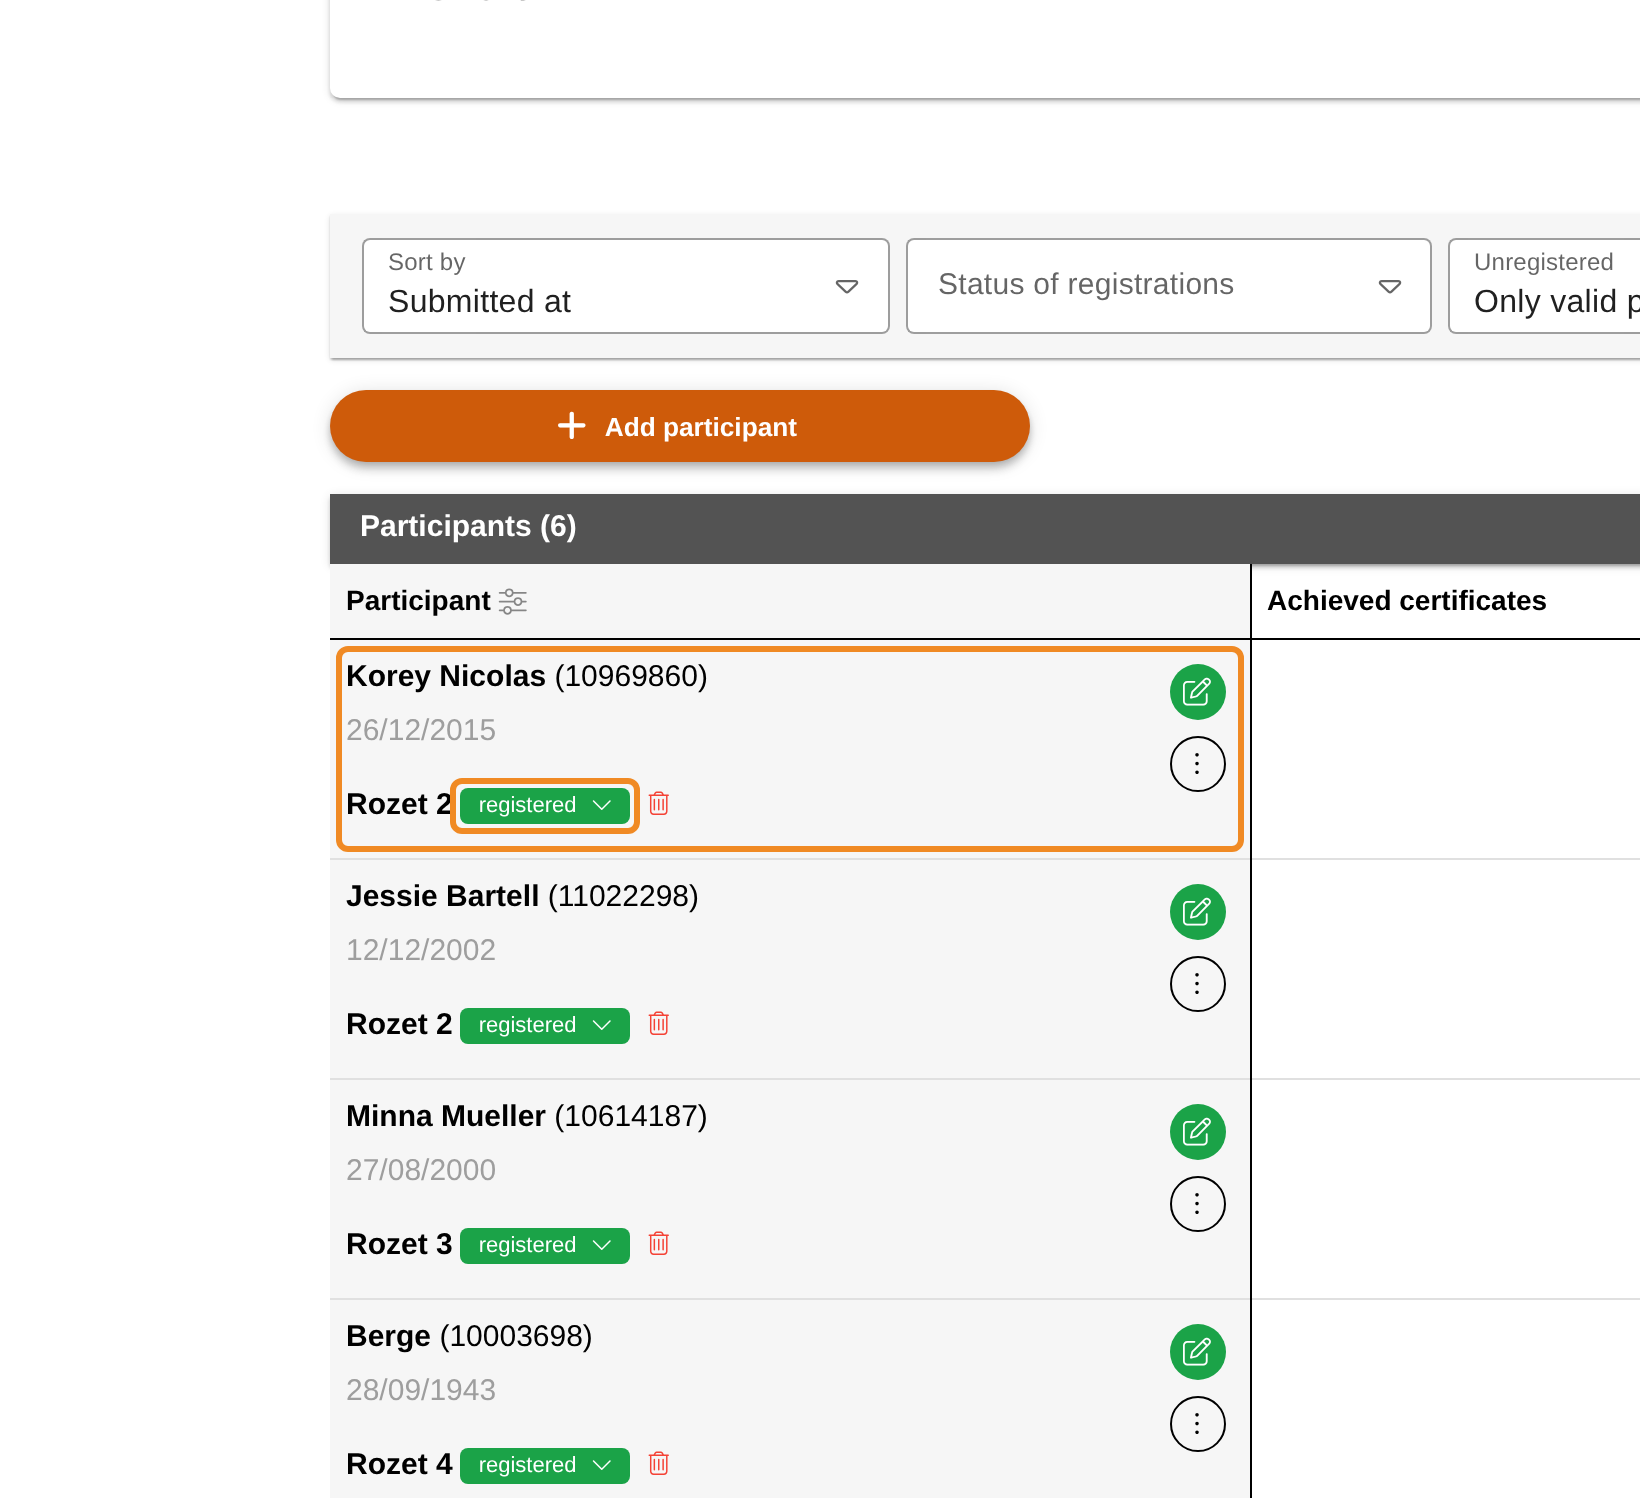
Click “Add participant”.
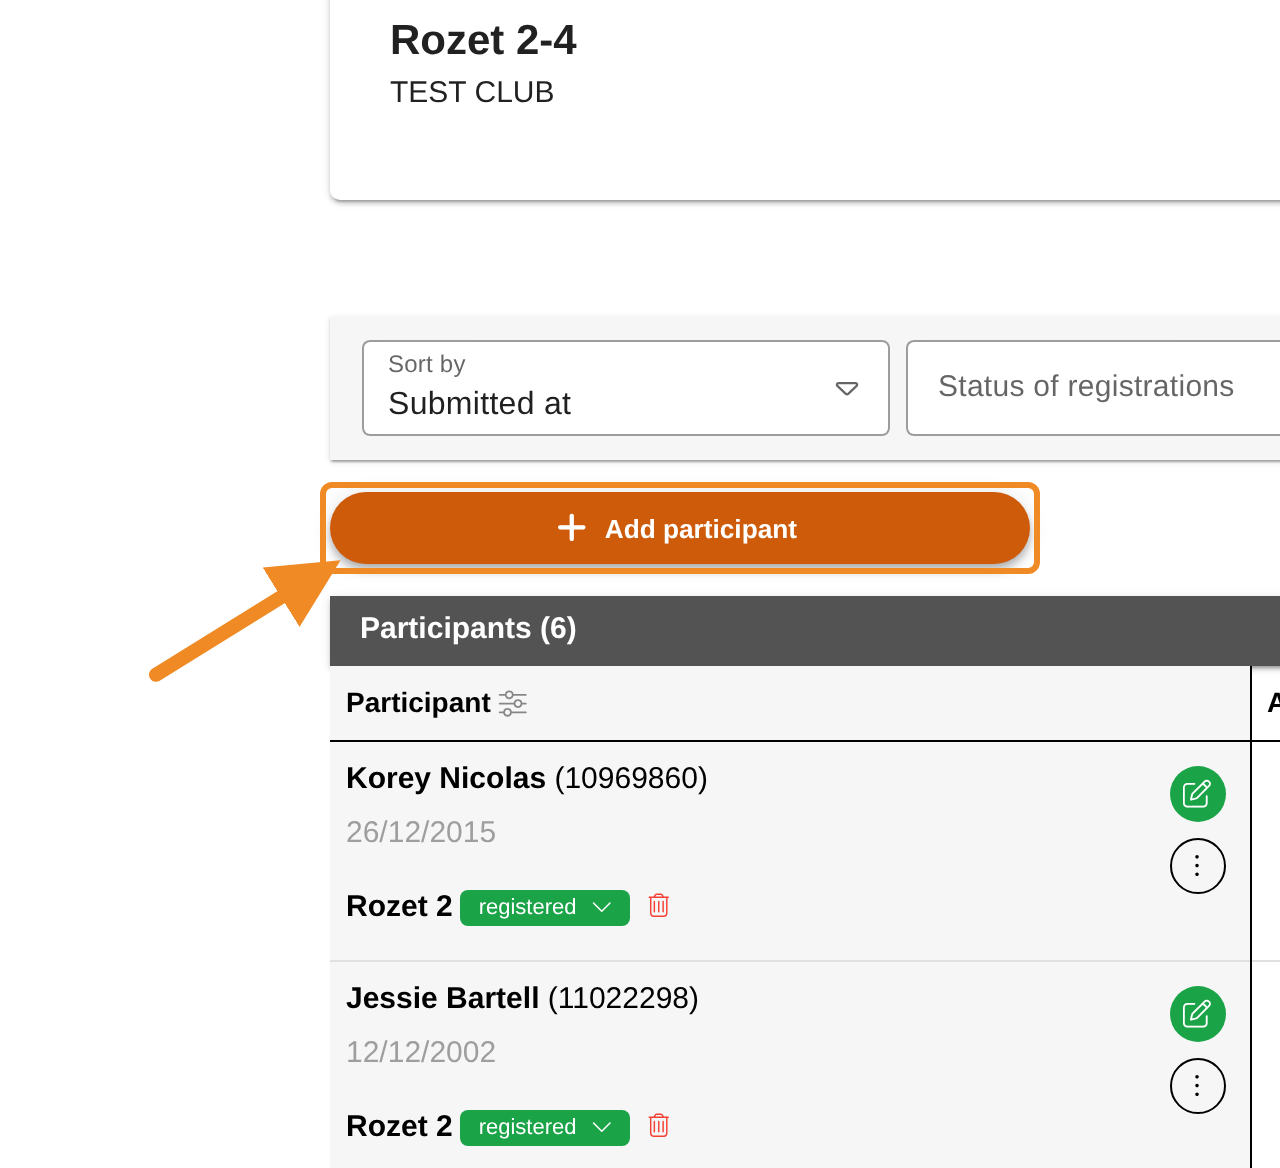
Step 11 — Find the participant
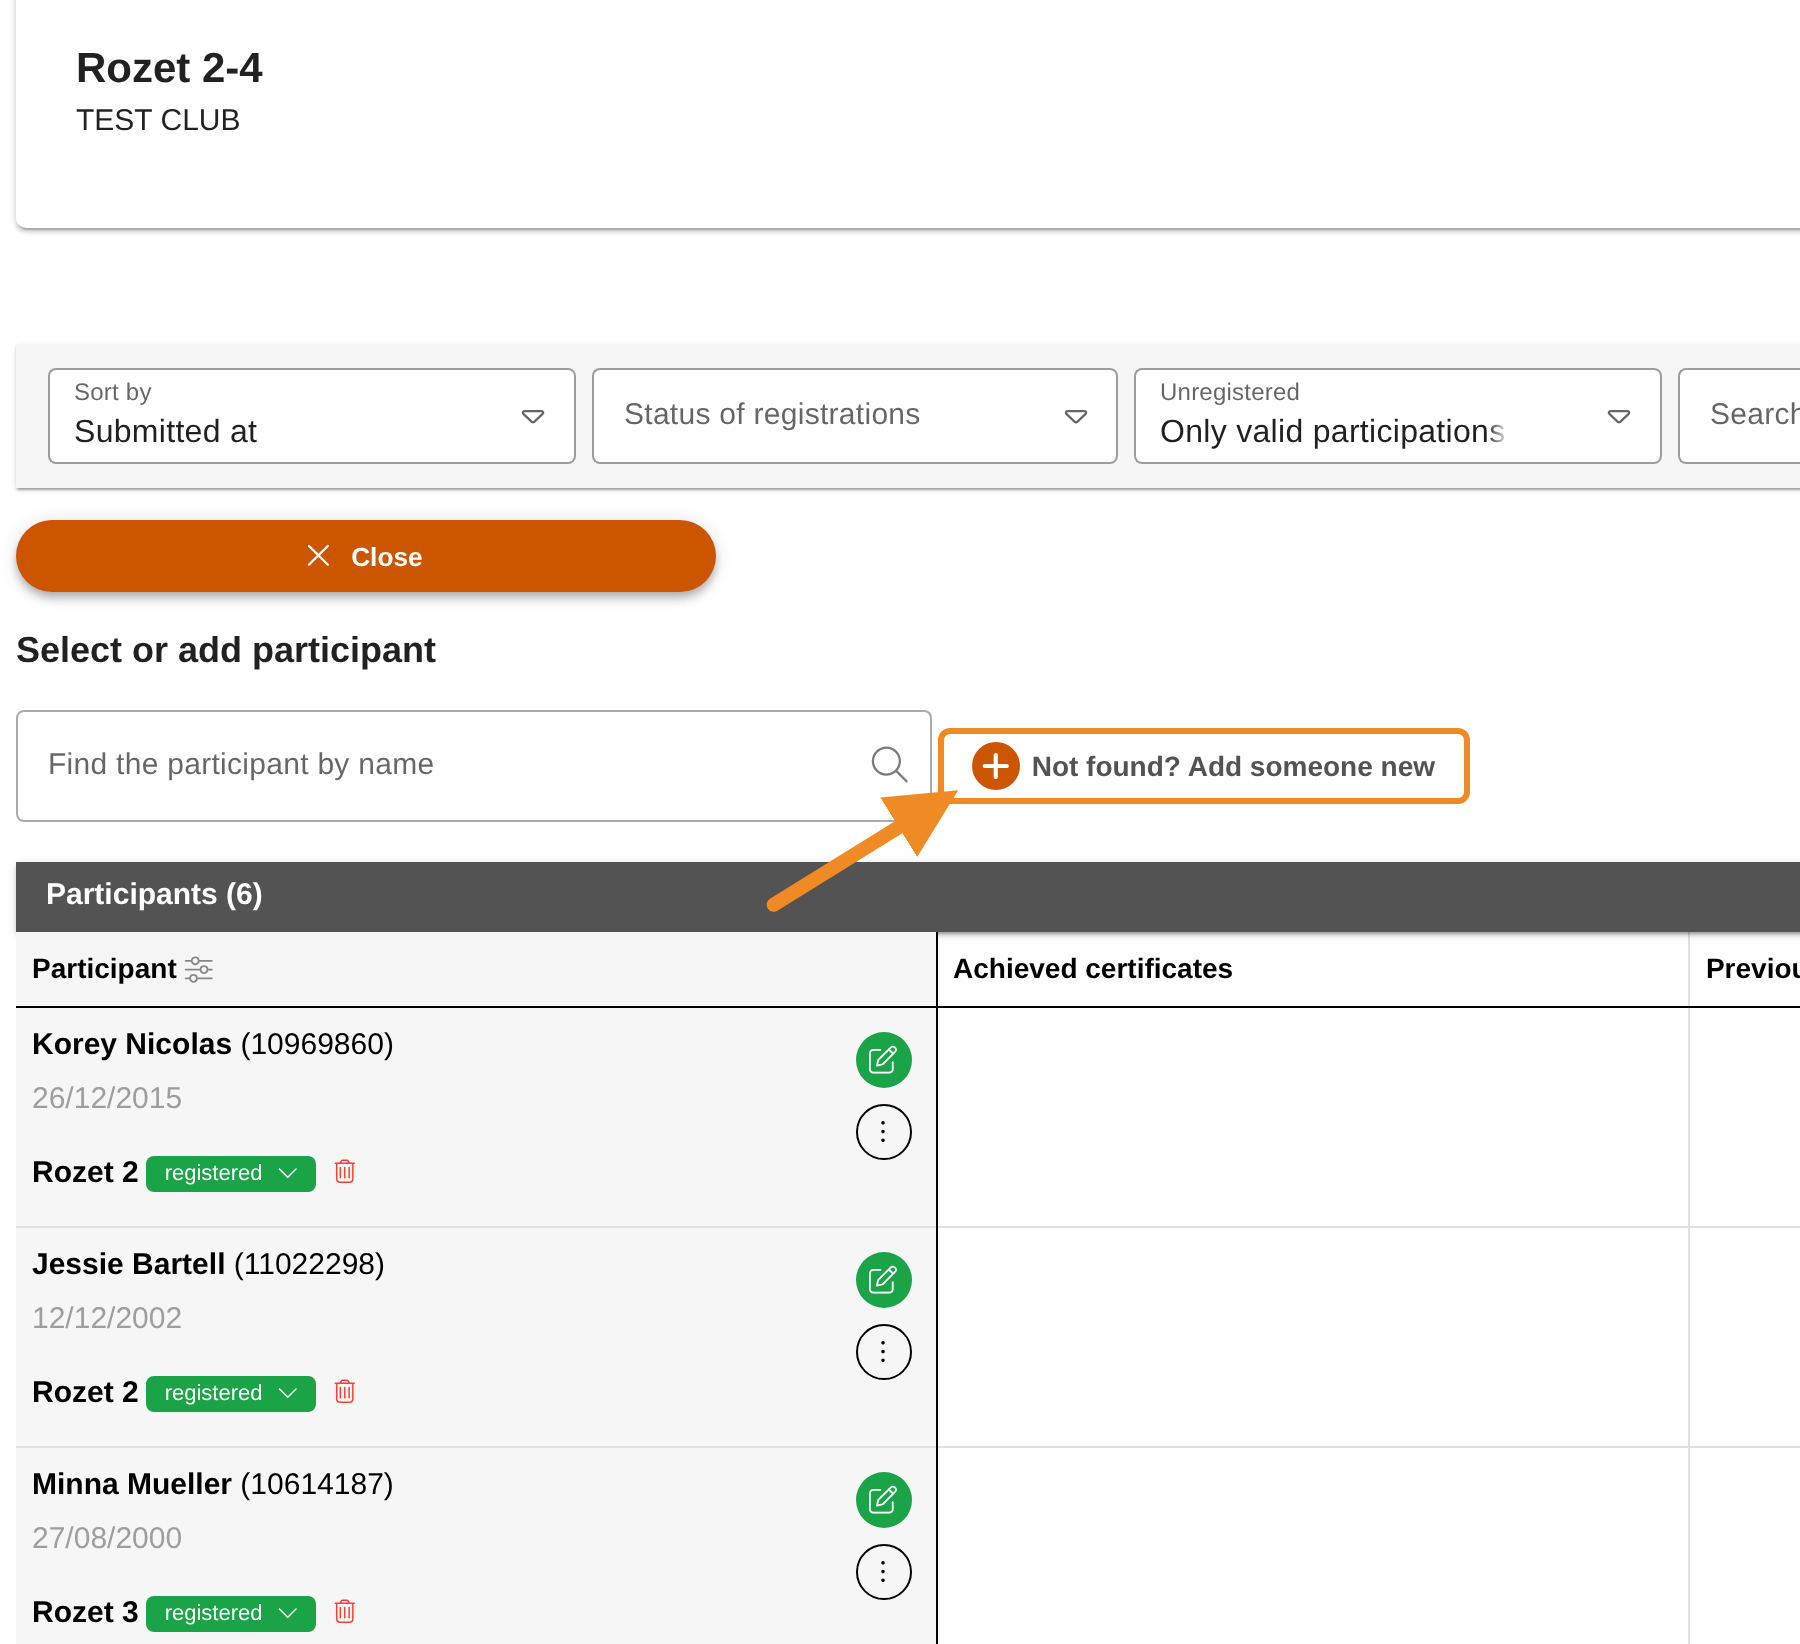
In “Find the participant by name”, type at least three letters of the participant’s name. Each person in the results shows a date of birth, a licence number and a club: check them, because several people can have the same name. Then click the right person.
If the person is not in the results, go to step 14.
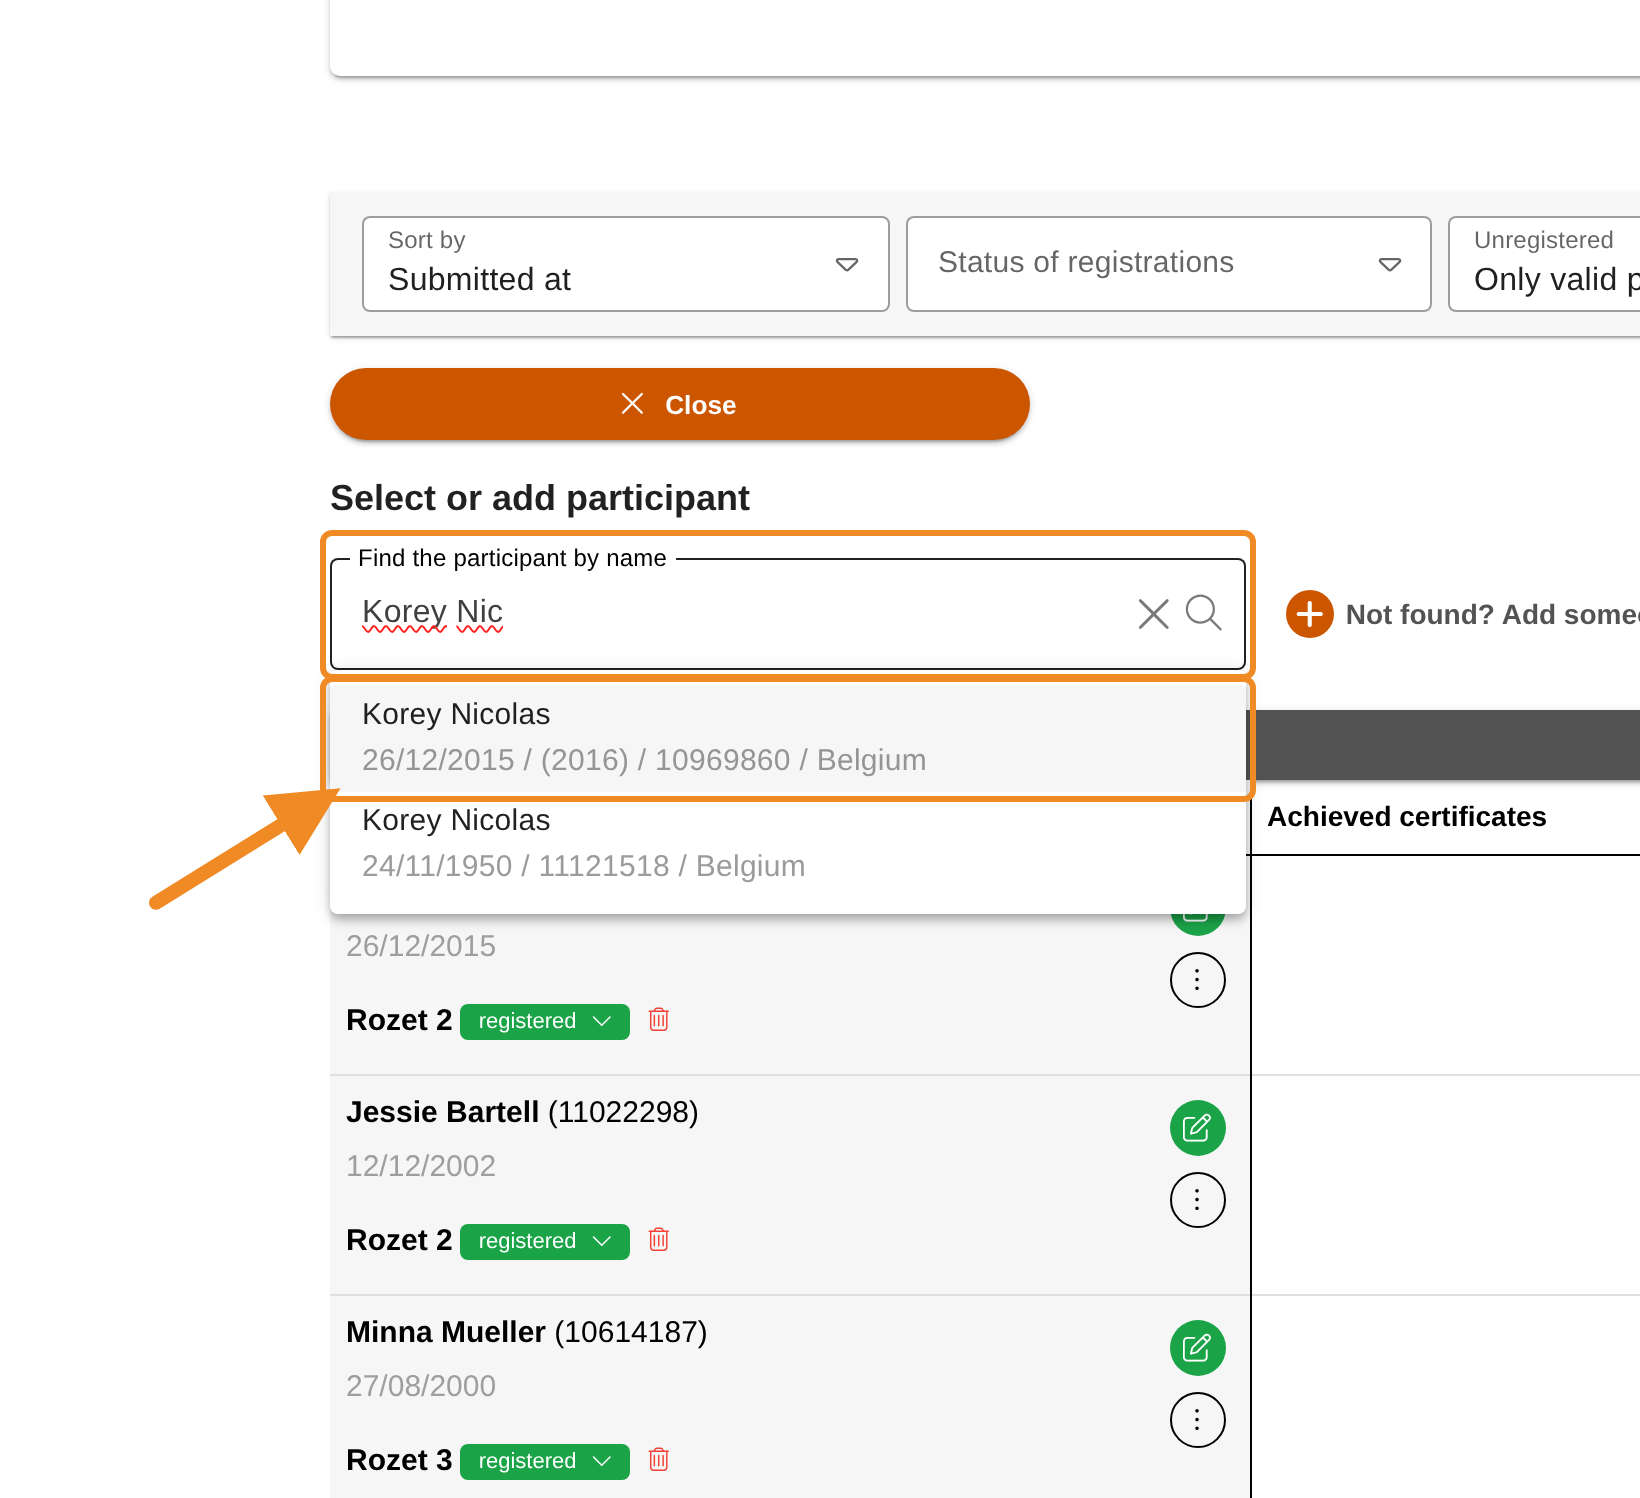
Step 12 — Tick the exams and save
The window “Exams for this participant” opens. It lists the exams of this session. Tick the exam or exams the participant takes. An exam’s parts appear below it: “Required part” parts are ticked for you, and a part marked “Already passed” has been passed before. Add a note about the participant if you wish. Then click “Save”.
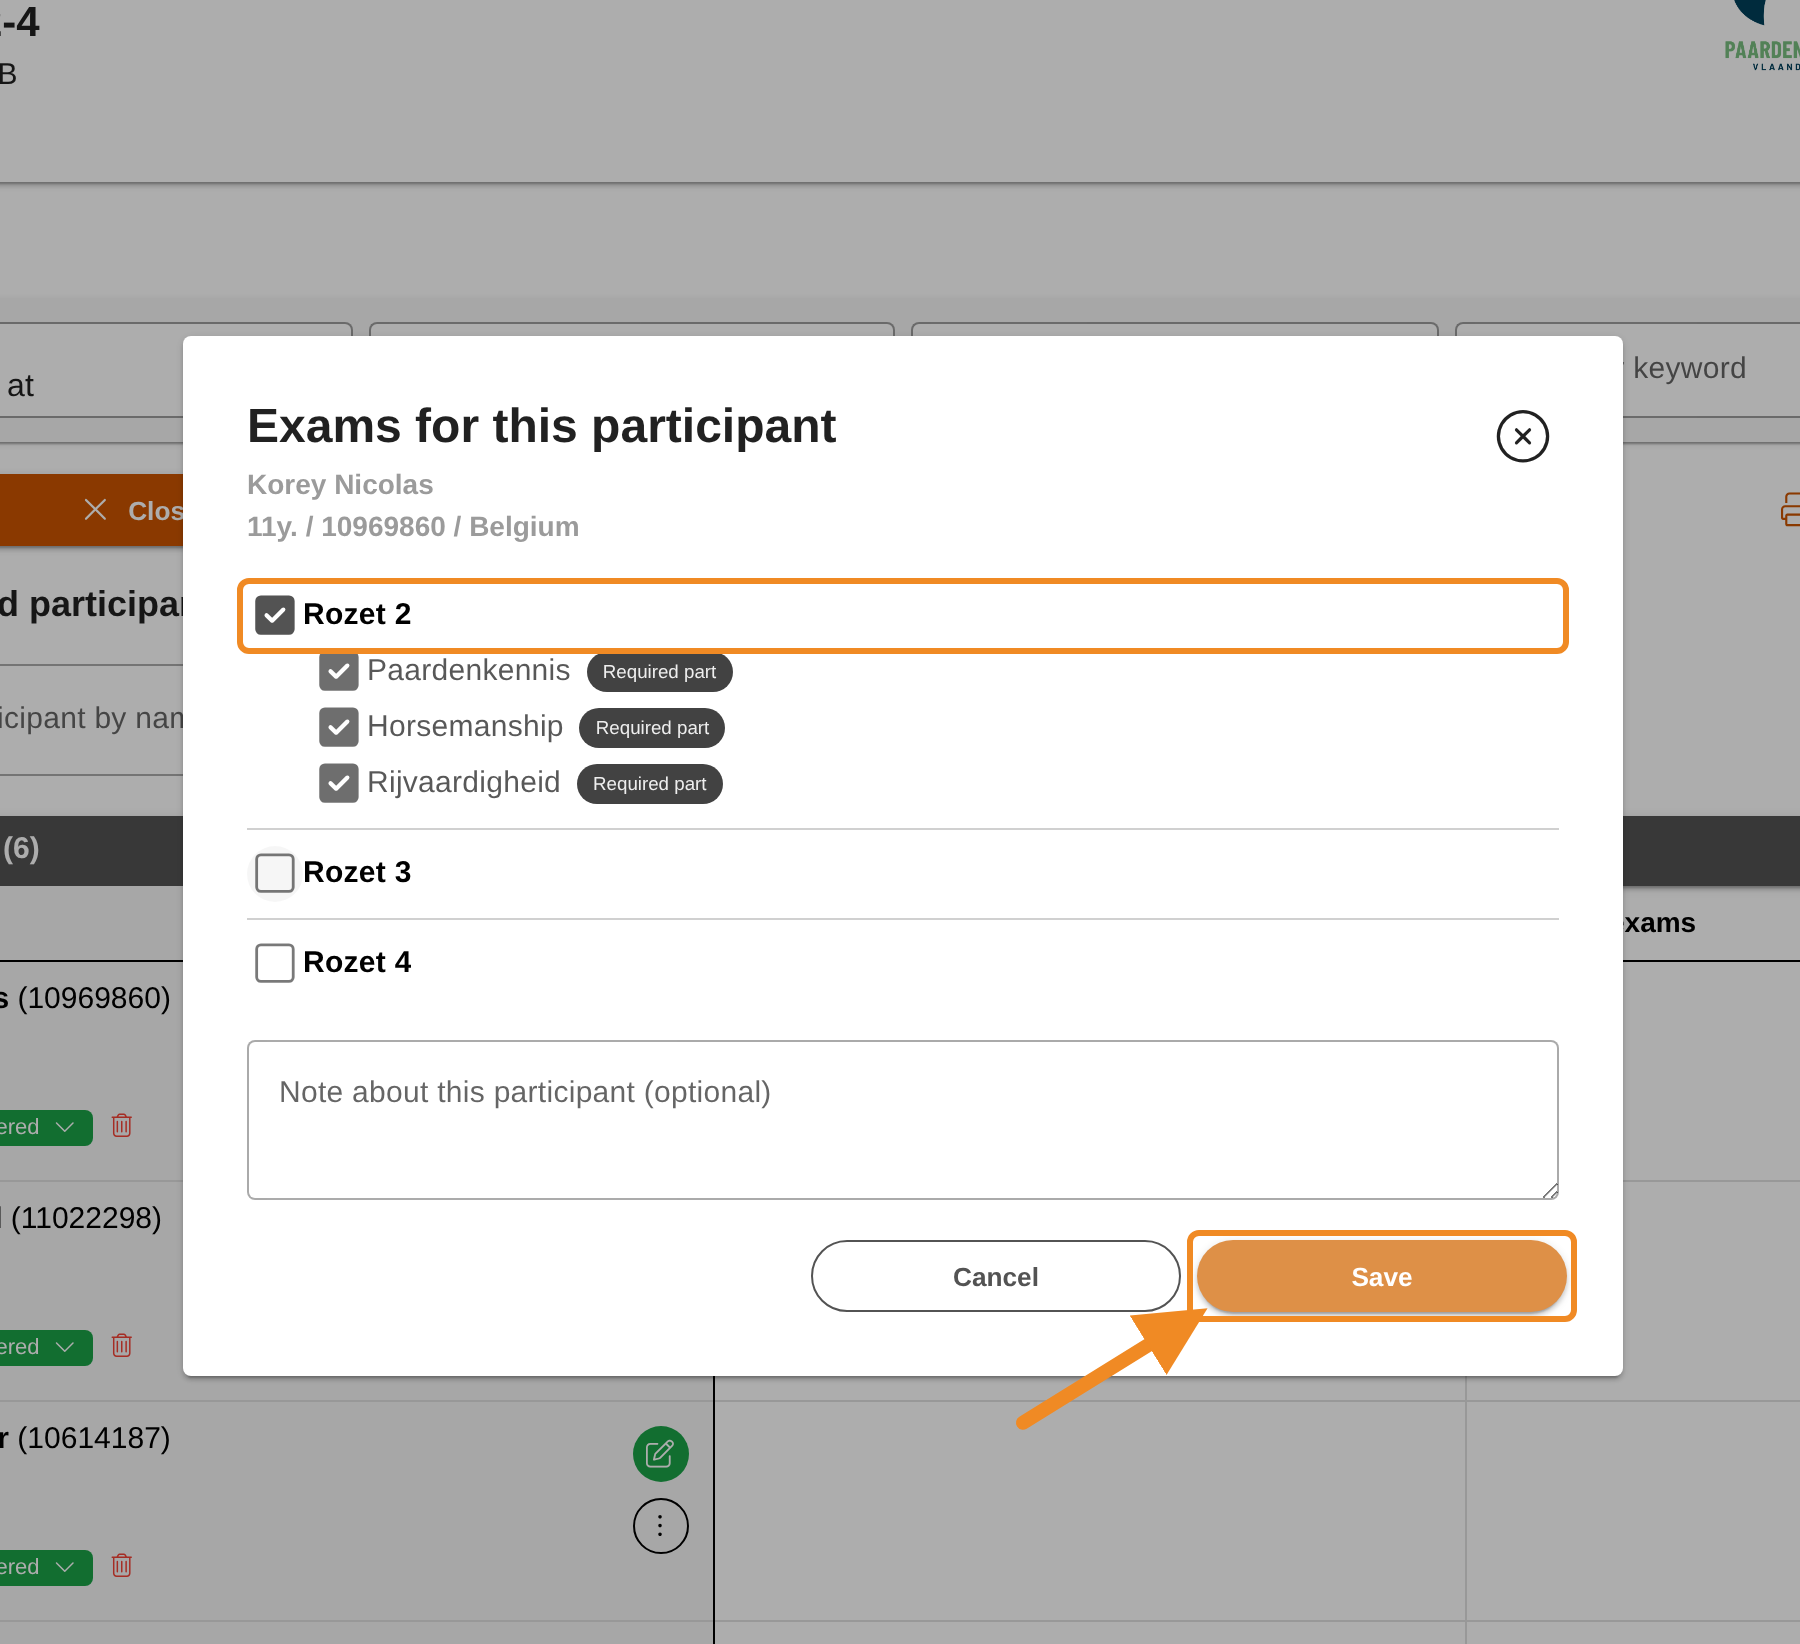
Step 13 — Check the list
The participant is now in the list. Each exam they are registered for shows the status “registered”.
Step 14 — Add someone who is not in the system yet
If the search finds nobody, click “Not found? Add someone new”, beside the search field. A form opens.
Step 15 — Fill in the person’s details
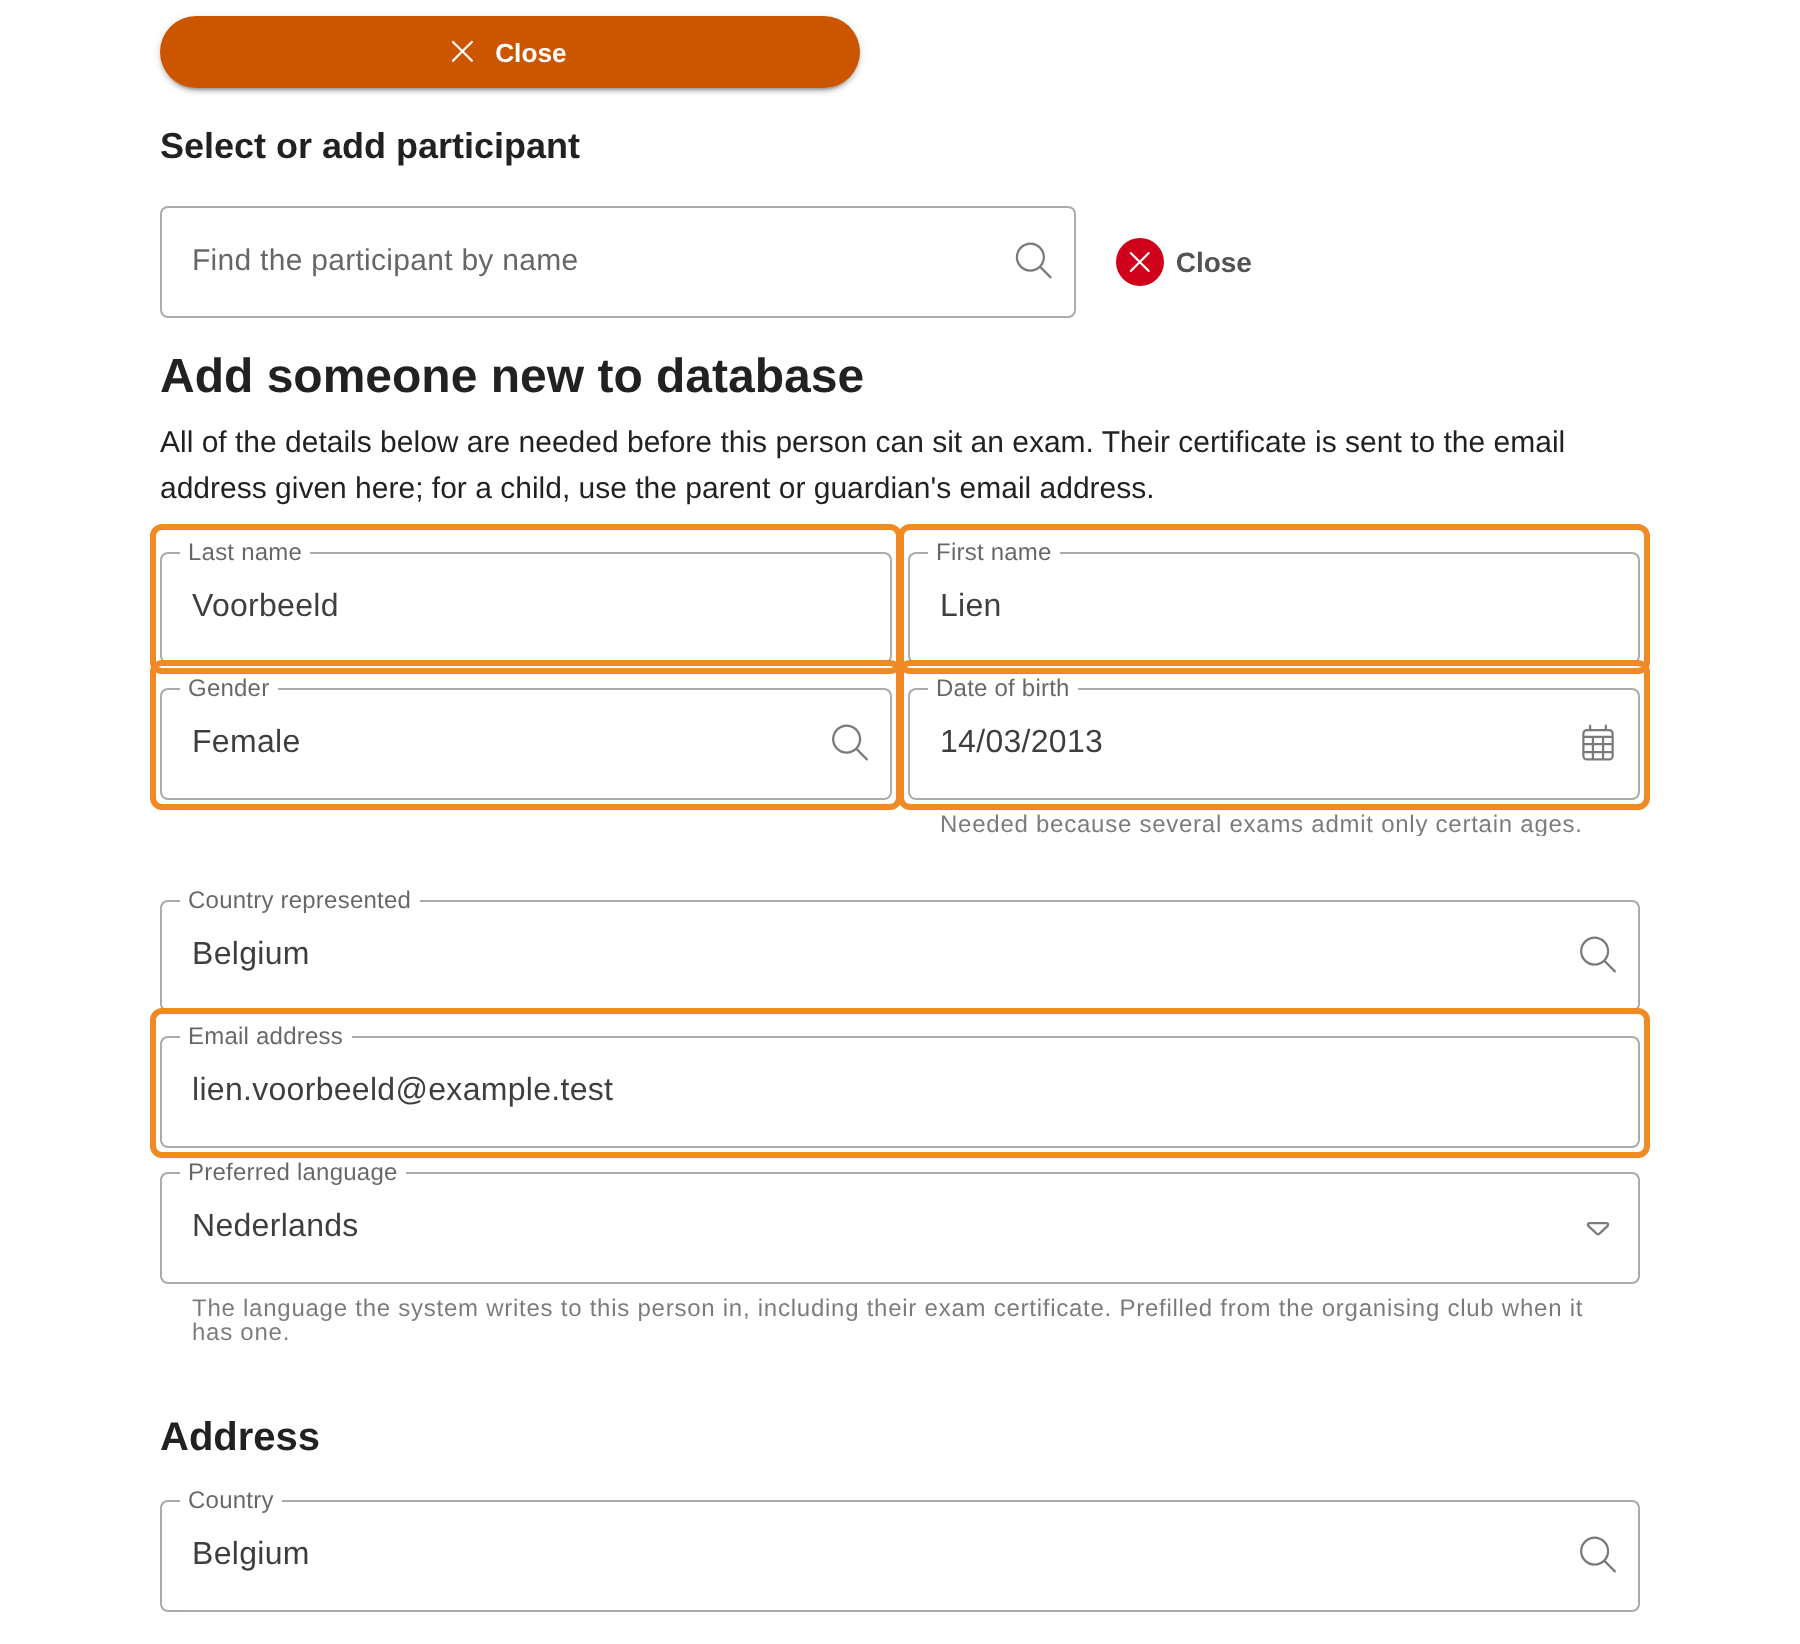
Fill in “Last name”, “First name”, “Gender”, “Date of birth” and “Email address”. All are needed before the person can take an exam. The certificate is sent to this email address: for a child, give the email address of a parent or guardian. “Country represented” and “Preferred language” are already filled in; change them if they are not right for this person.
Step 16 — Fill in the address and continue
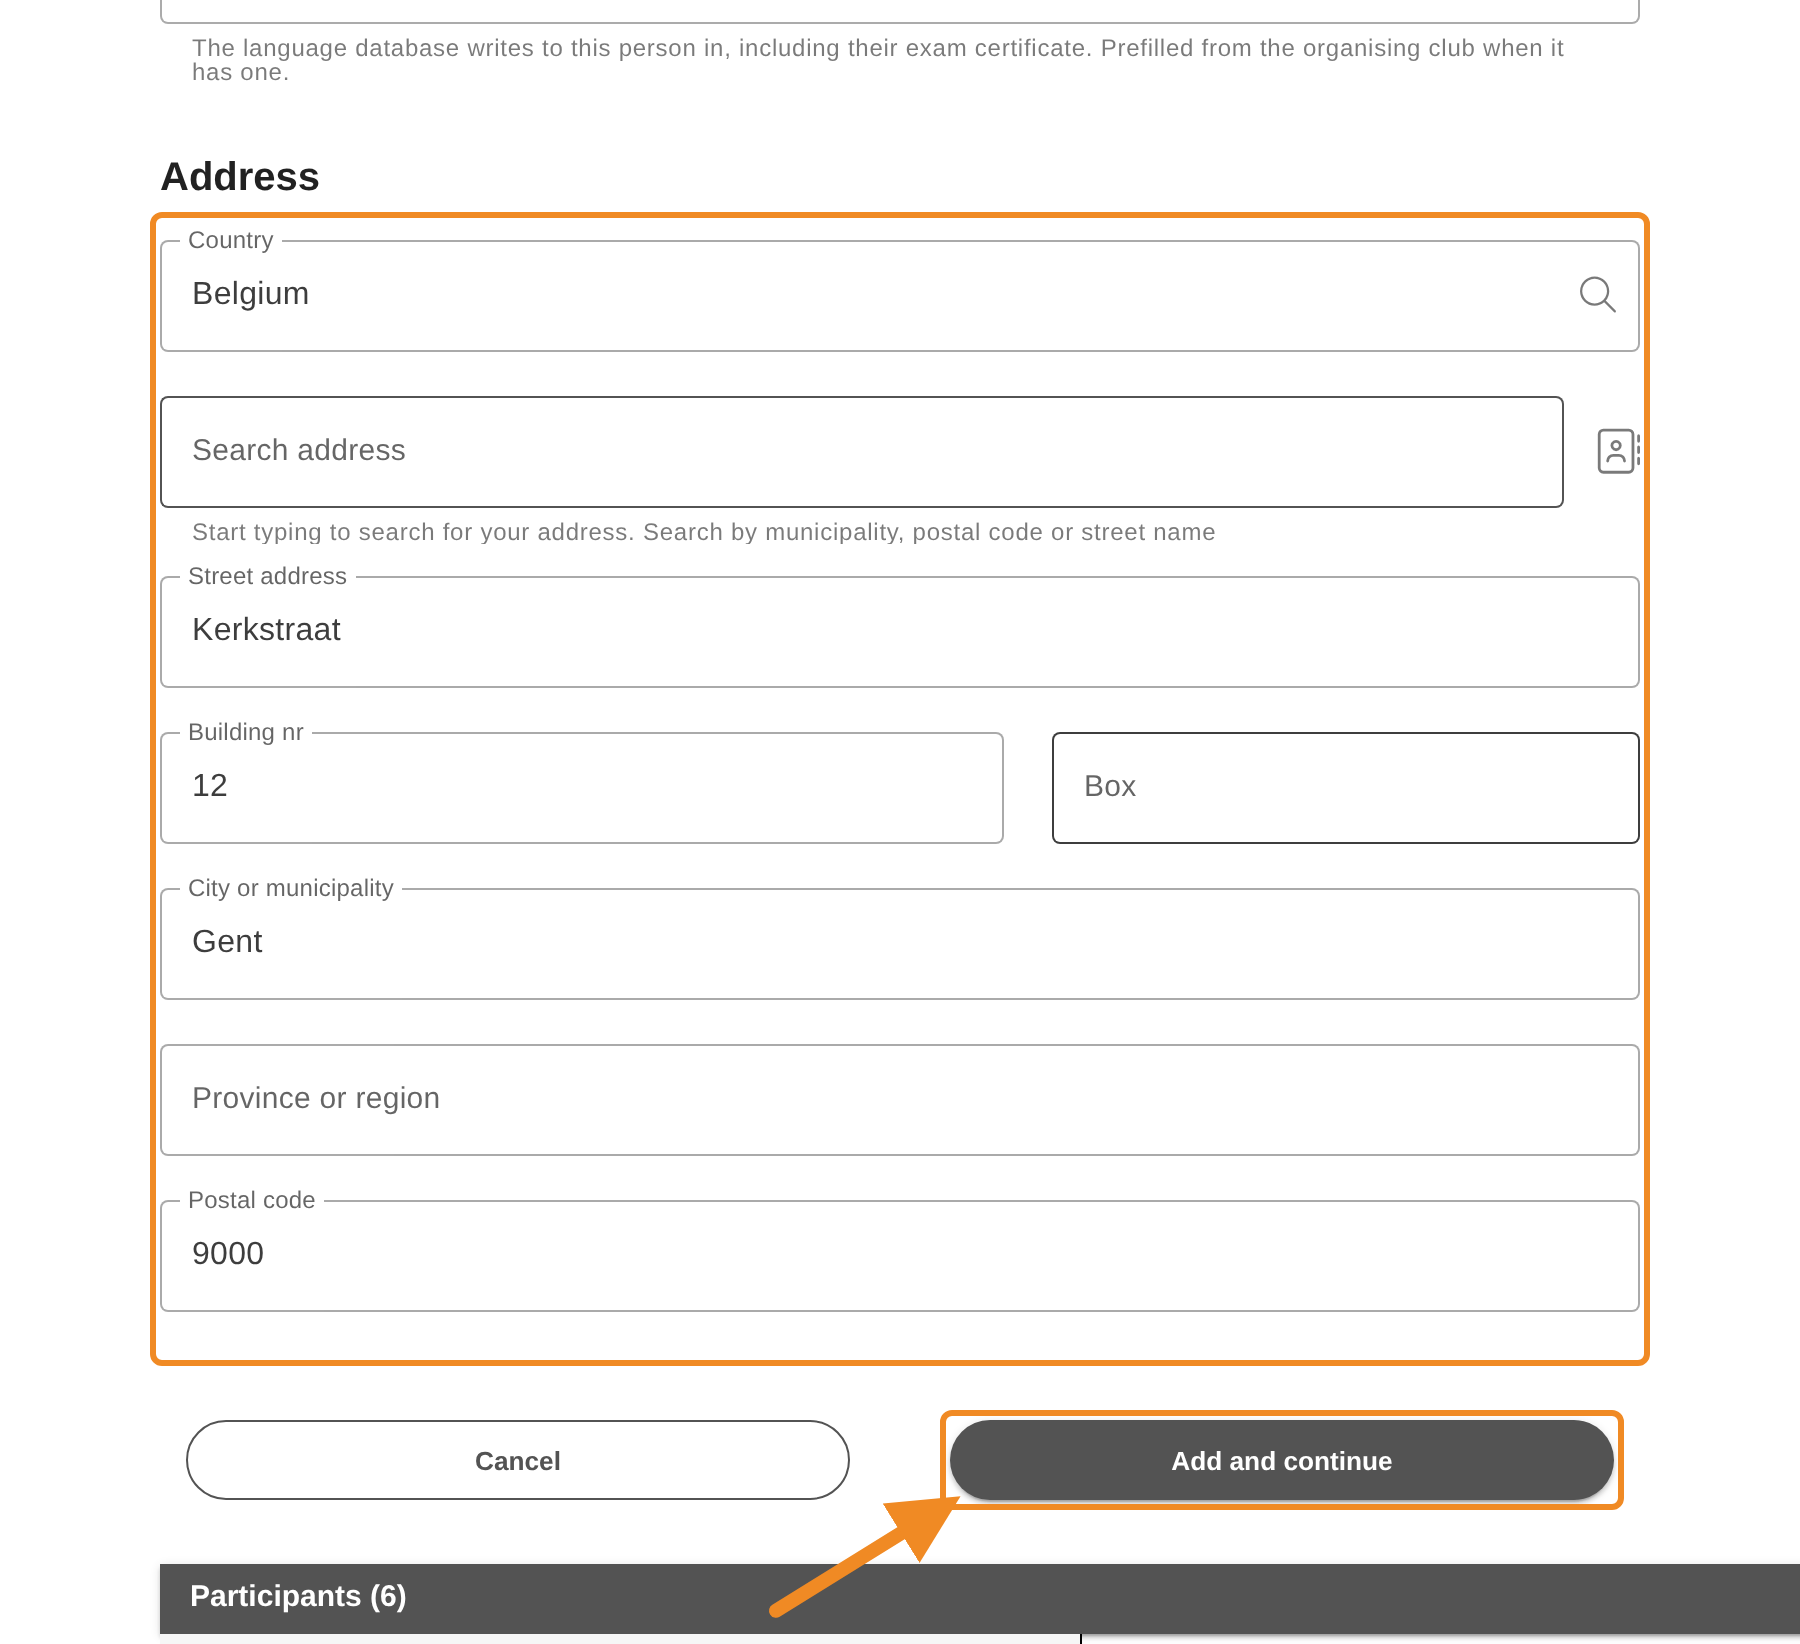
Under “Address”, fill in the street, the house number, the city or municipality and the postal code. Below the form, the system lists anything that is still missing. Then click “Add and continue”. The person is added to the system, and the window “Exams for this participant” opens: tick the exams and click “Save”, as in step 12.
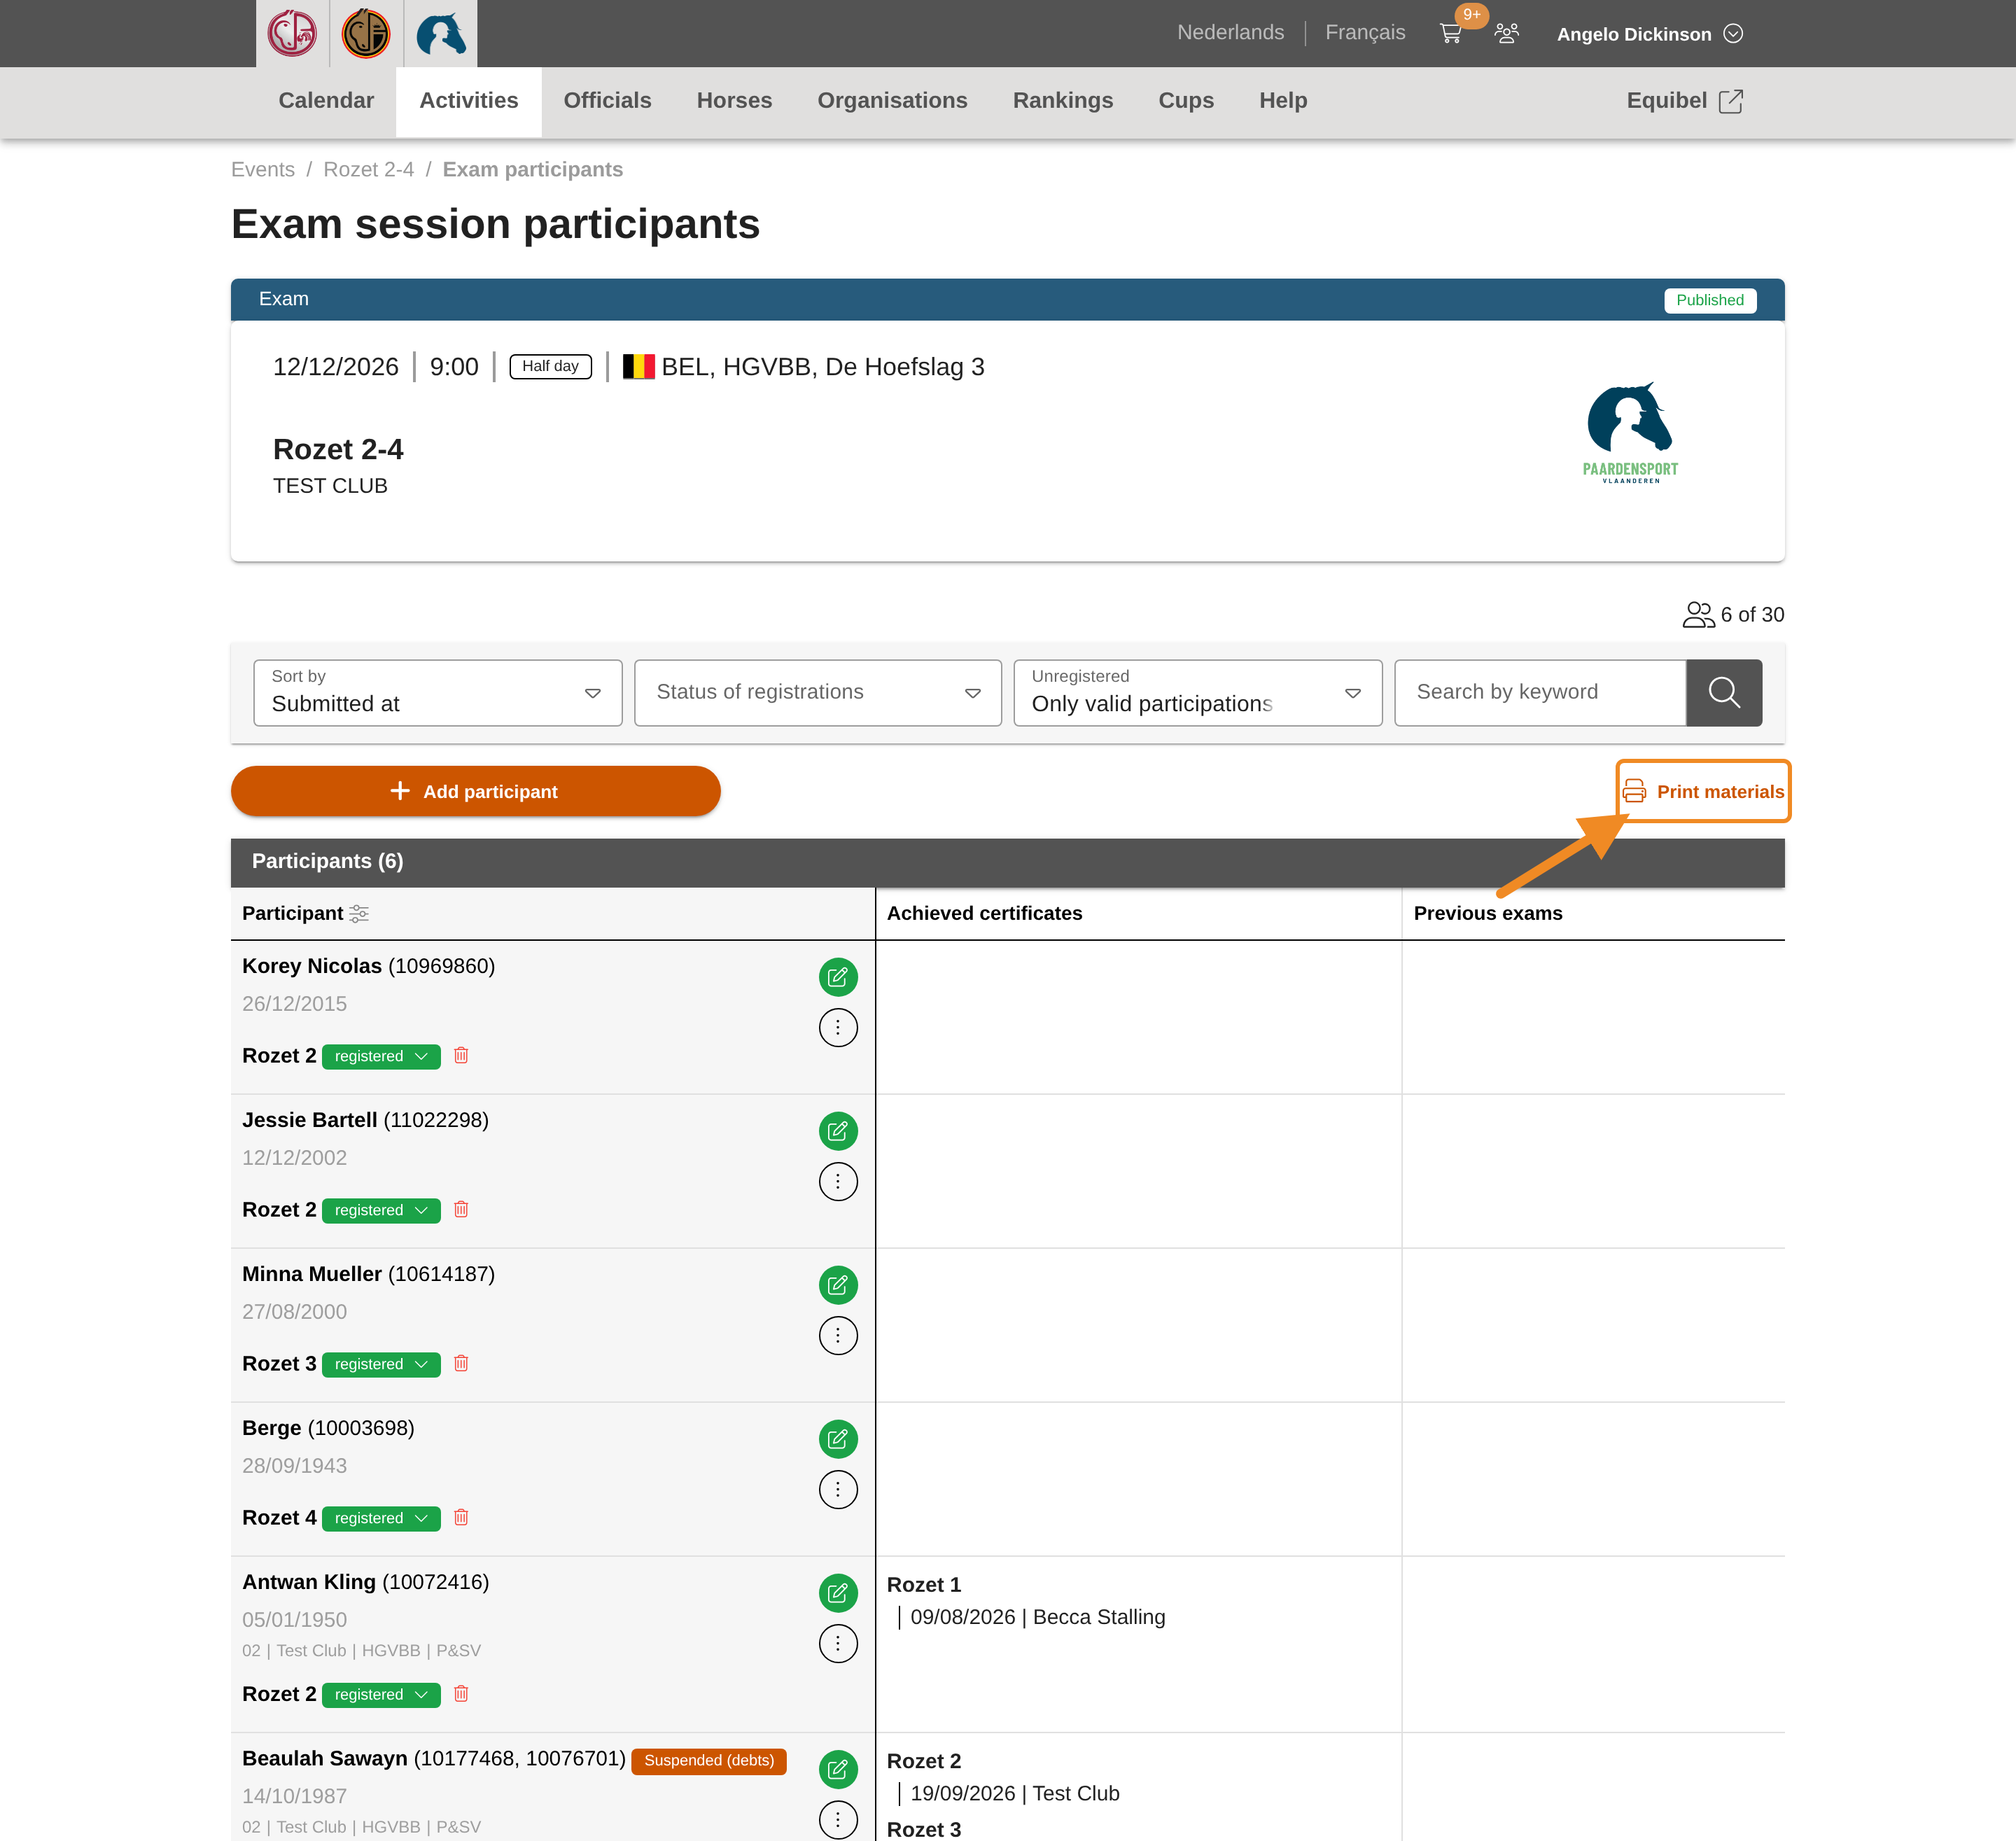
Step 17 — Print the exam materials
Before the exam day, open the session’s participants as in steps 1–9 and click “Print materials”, above the list on the right. After a few seconds one PDF opens in a new tab, with every sheet the exam needs:
- a session list per exam, with everyone registered for it — to check people in and, for some exams, for the examiner to mark the results on;
- a scoring sheet per participant, for the exams that use one;
- a feedback document per participant, showing what they were assessed on.
What the system knows about each participant is filled in where a sheet asks for it; the results are left blank for the examiner. A participant who withdrew is still listed, with their status.
The PDF is made new at every click, so print it again after a change in the registrations.
After the exam: the session’s reports
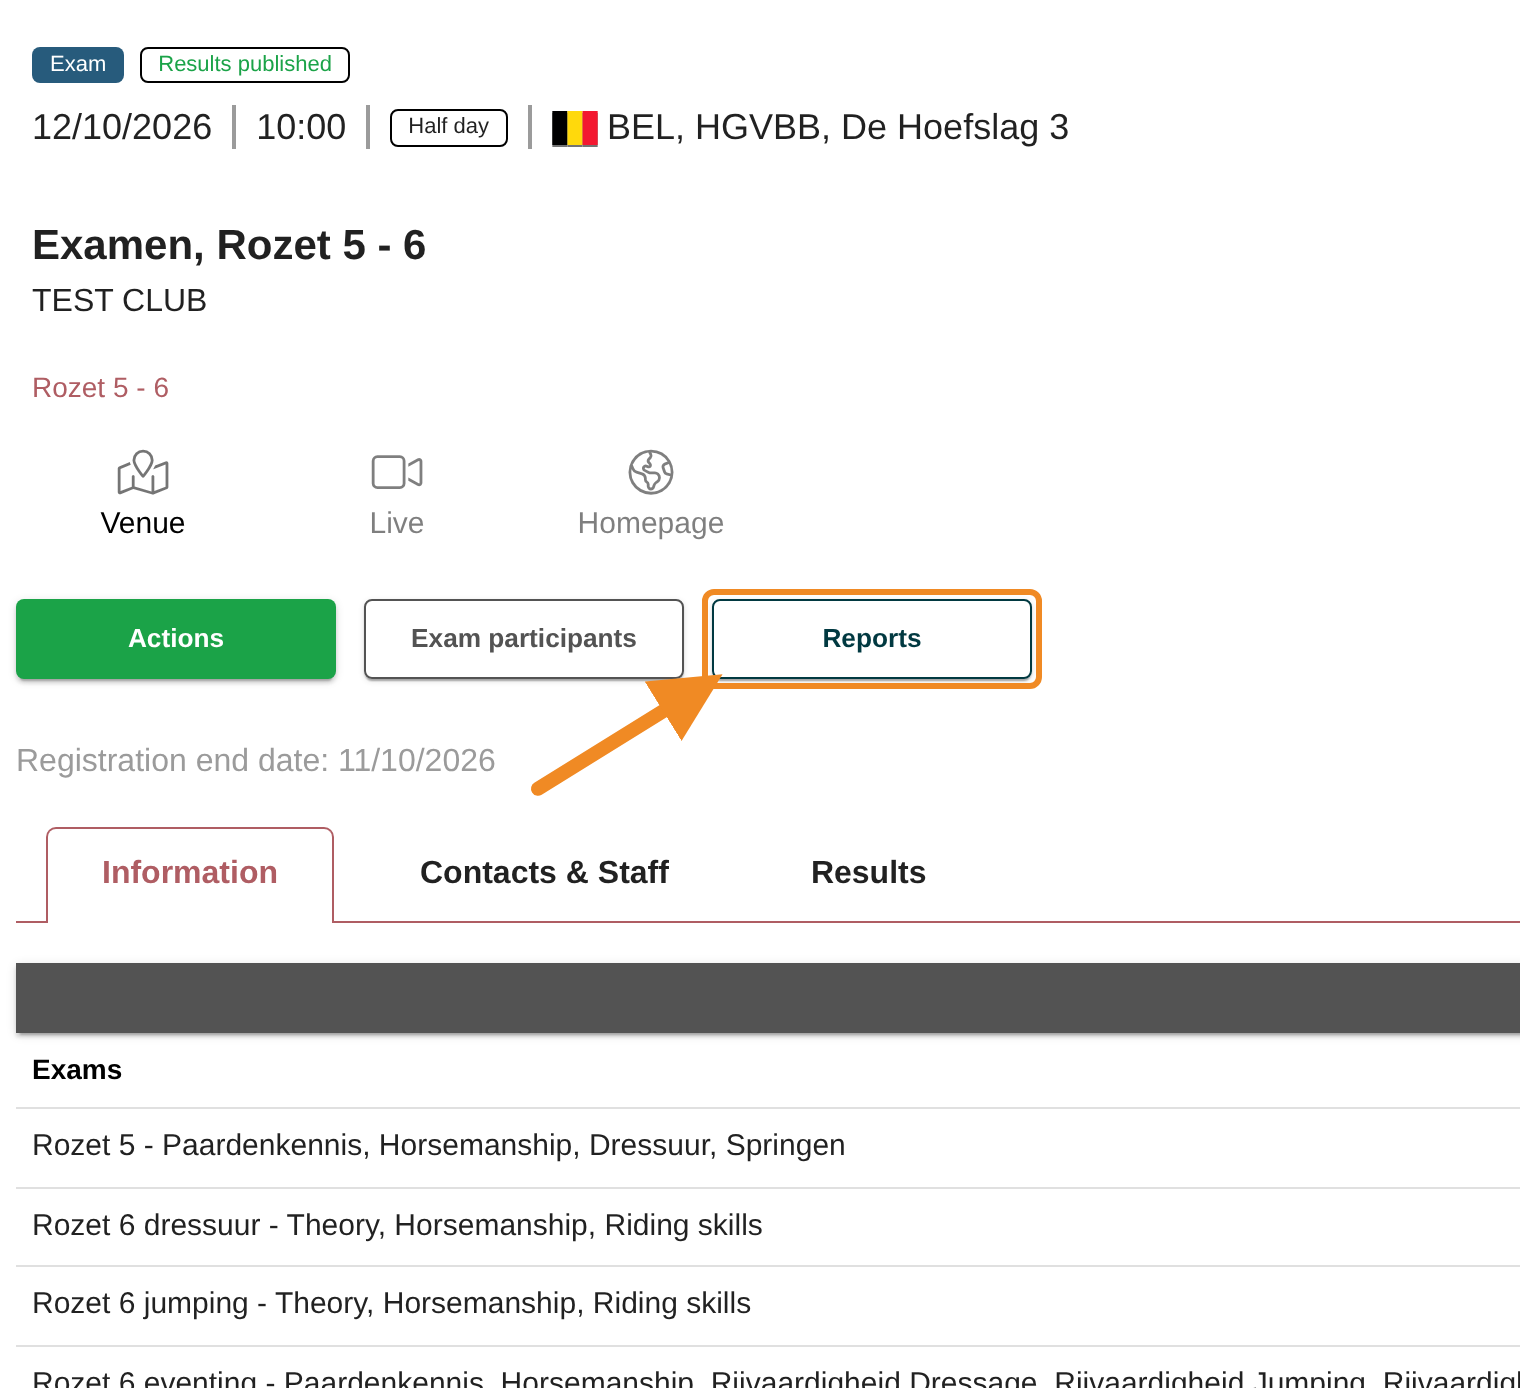
Step 18 — Open the reports
On the session’s page, click “Reports”. The page “Statistics and reports” opens, with three tabs.
Step 19 — Read the statistics
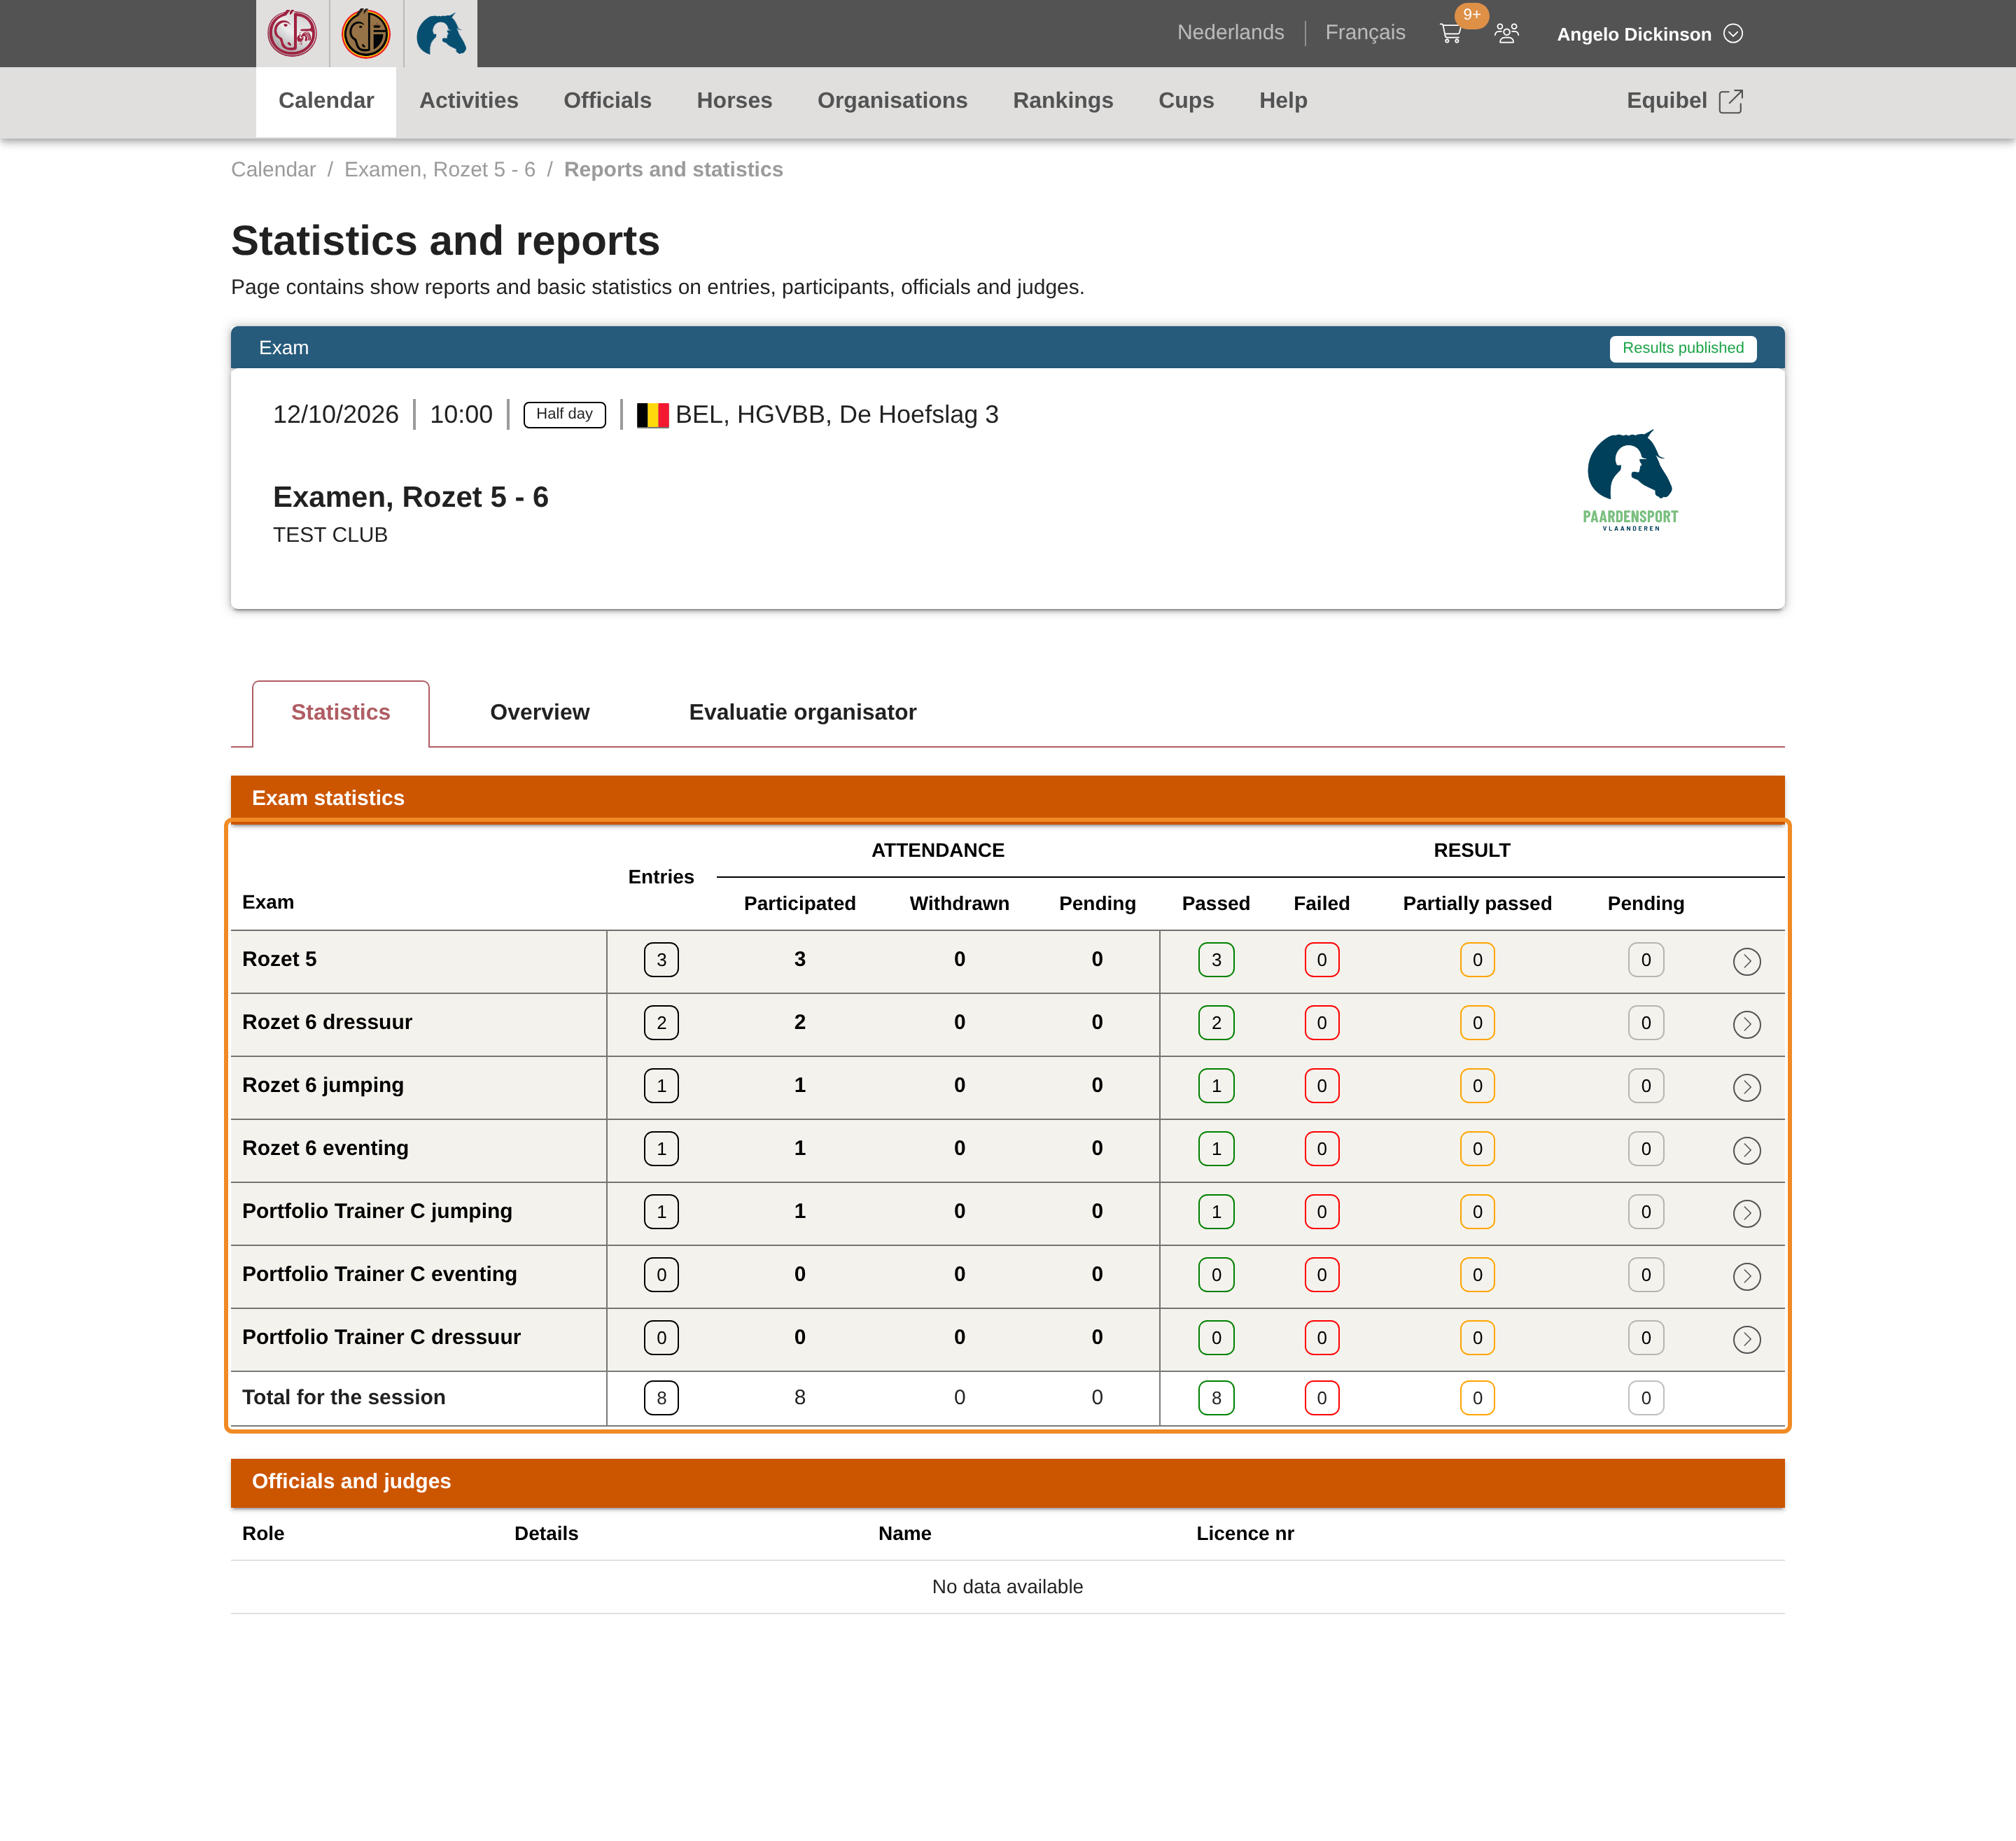
The tab “Statistics” counts, for each exam of the session:
- “Entries” — how many participants are registered for the exam;
- under attendance: “Participated”, “Withdrawn”, and “Pending” for those whose attendance is not recorded yet;
- under result: “Passed”, “Failed”, “Partially passed”, and “Pending” for those whose result is not in yet.
The last row, “Total for the session”, adds up the whole session. Below the table, “Officials and judges” lists the examiners of the session. The figures fill in as the examiners record the results.
Step 20 — See the results per part
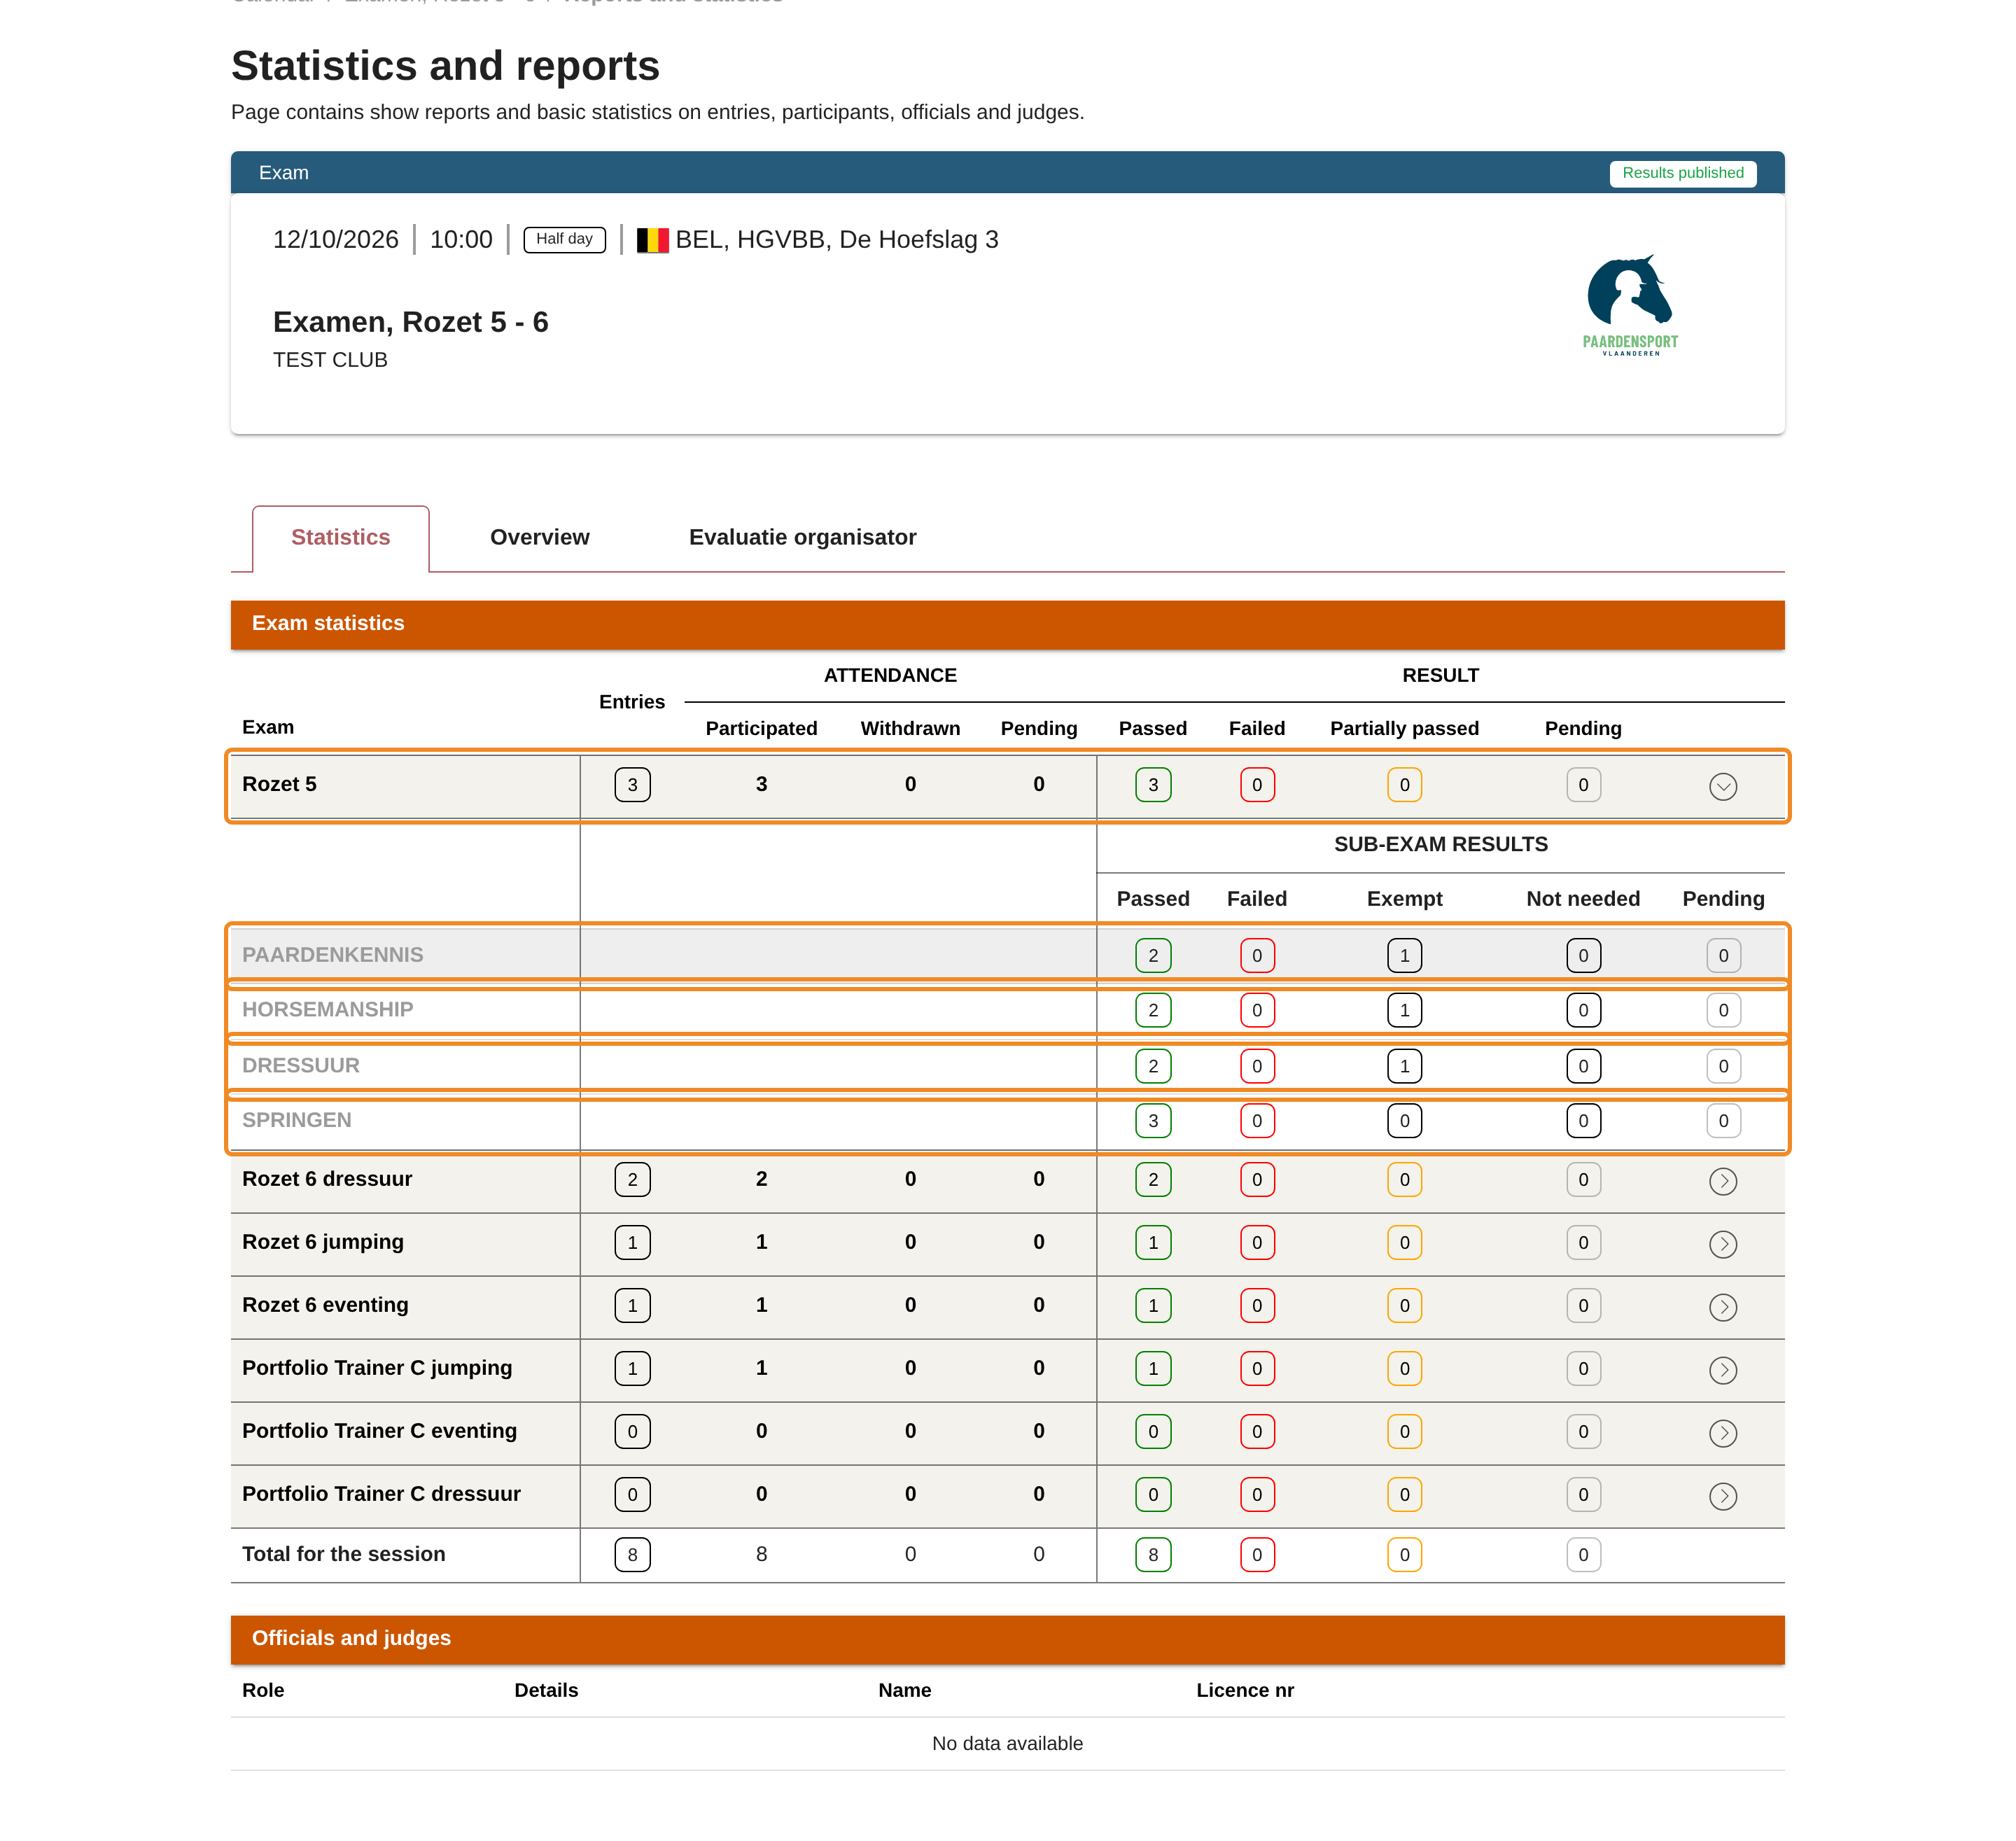
Click the arrow at the end of an exam’s row. The exam’s parts appear below it, each counted as “Passed”, “Failed”, “Exempt” — for a participant who did not have to take that part again — “Not needed” or “Pending”.
Step 21 — Evaluate the examiner
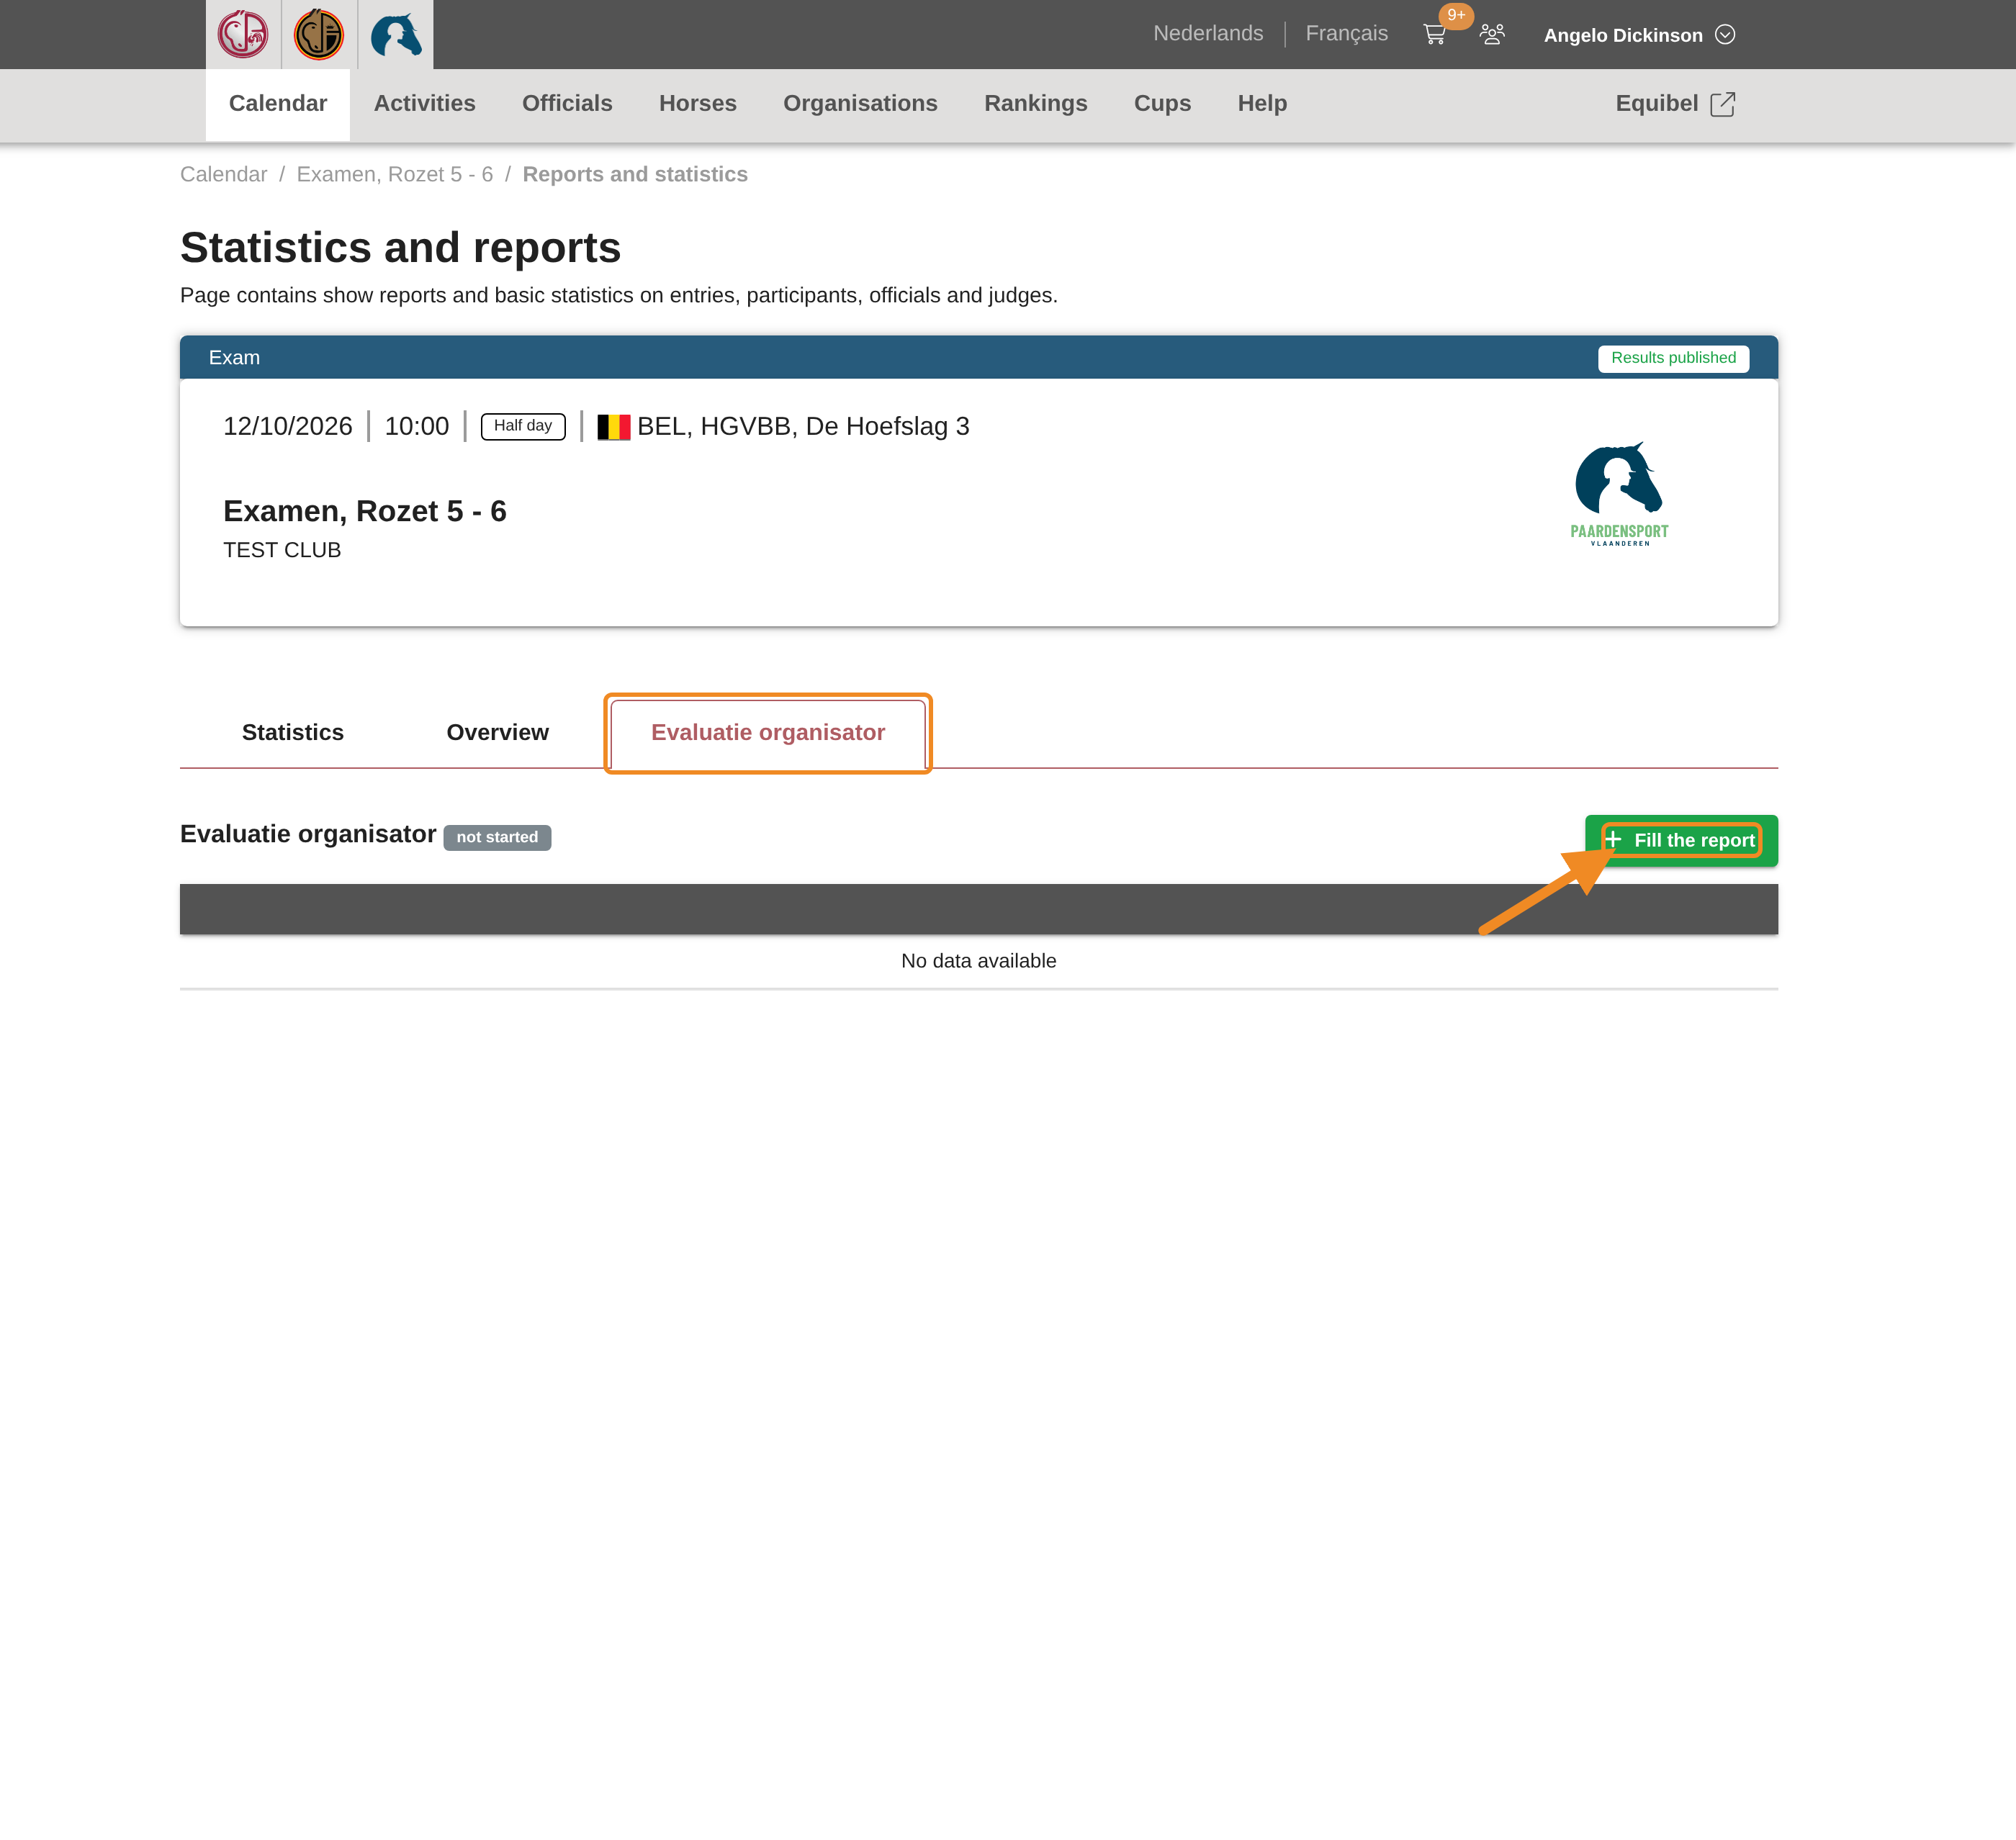
Once the exam has ended, your club must evaluate the examiner. Open the tab “Evaluatie organisator” and click “Fill the report”. The tab “Overview” lists the same report with its status.
Step 22 — Fill in and send the evaluation
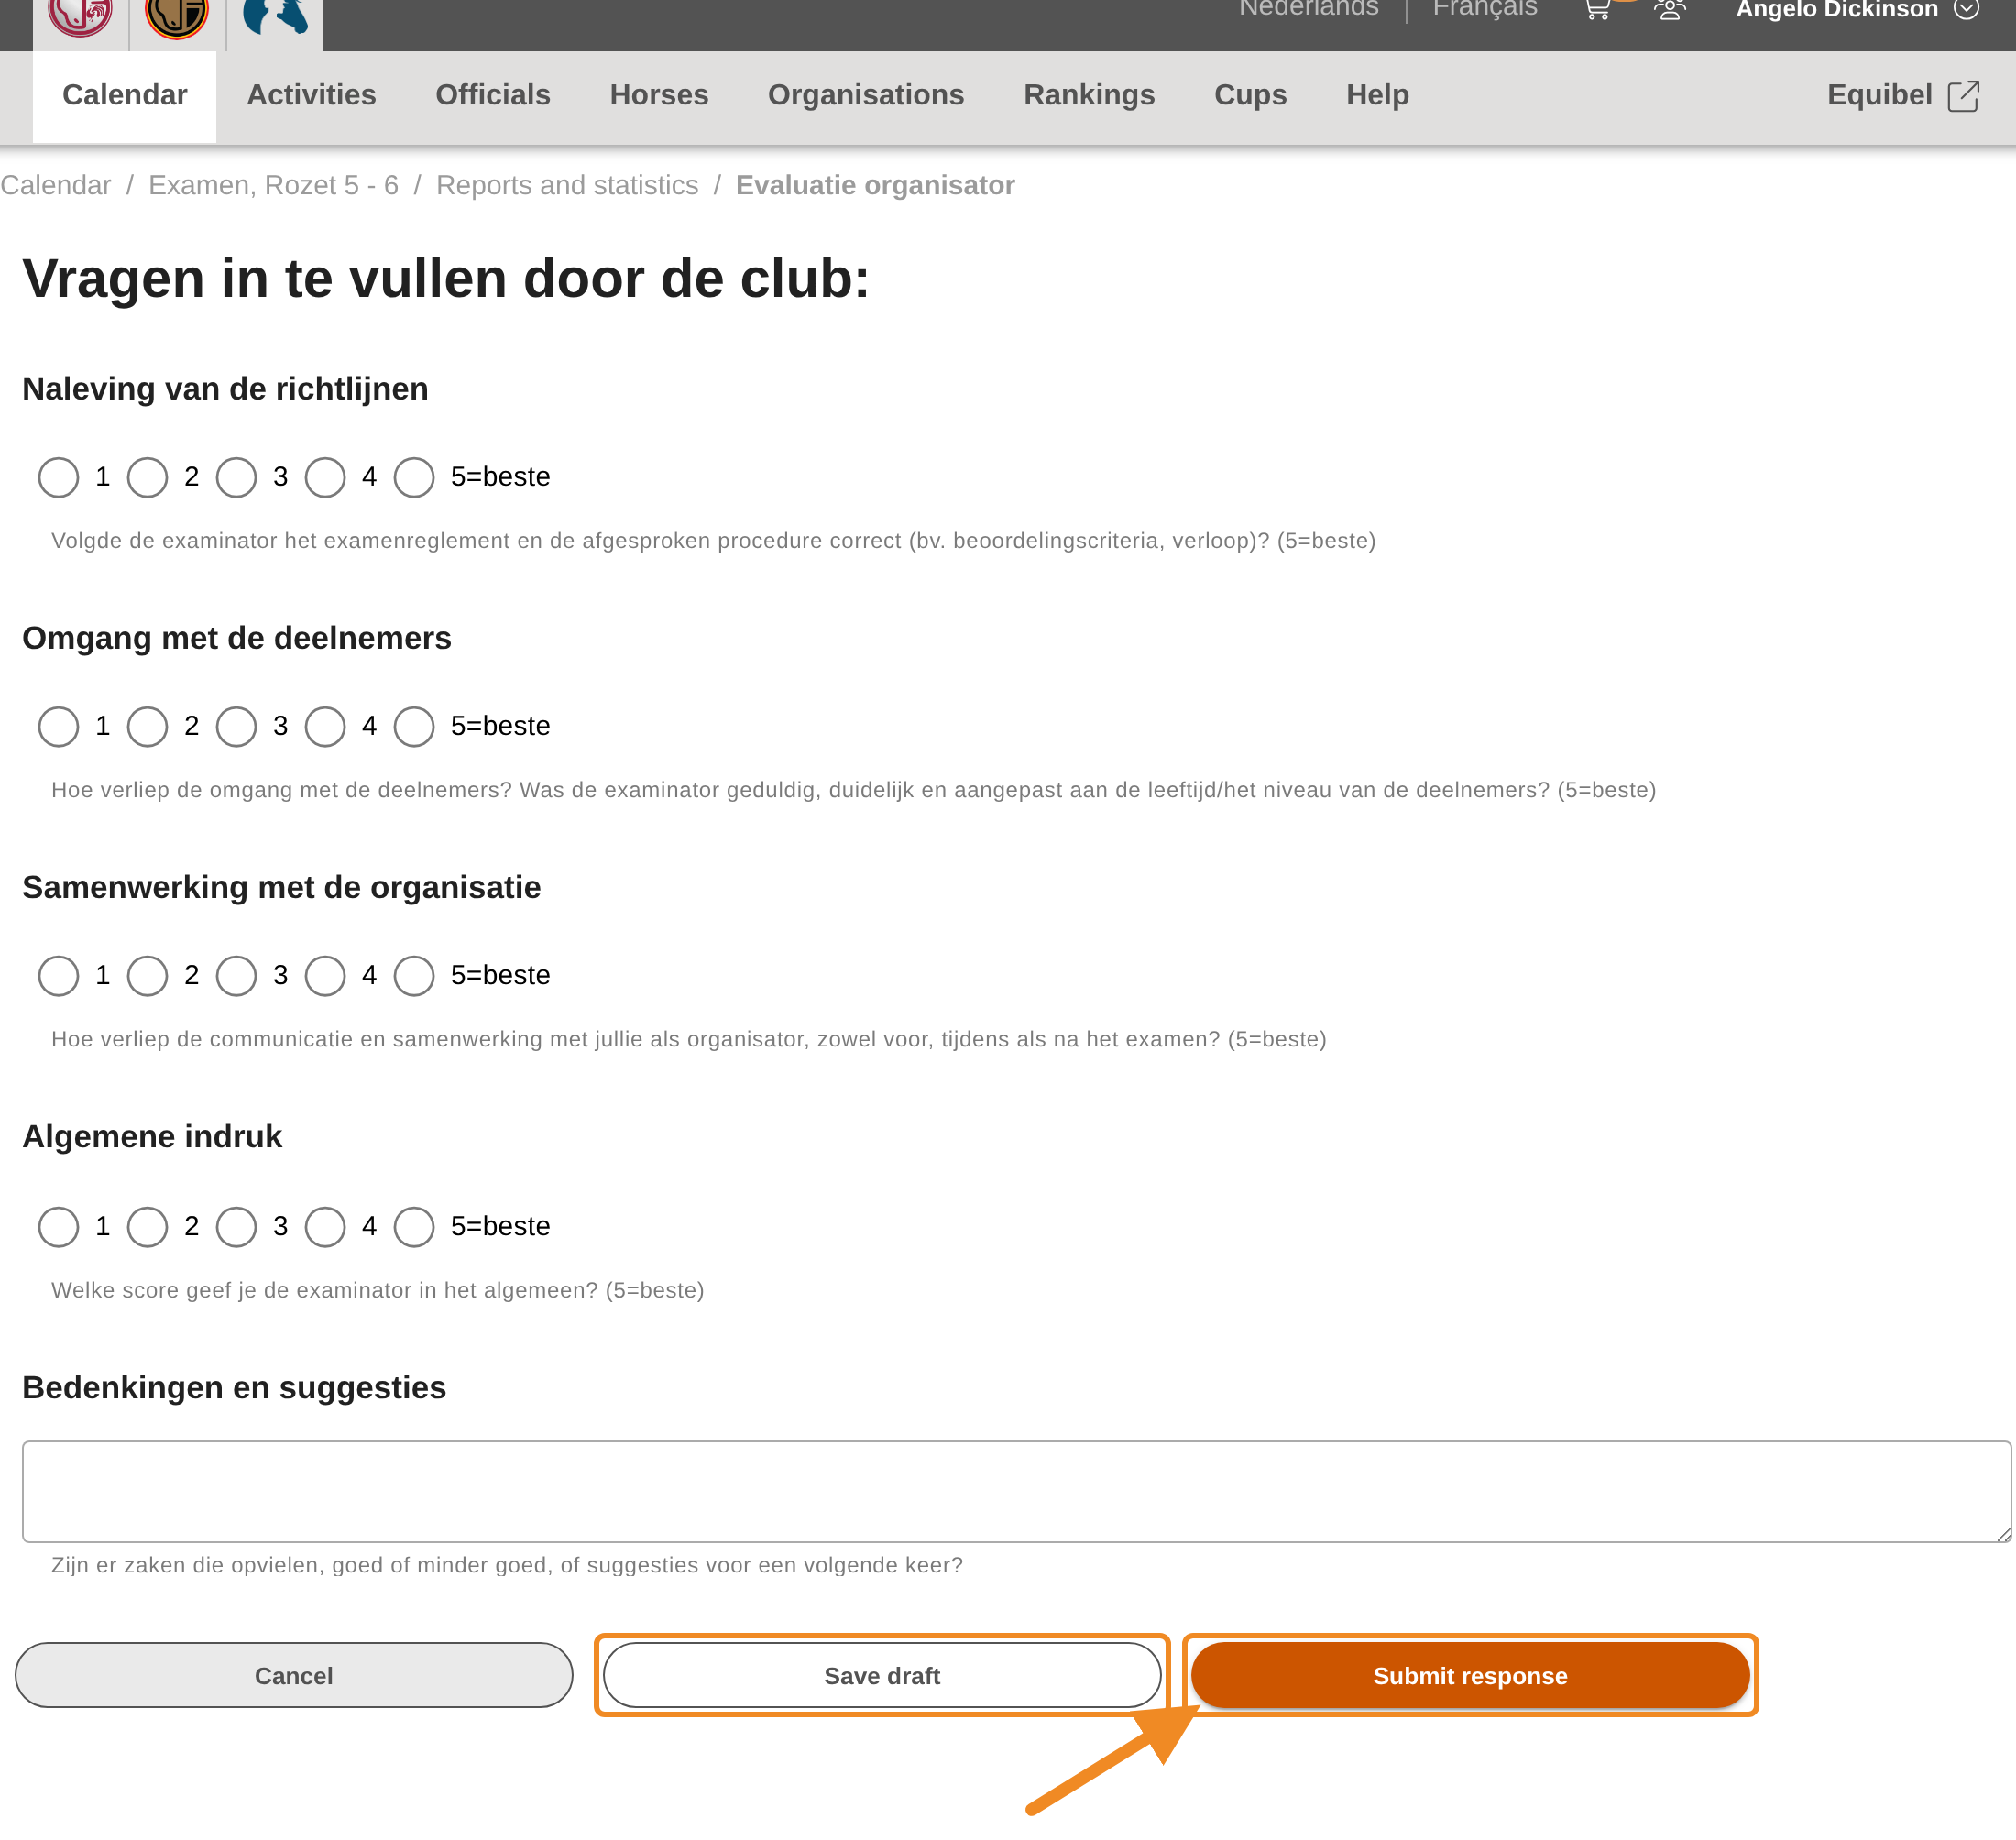
The evaluation asks how the examiner followed the exam rules, dealt with the participants and worked with your club, and for an overall score — each from 1 to 5 (5 is best). Add remarks or suggestions at the end if you wish. “Save draft” keeps your answers to finish later. When you are done, click “Submit response”. Your club fills in one evaluation per session.
What the exam session costs your club
Registering participants costs nothing at that moment. Once the session’s results are confirmed, the system puts one order for the whole session in your club’s shopping basket: “Finances” on your club page. The order has a line for each exam a participant sat. Its price depends on the exam, on whether it was a full exam or a resit of part of it, and on whether the participant holds a licence. Your club pays the order as a whole, within 30 days, and receives a proof of payment.
A minimum number of participations. Most exam sessions are billed for at least 8 participations. A participation is one exam sat: a participant who takes two exams counts twice. When fewer exams are sat, the order adds a line for each missing participation.
Good to know
- Someone like this already exists: if the system knows a person with similar details, it adds nobody yet and shows them. Click “Register this person” if it is the same person, or “This is a different person - add them” if it is not.
- Warnings: an exam can have conditions, such as a minimum age or an earlier certificate, and a session has a number of places. When a participant does not meet them, the window shows the reason under the exam and does not register them for it. If the registration should go ahead anyway, contact the club administration of Paardensport Vlaanderen.
- Changing a participant’s exams: in the list, click the pencil “Edit this participant's exams” on the participant’s card. To take one exam away, click the bin “Unregister from this exam” beside it.
If something goes wrong
| Problem | What to do |
|---|---|
| I don’t see “Exam participants” on the session’s page | The session is not published yet. Wait until Paardensport Vlaanderen has published it. |
| I don’t see “Add participant” | The exam has taken place, or its results have been confirmed. Nobody can be added any more. |
| “Save” stays grey | Tick at least one exam. |
| “Add and continue” stays grey | A detail is missing. Below the form, the system lists what is still needed. |
| The search does not find the person | Type at least three letters, or search by the last name. Still nobody? Add them as in step 14. |
Related articles: How to Pay Your Club’s Orders · How to Report a Sports Promotional Activity · How to Request a Brevet Exam