
How to Check a Member’s Personal Data
Your club can keep its members’ personal data up to date: their name, date of birth, contact details and address. Check a member’s data when they tell you something has changed, and whenever you notice a mistake. Some data, such as the licence number, can only be changed by the club administration of Paardensport Vlaanderen.
Members can also do this themselves: every member can sign in and change their own contact details, address and language.
Before you begin
You need:
- the club administrator role for your club;
- about 5 minutes per member.
You can change the data of your club’s current members only.
Part 1 — Open the members list
Step 1 — Open your profile menu
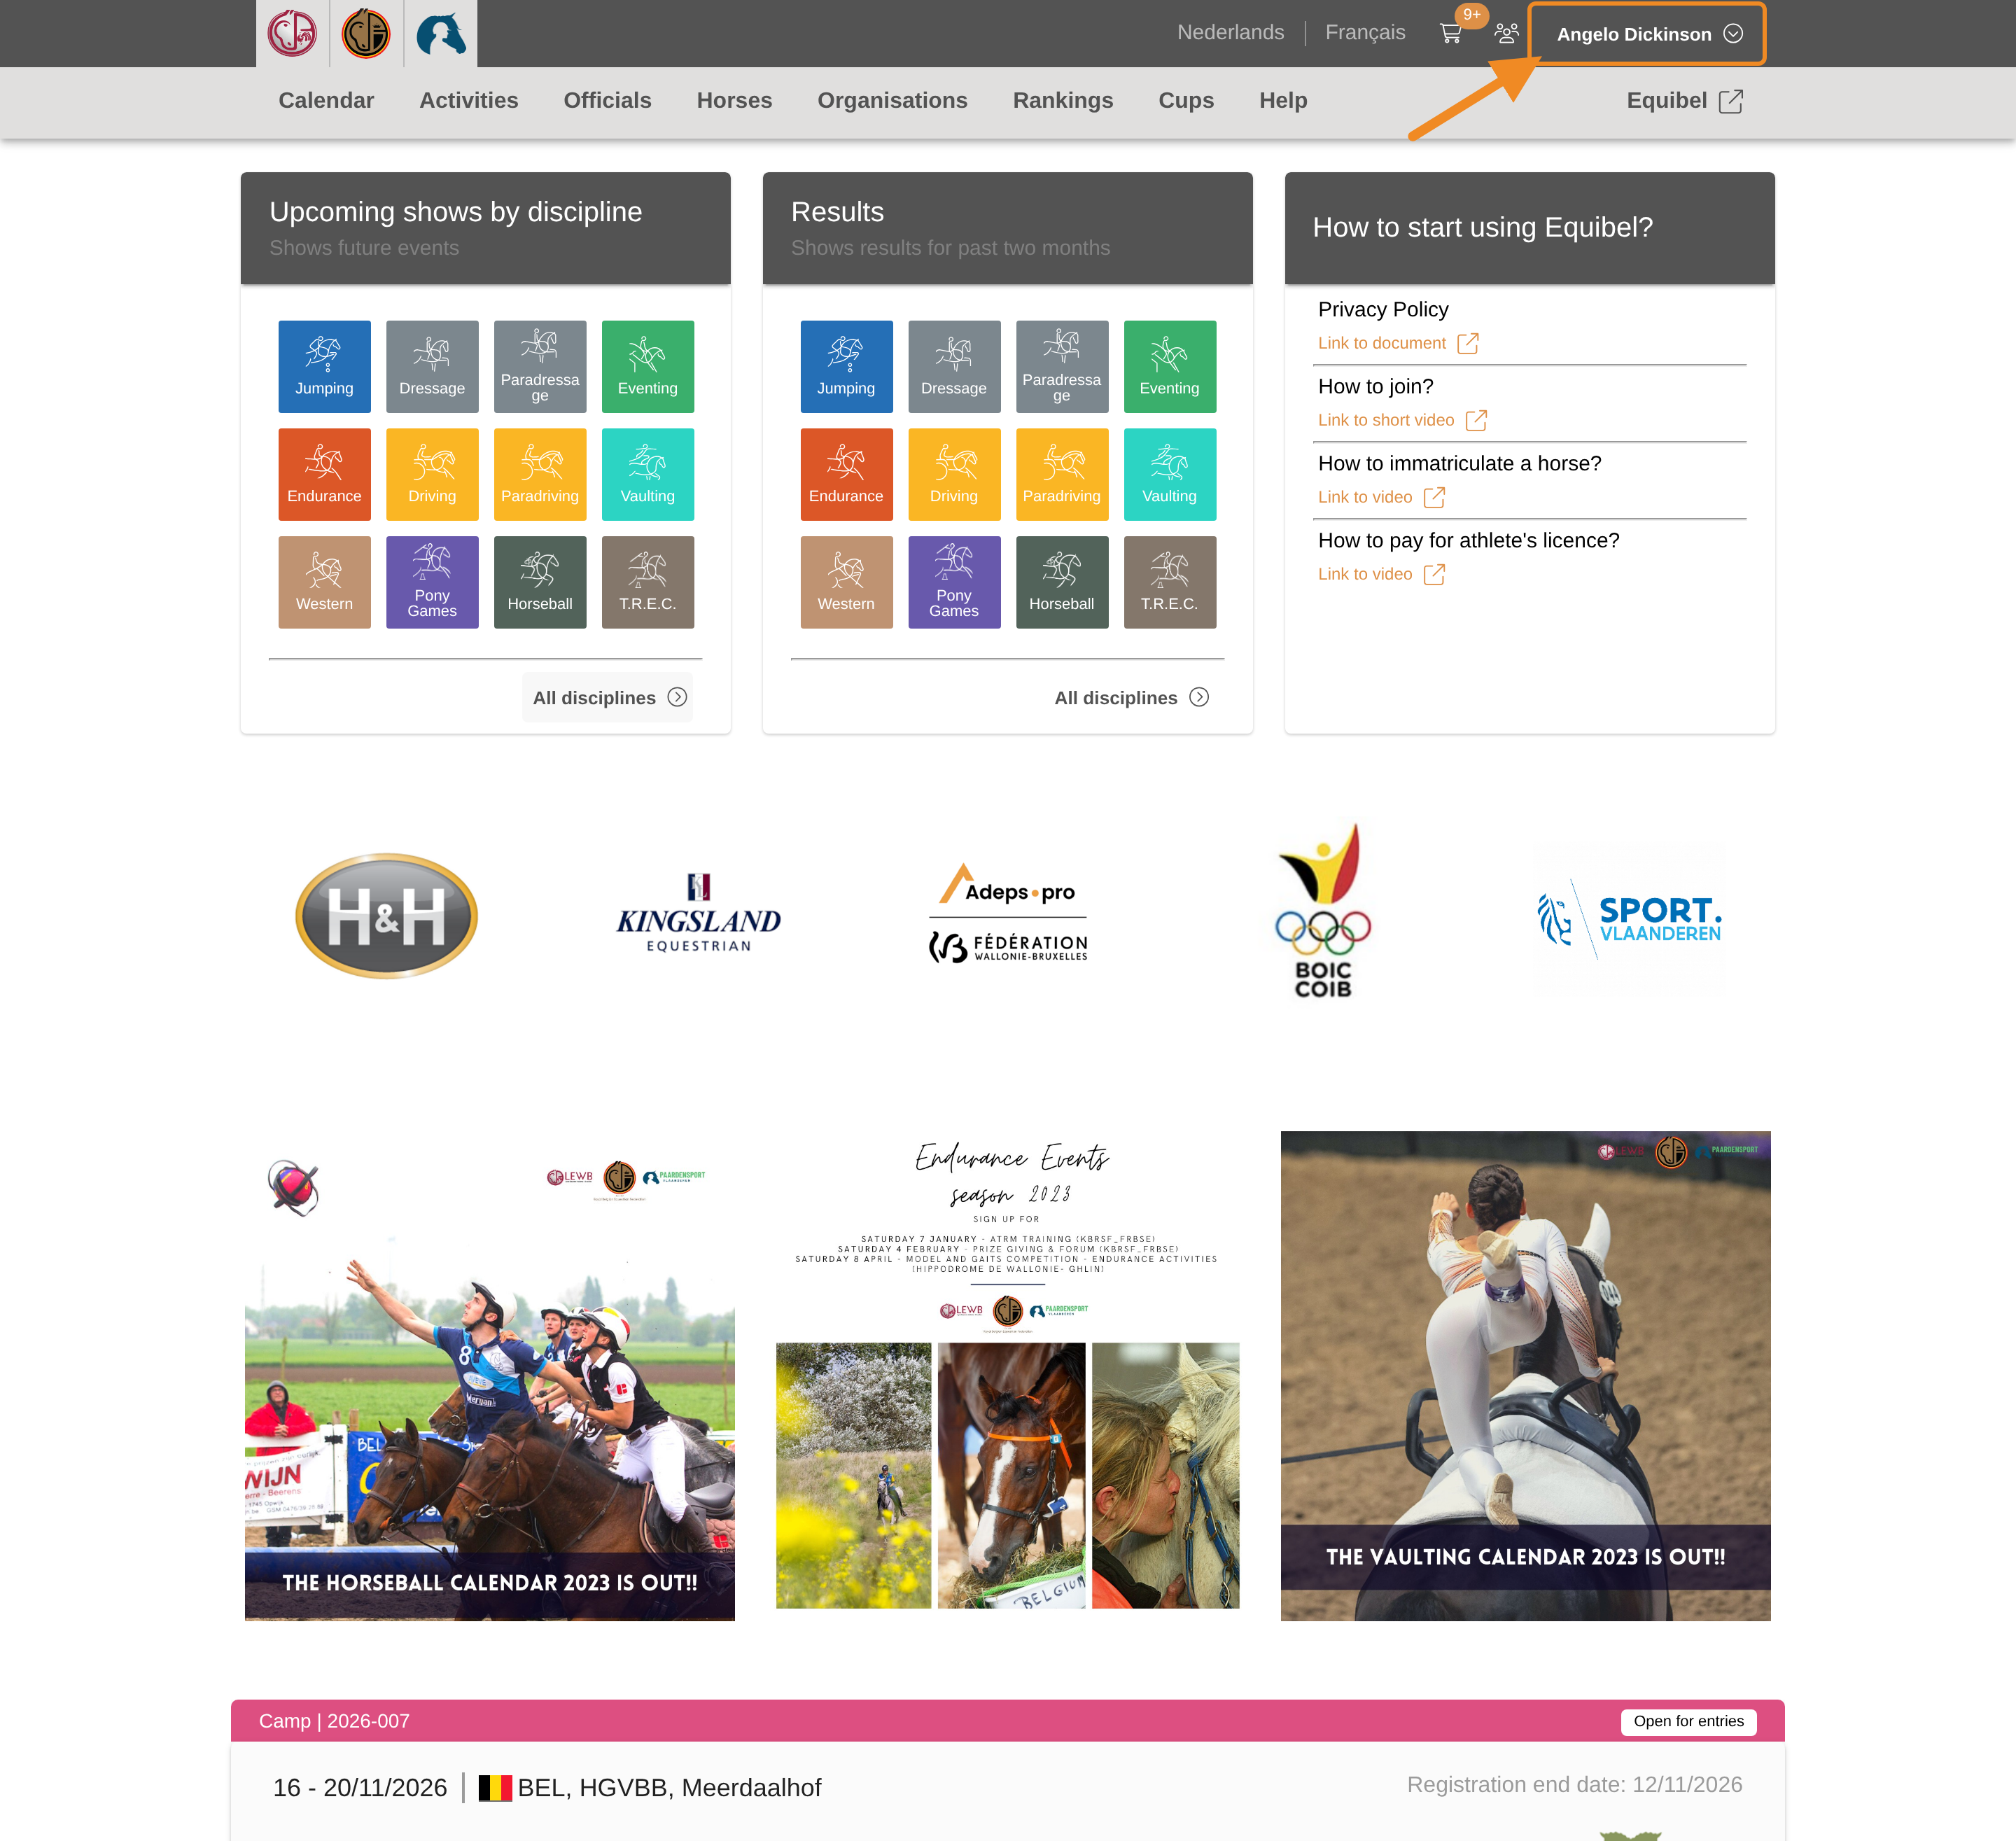
Click your profile button in the upper-right corner of any page.
Step 2 — Open your club
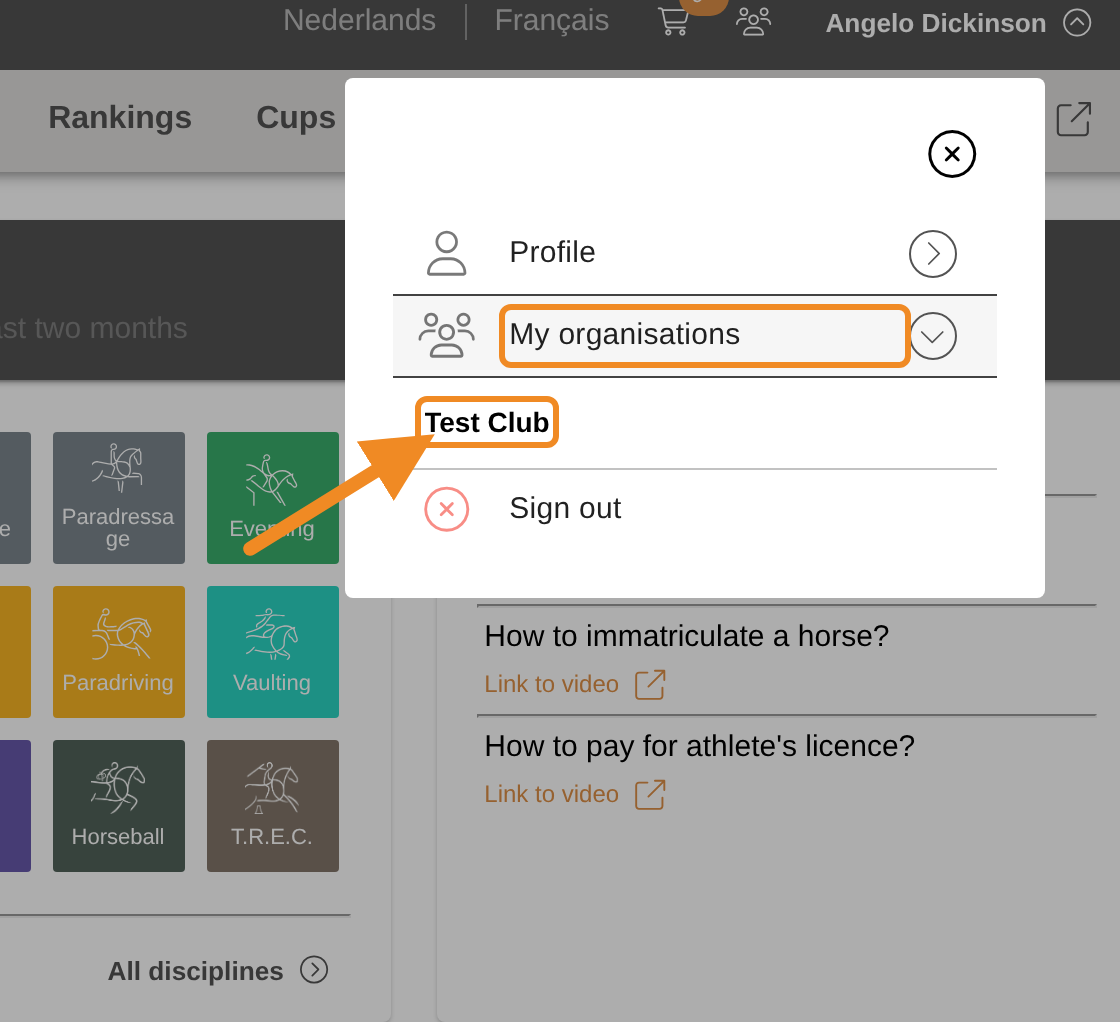
Open “My organisations” and select your club.
Step 3 — Find the members list
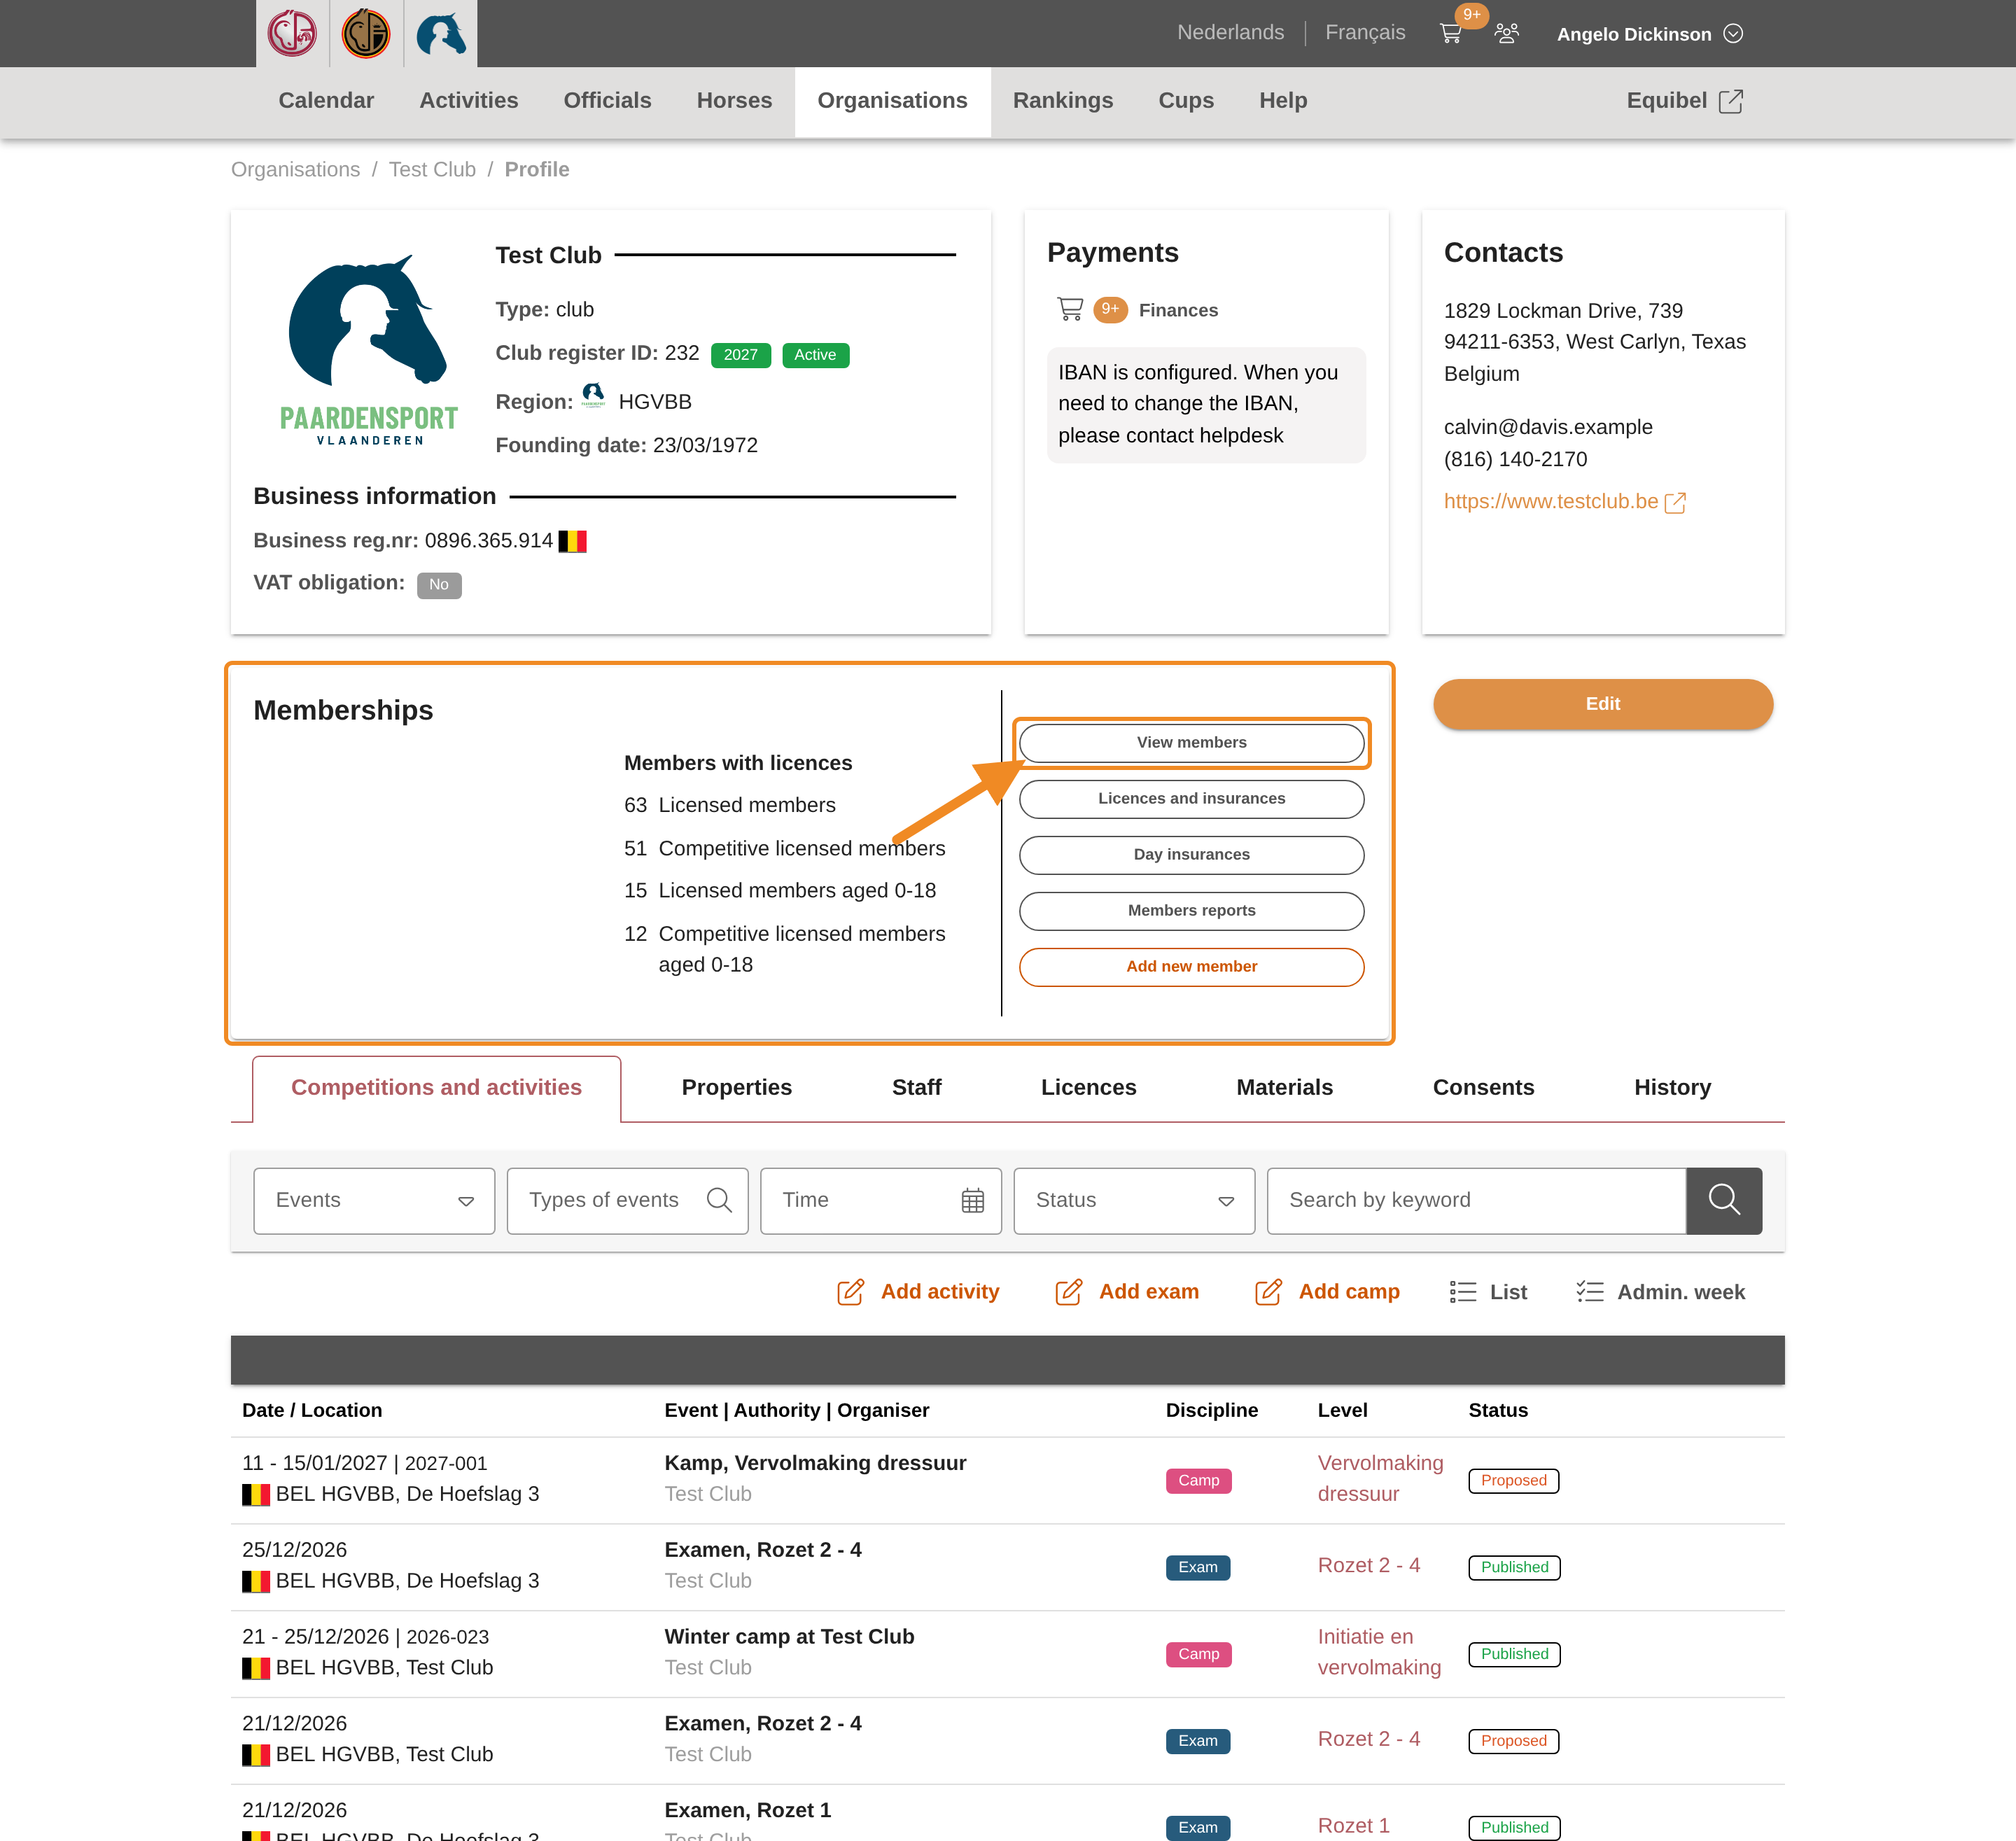
Your club page has a “Memberships” section. Find “View members” in it.
Step 4 — Open the members list
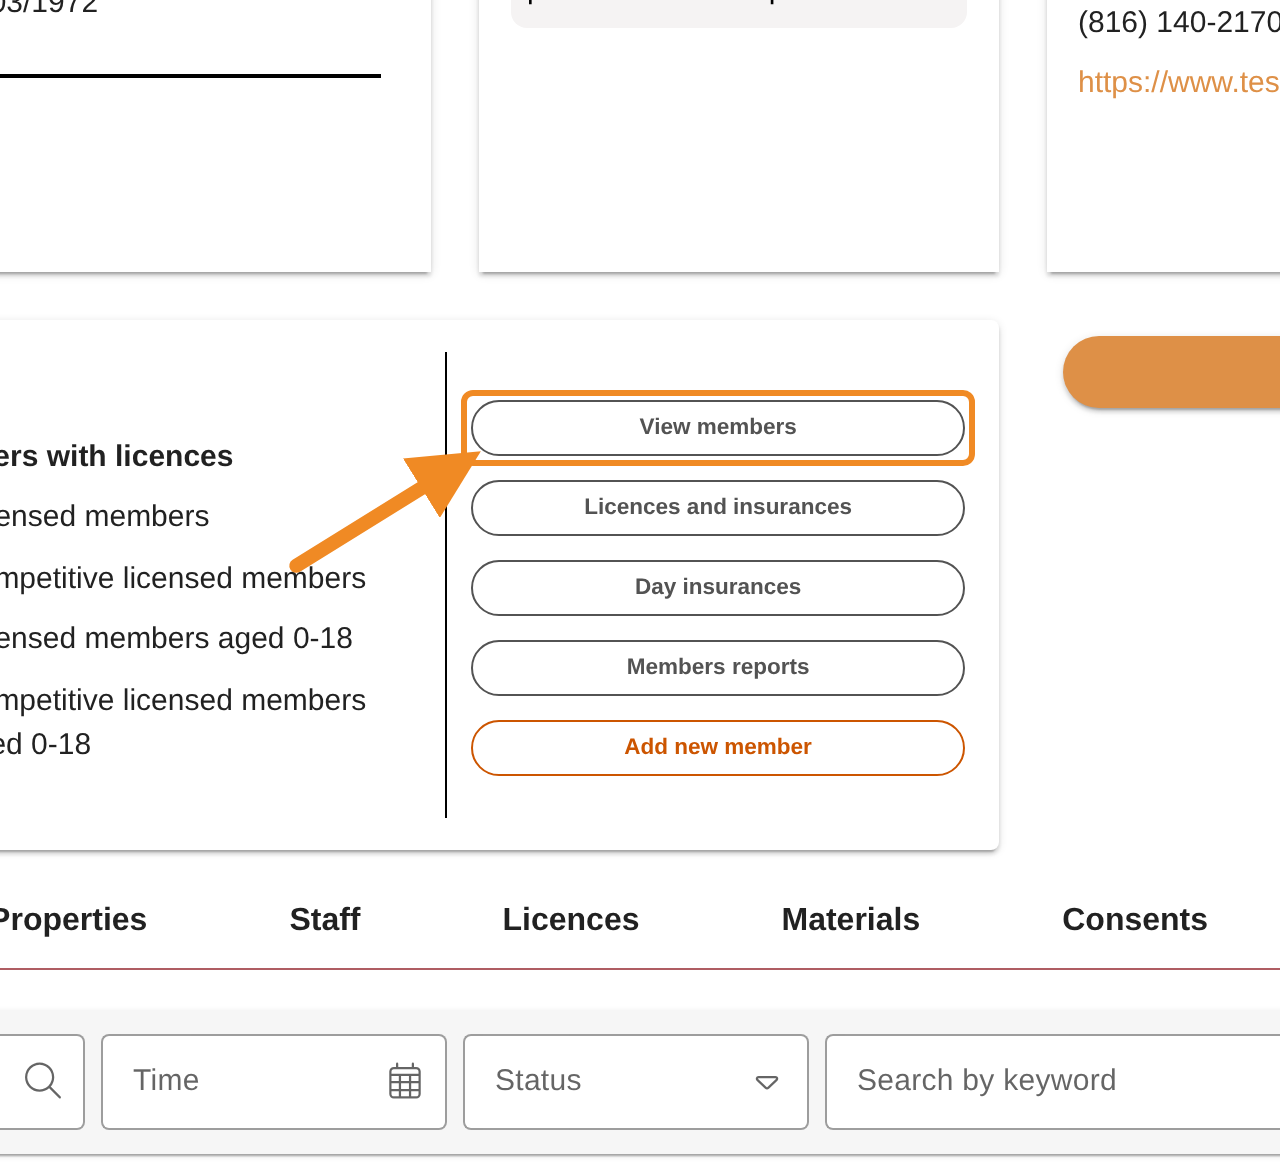
Click “View members”. The list of your club’s members opens.
Part 2 — Organise the list
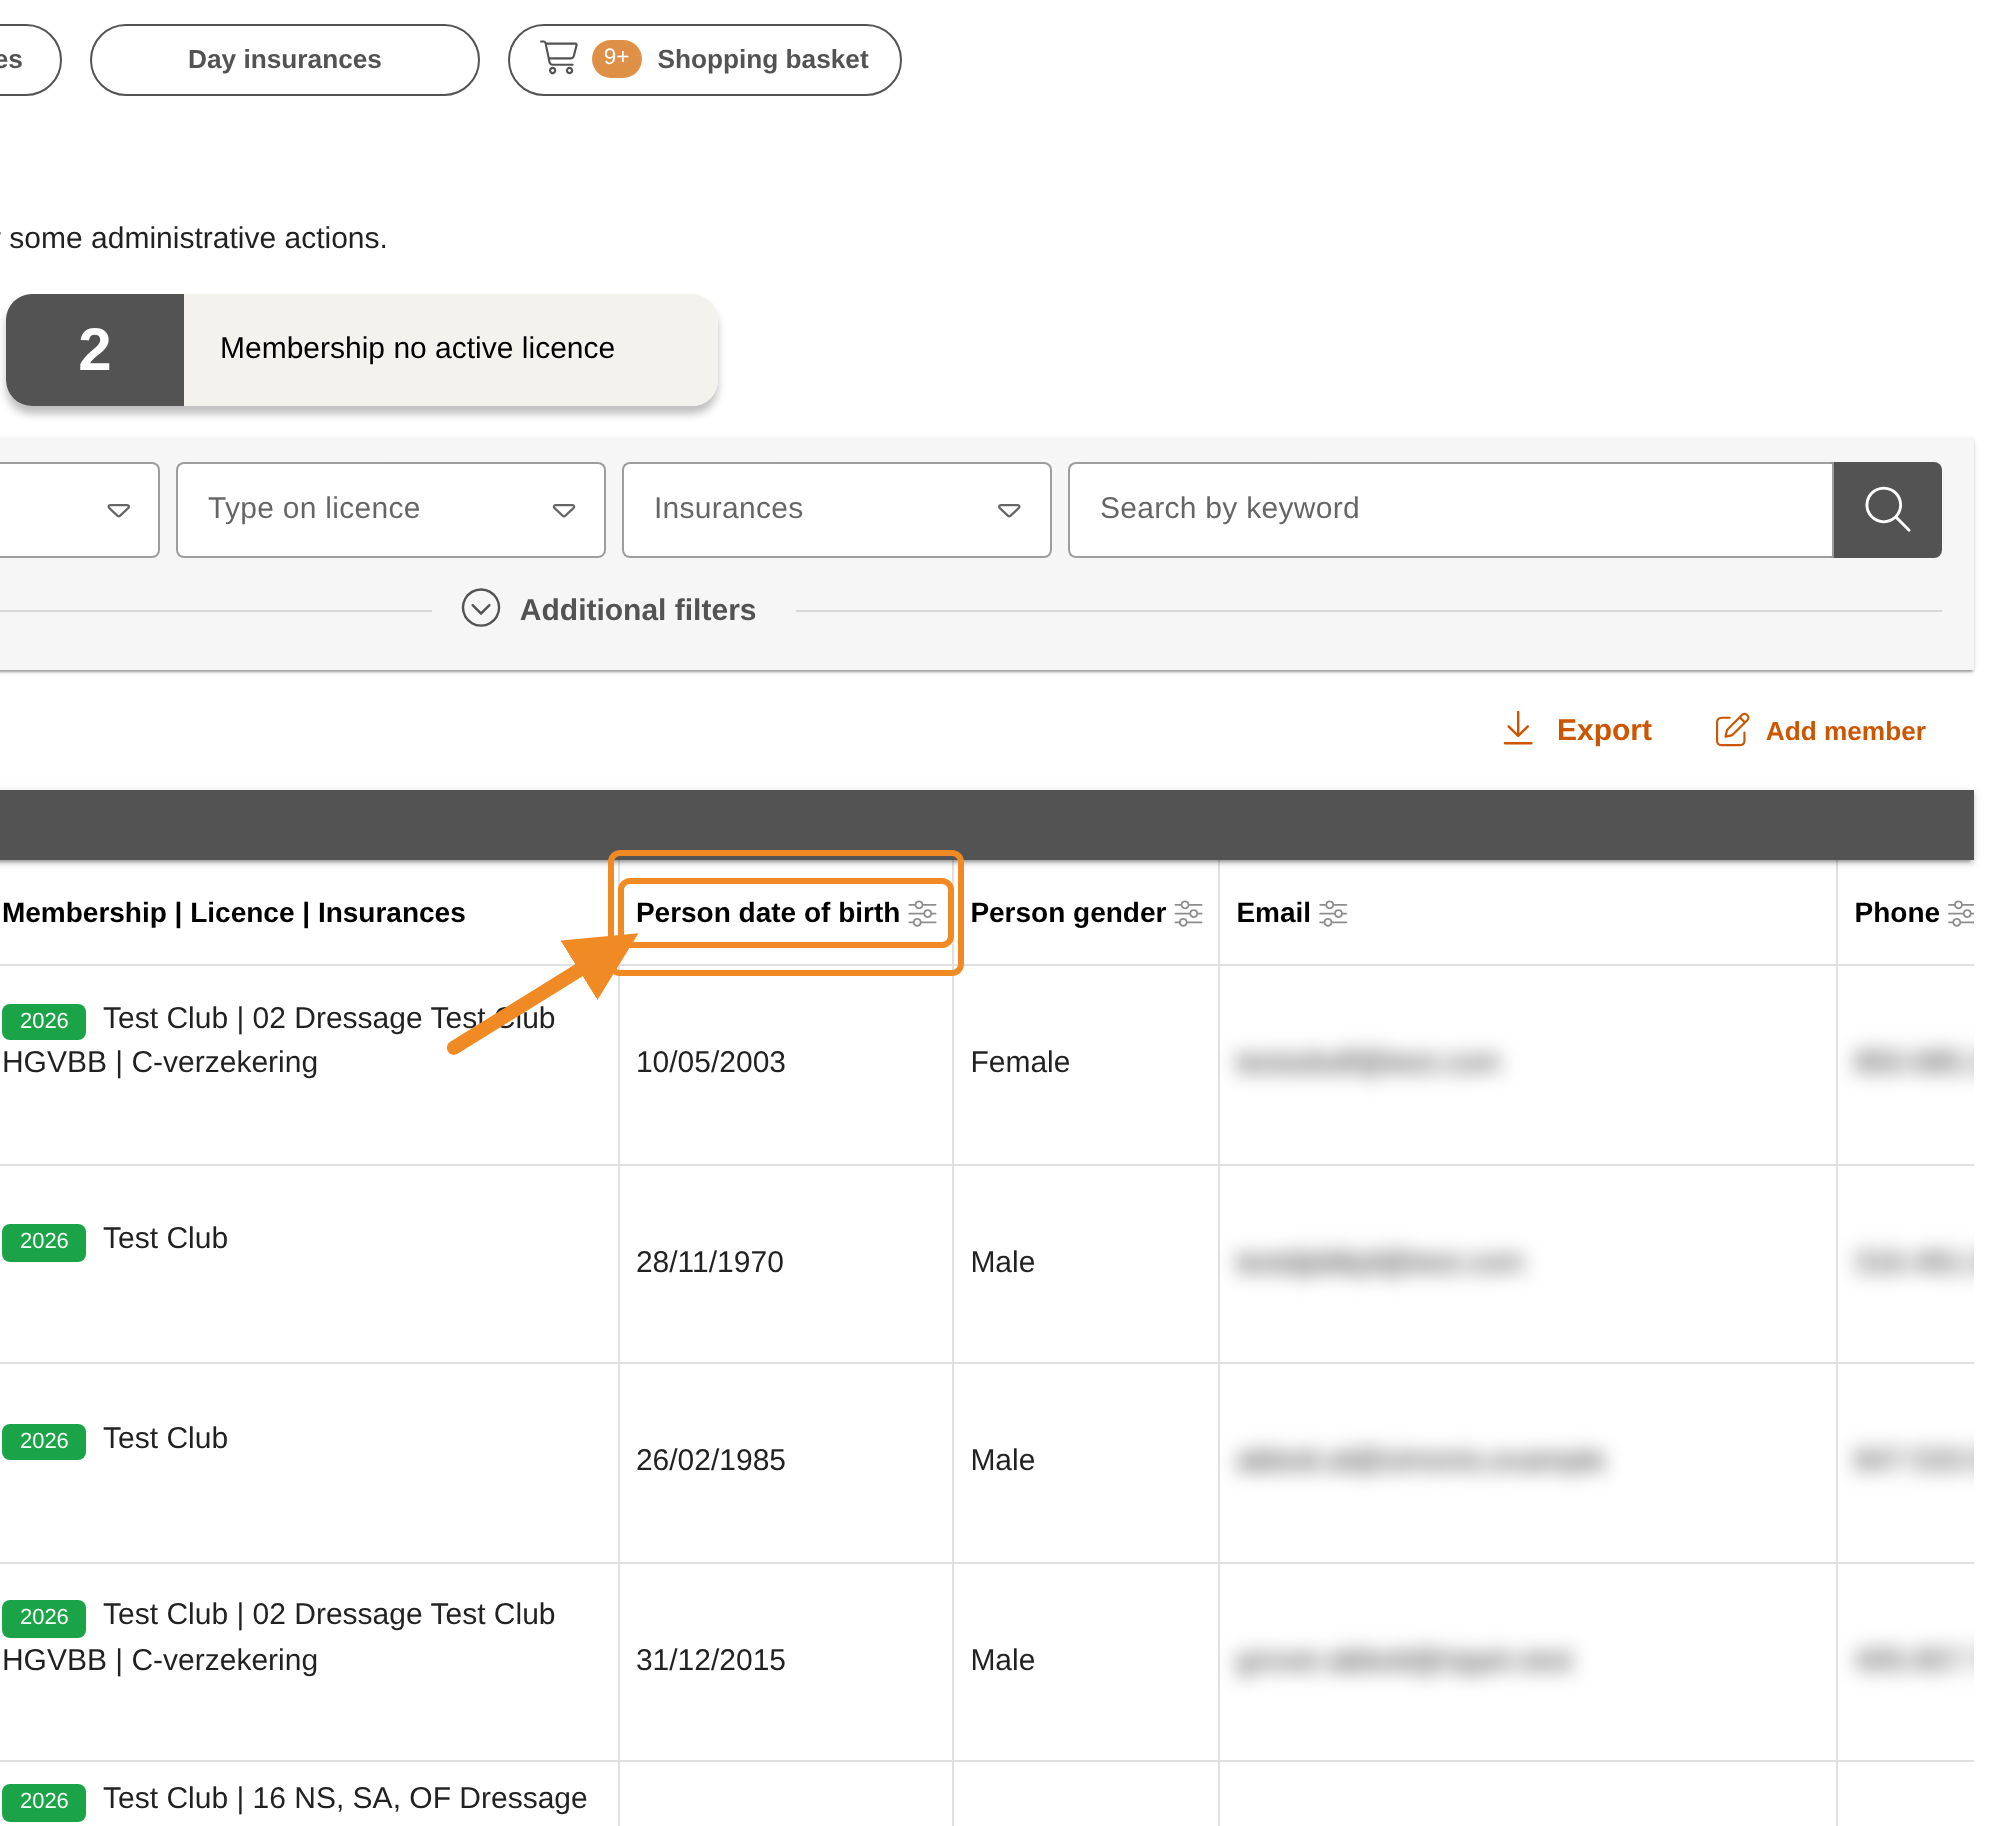
Step 5 — Find the column tools
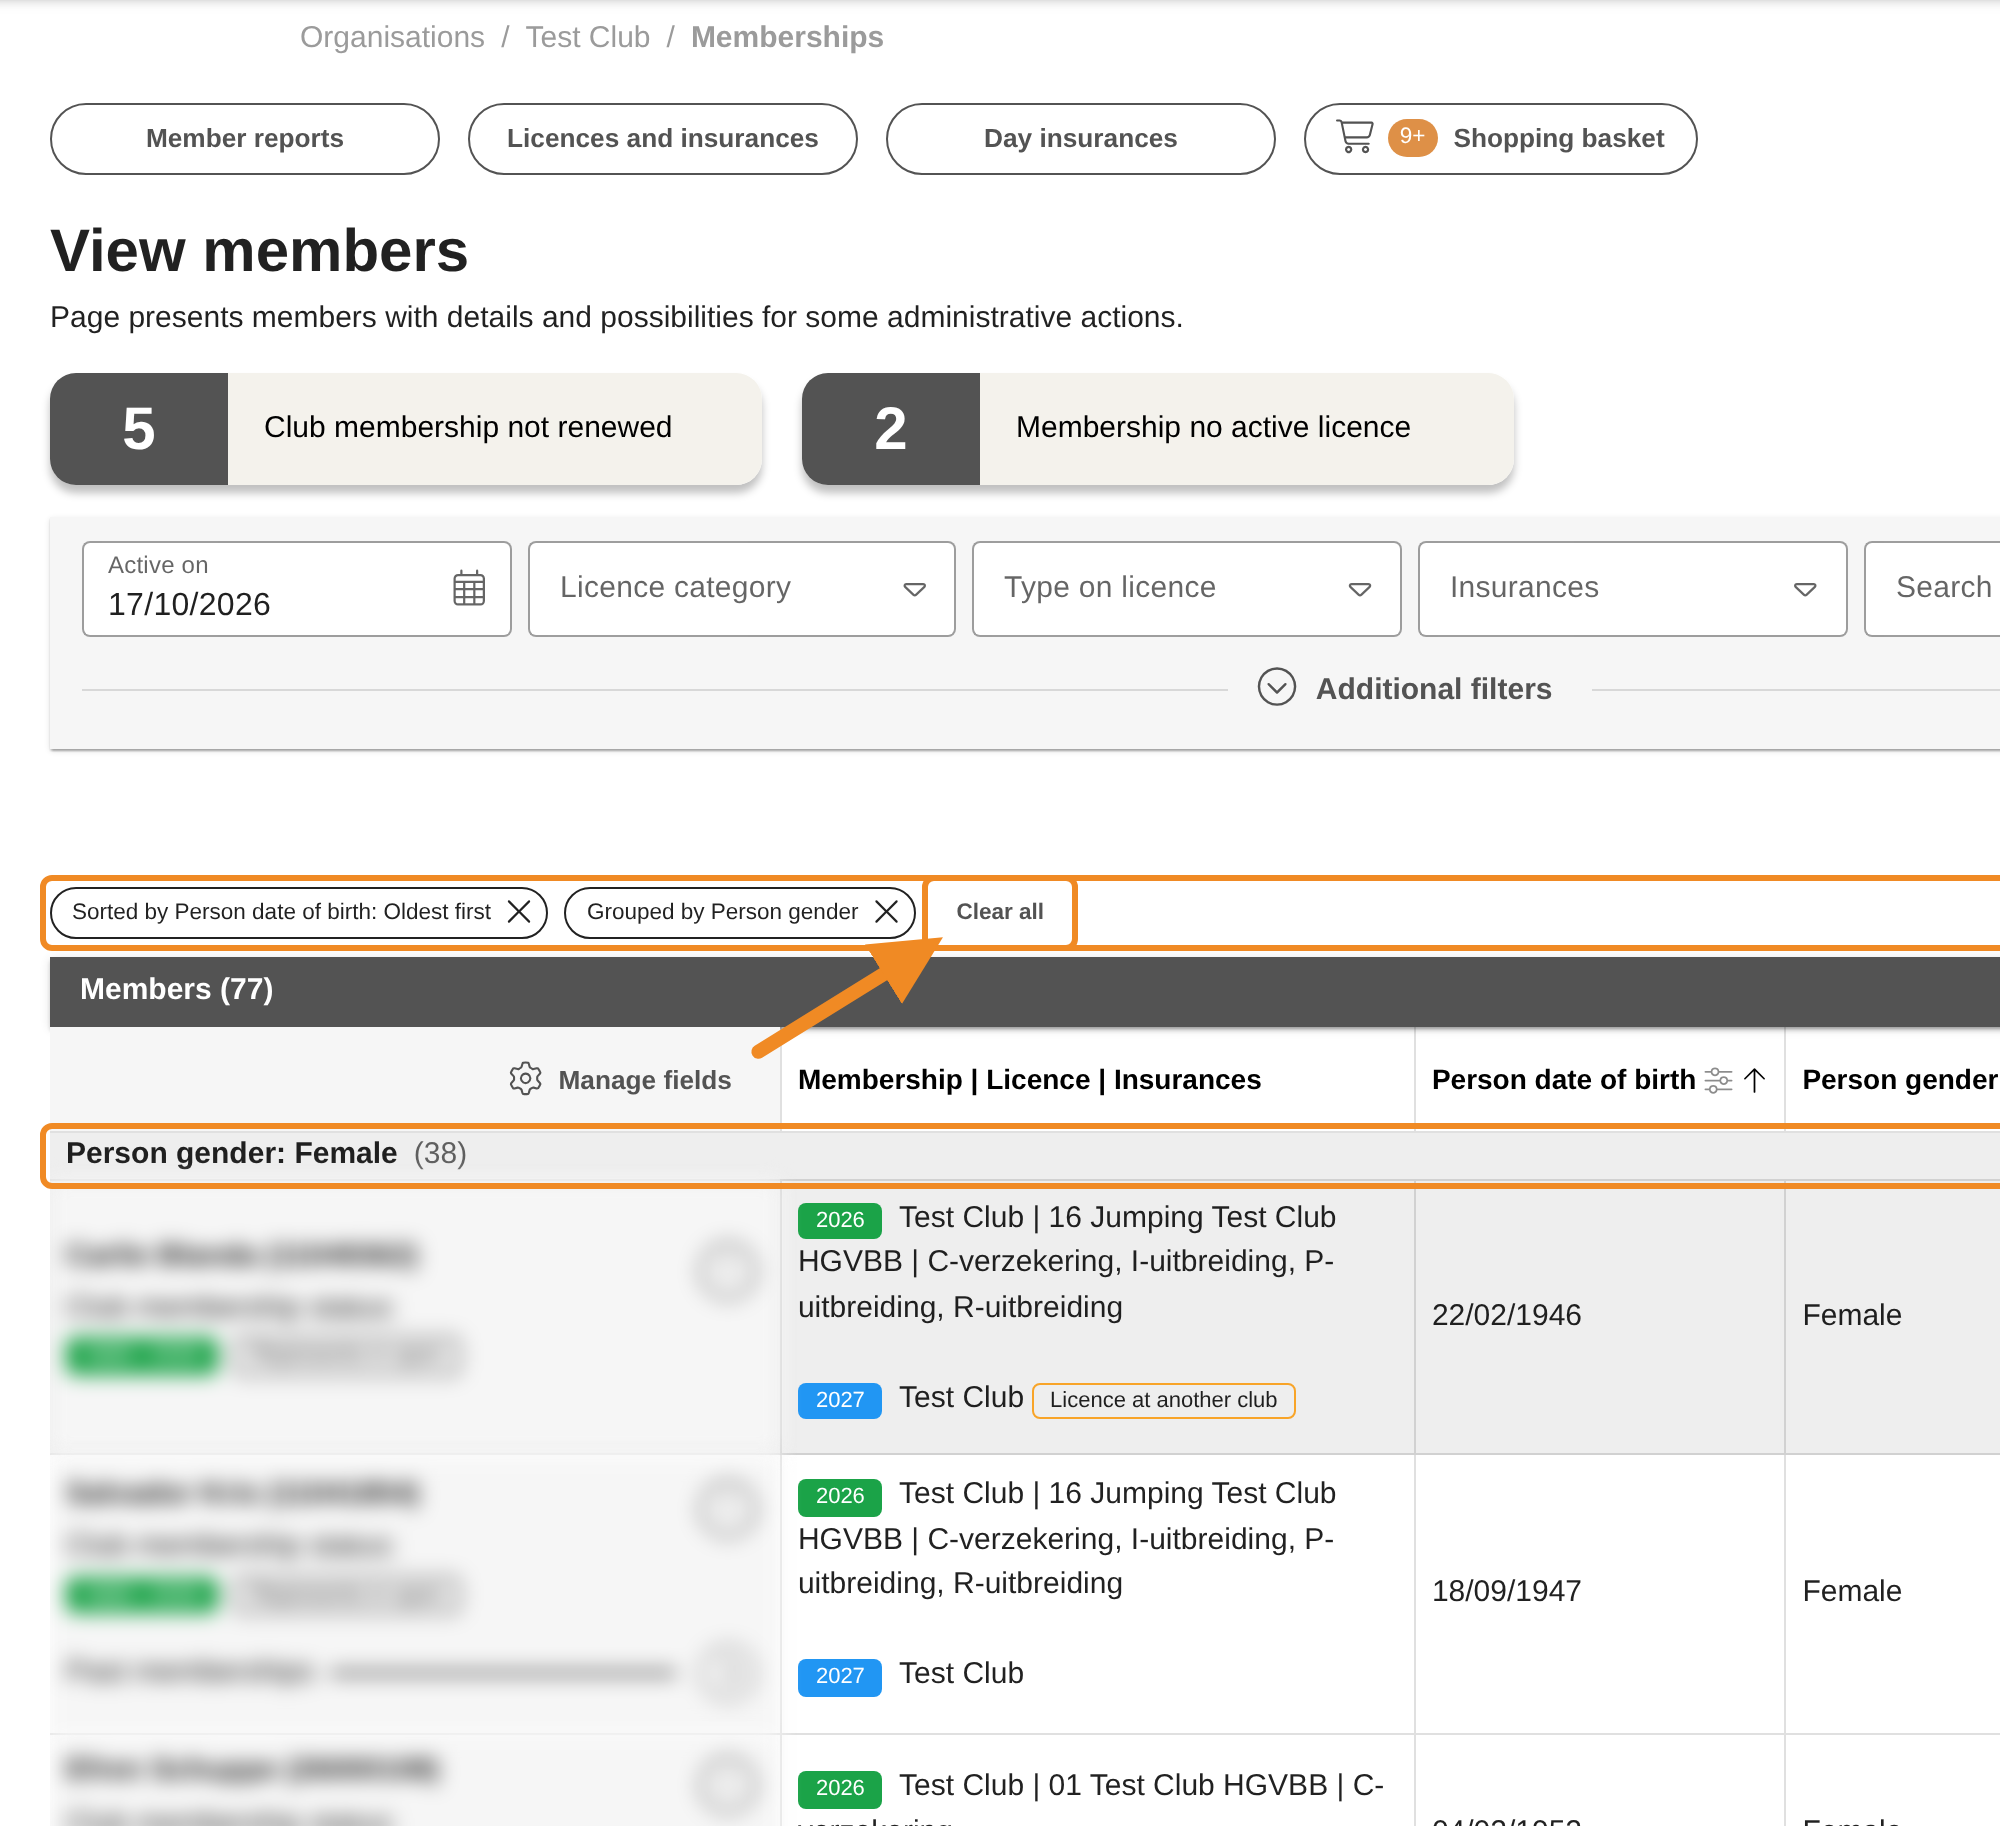
Each column name in the list has a small icon next to it. Click it to sort, filter or group the list by that column. The tools differ by column: a date sorts from oldest to newest, a text column from A to Z.
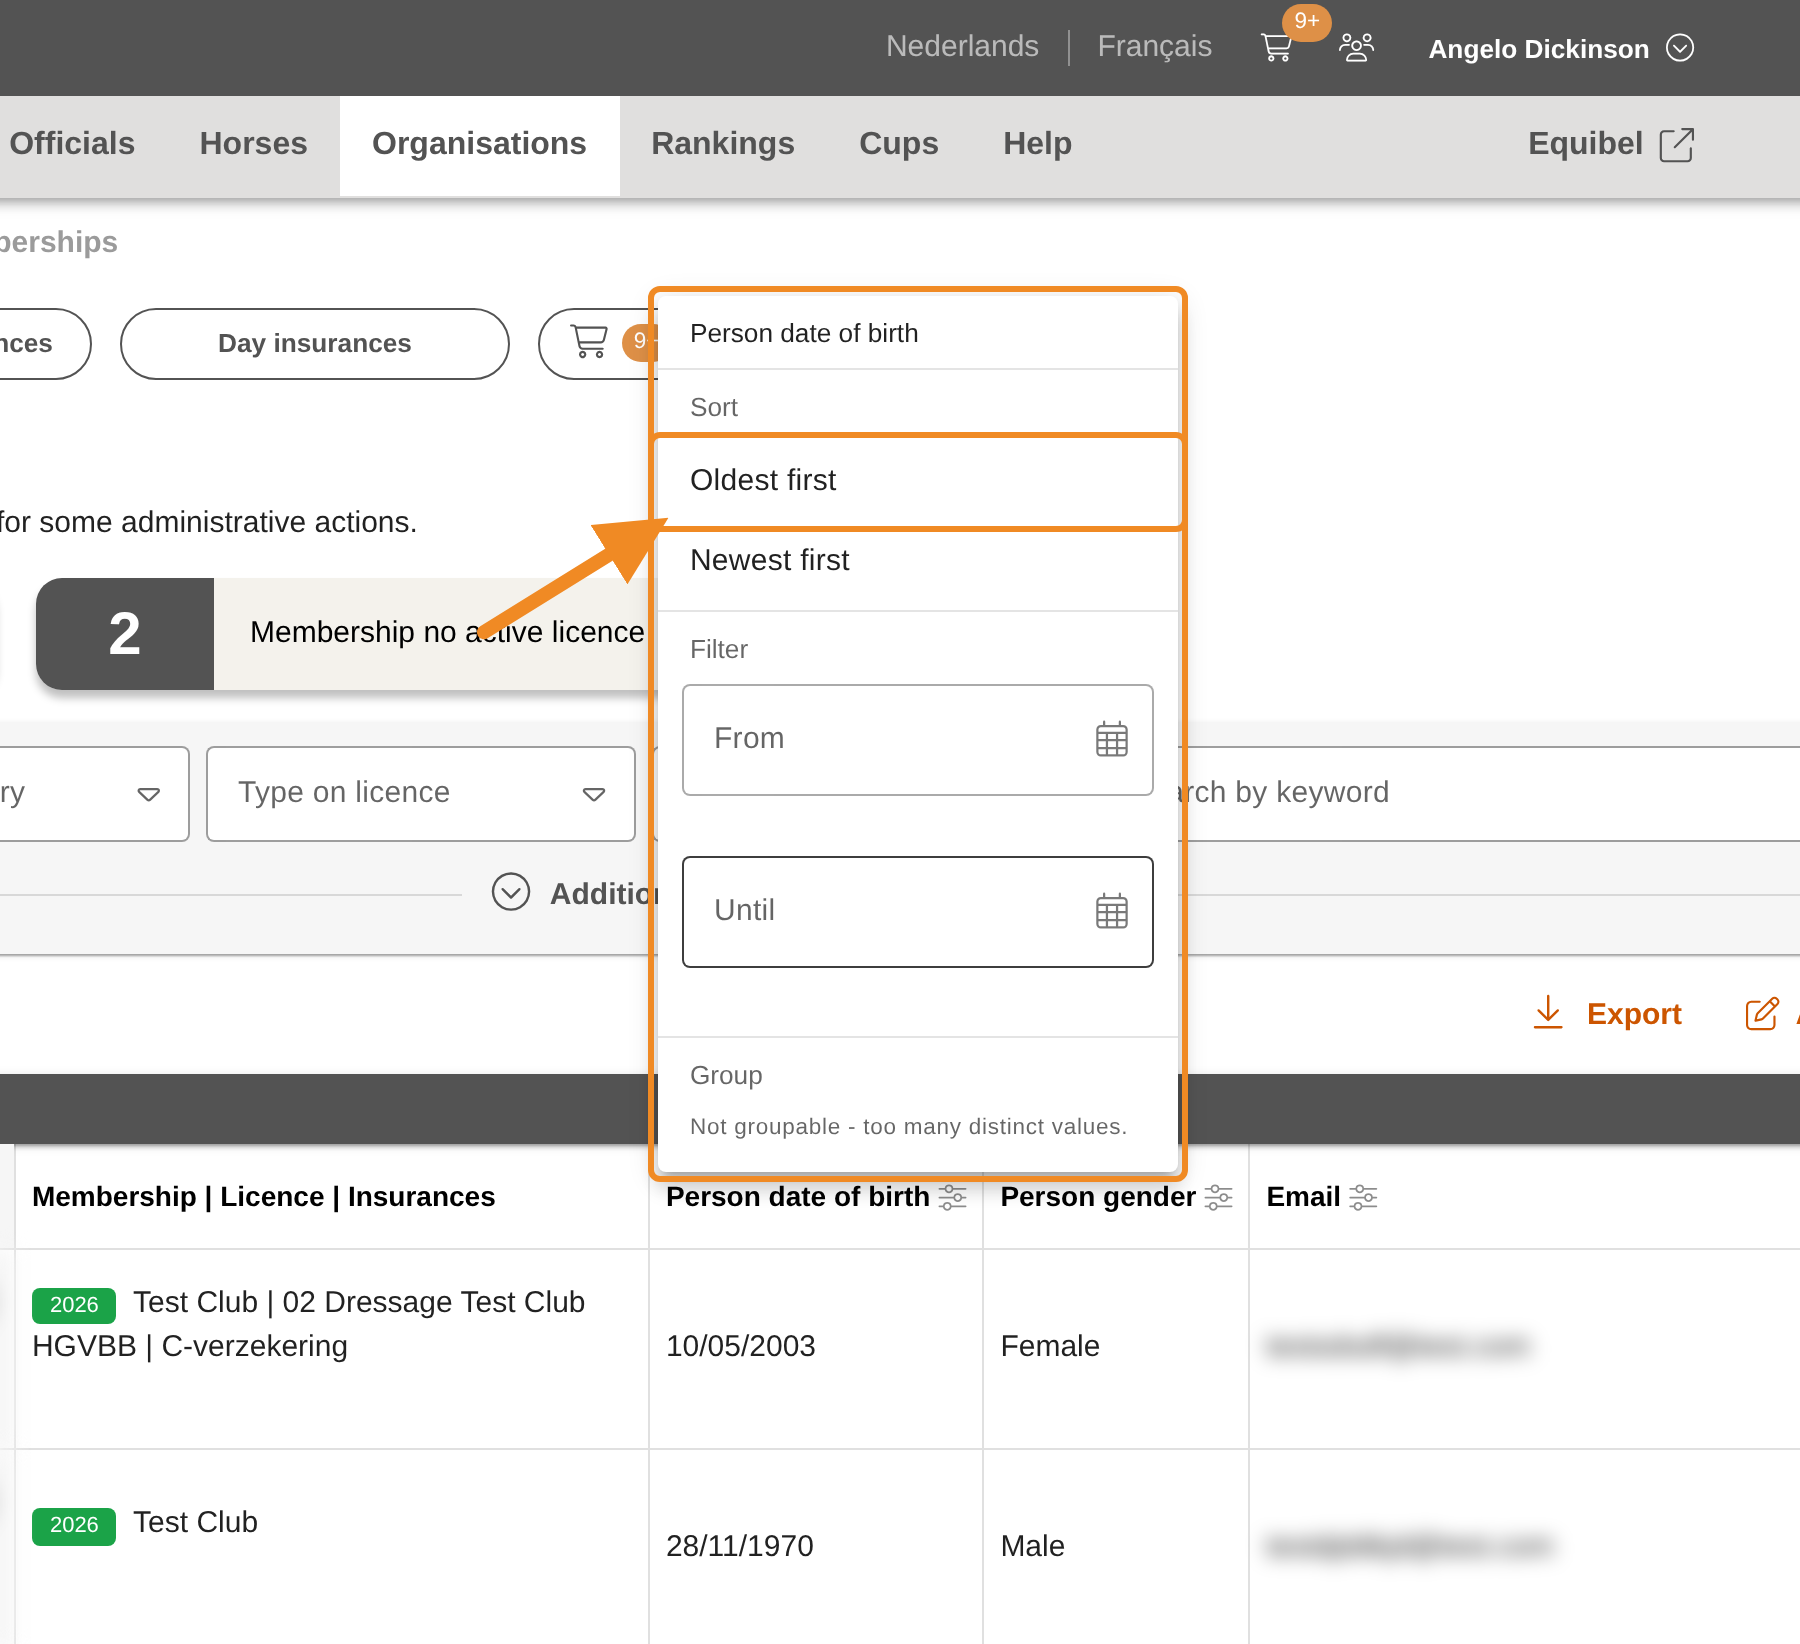
Step 6 — Sort
Under “Sort”, choose the order — for example “Oldest first” for the date of birth.
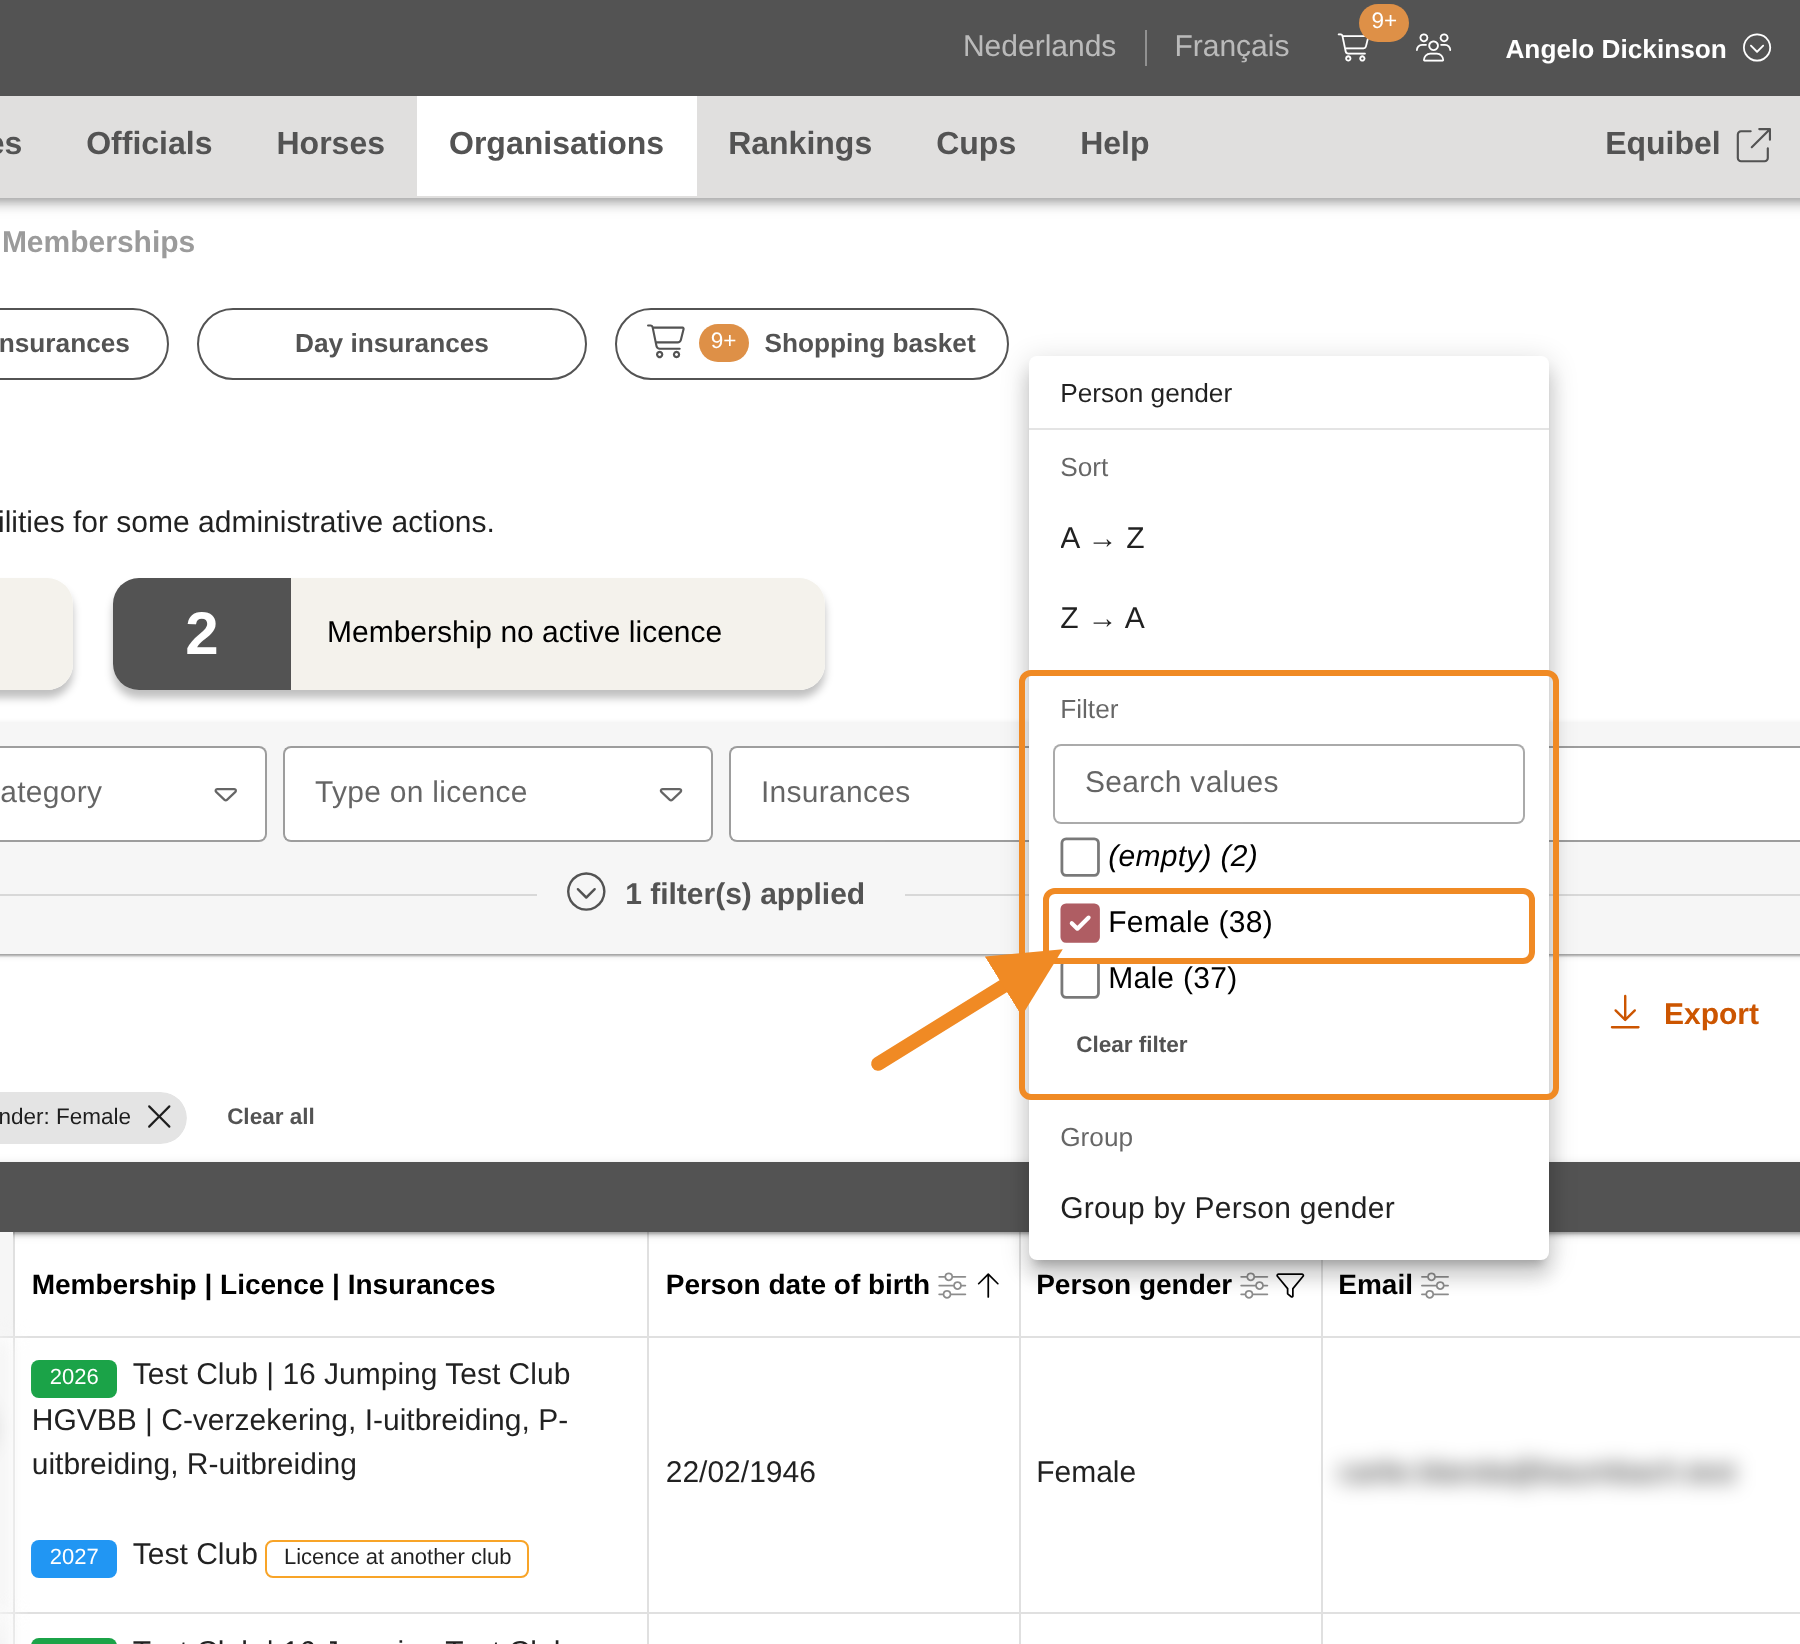
Step 7 — Filter
Under “Filter”, tick the values to keep. The number next to each value is how many members have it. The list then shows only those members. A date column asks for a period instead: a date from and a date until.
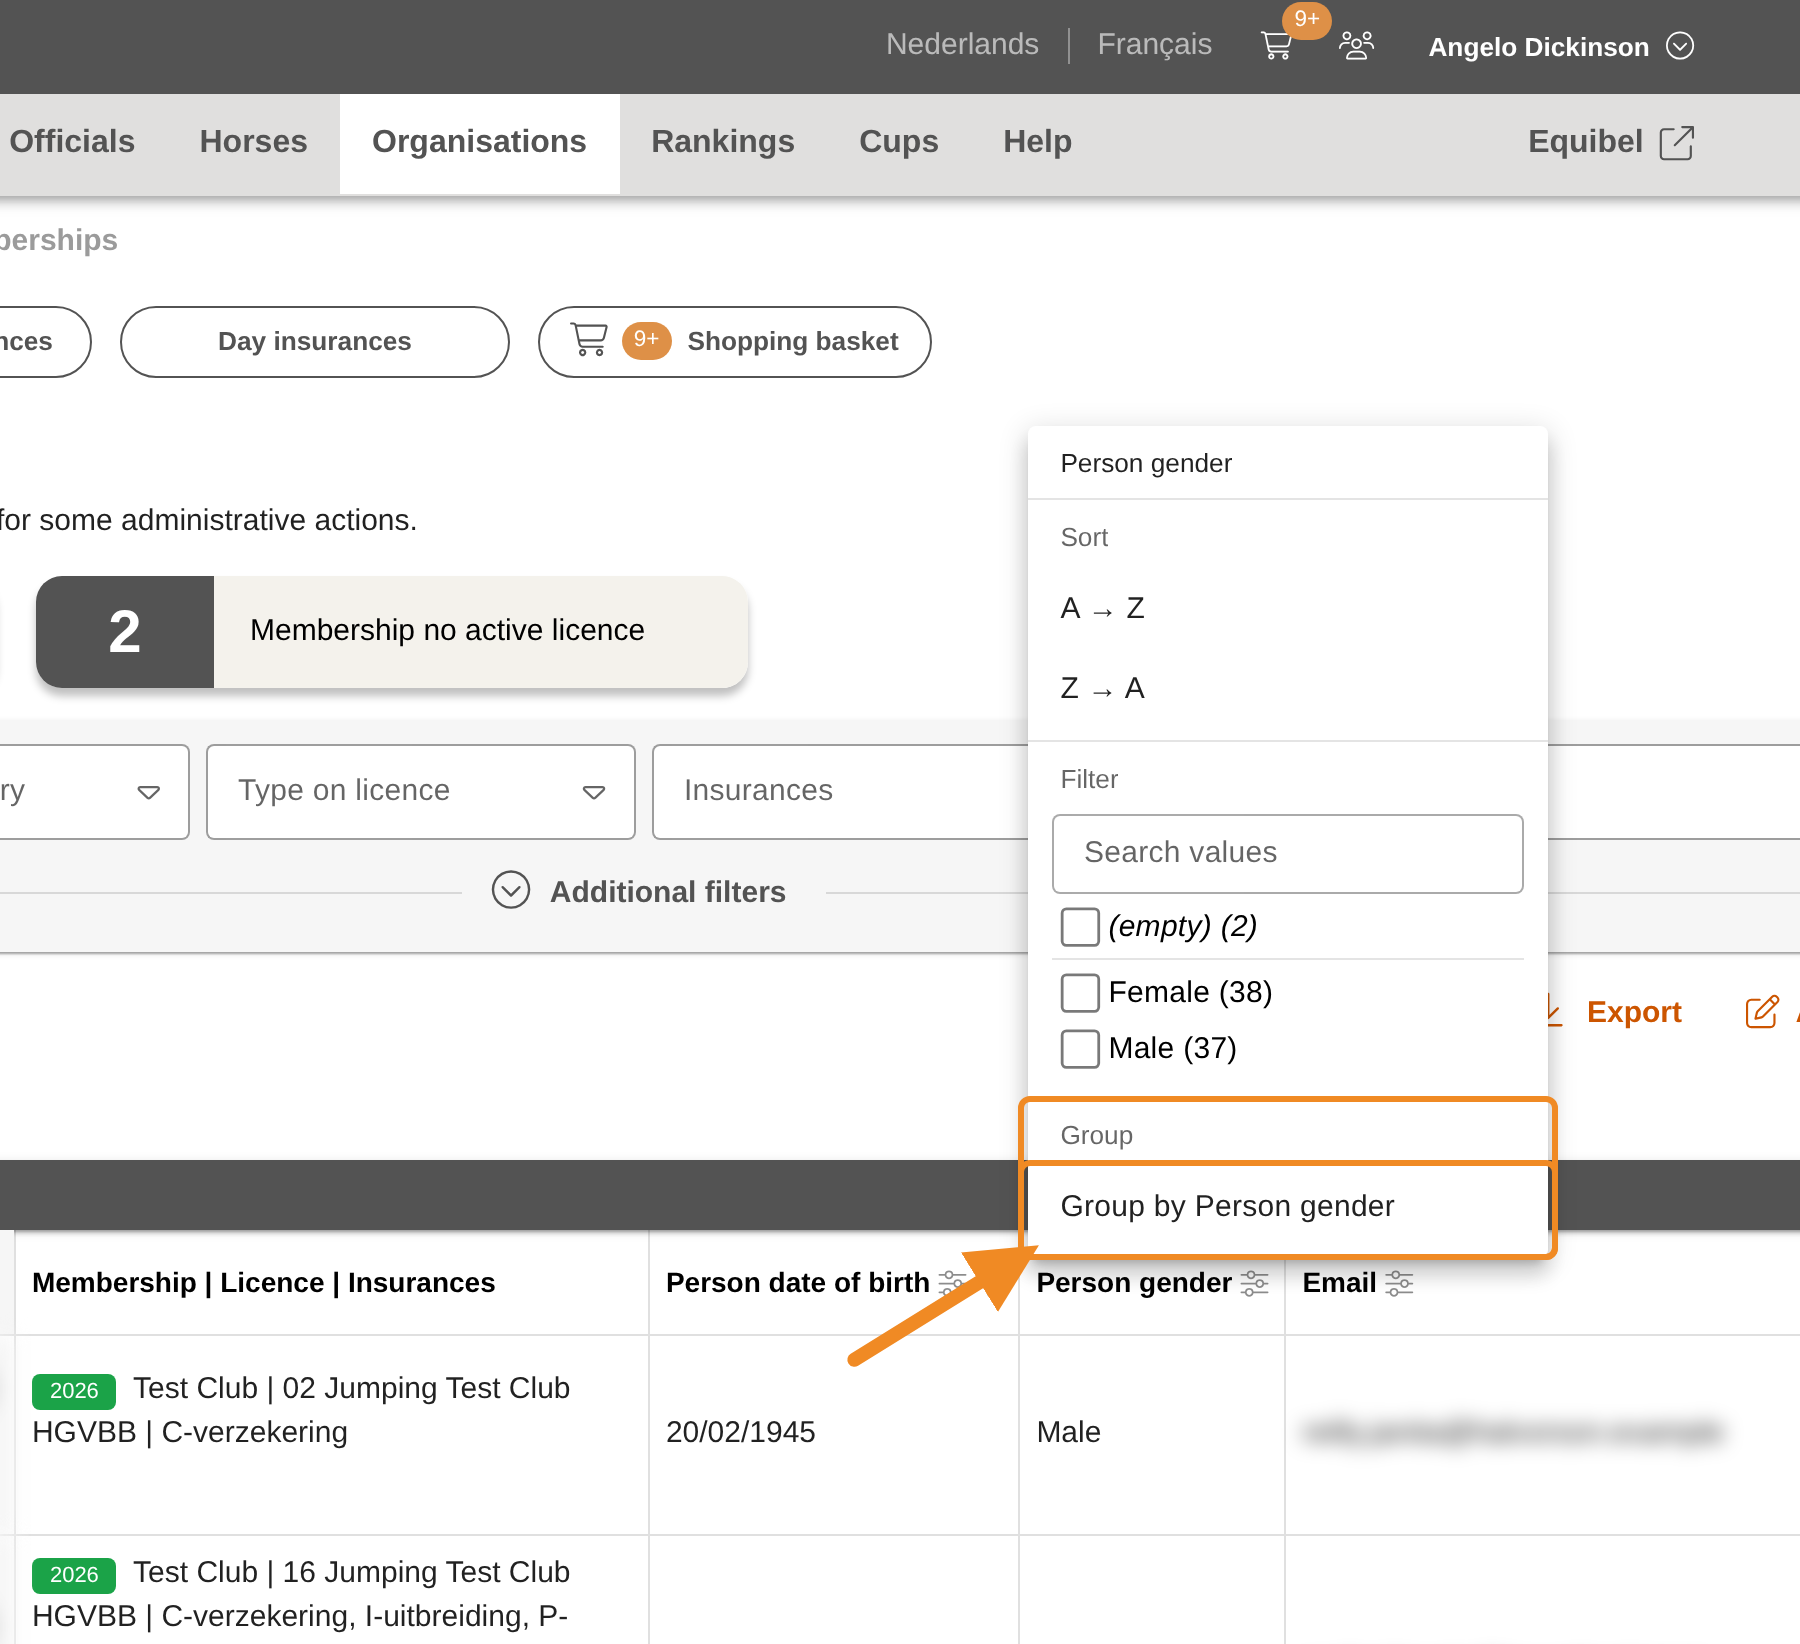
Step 8 — Group
Under “Group”, click the option to group the list by that column. The members are then listed in bands, one per value, each with its number of members. A column with too many different values, such as the date of birth, cannot be grouped.
Step 9 — See and remove what you applied
The bar above the list shows every sort, filter and grouping you applied. Click the × on one to remove it, or “Clear all” to remove them all.
Step 10 — Choose the columns
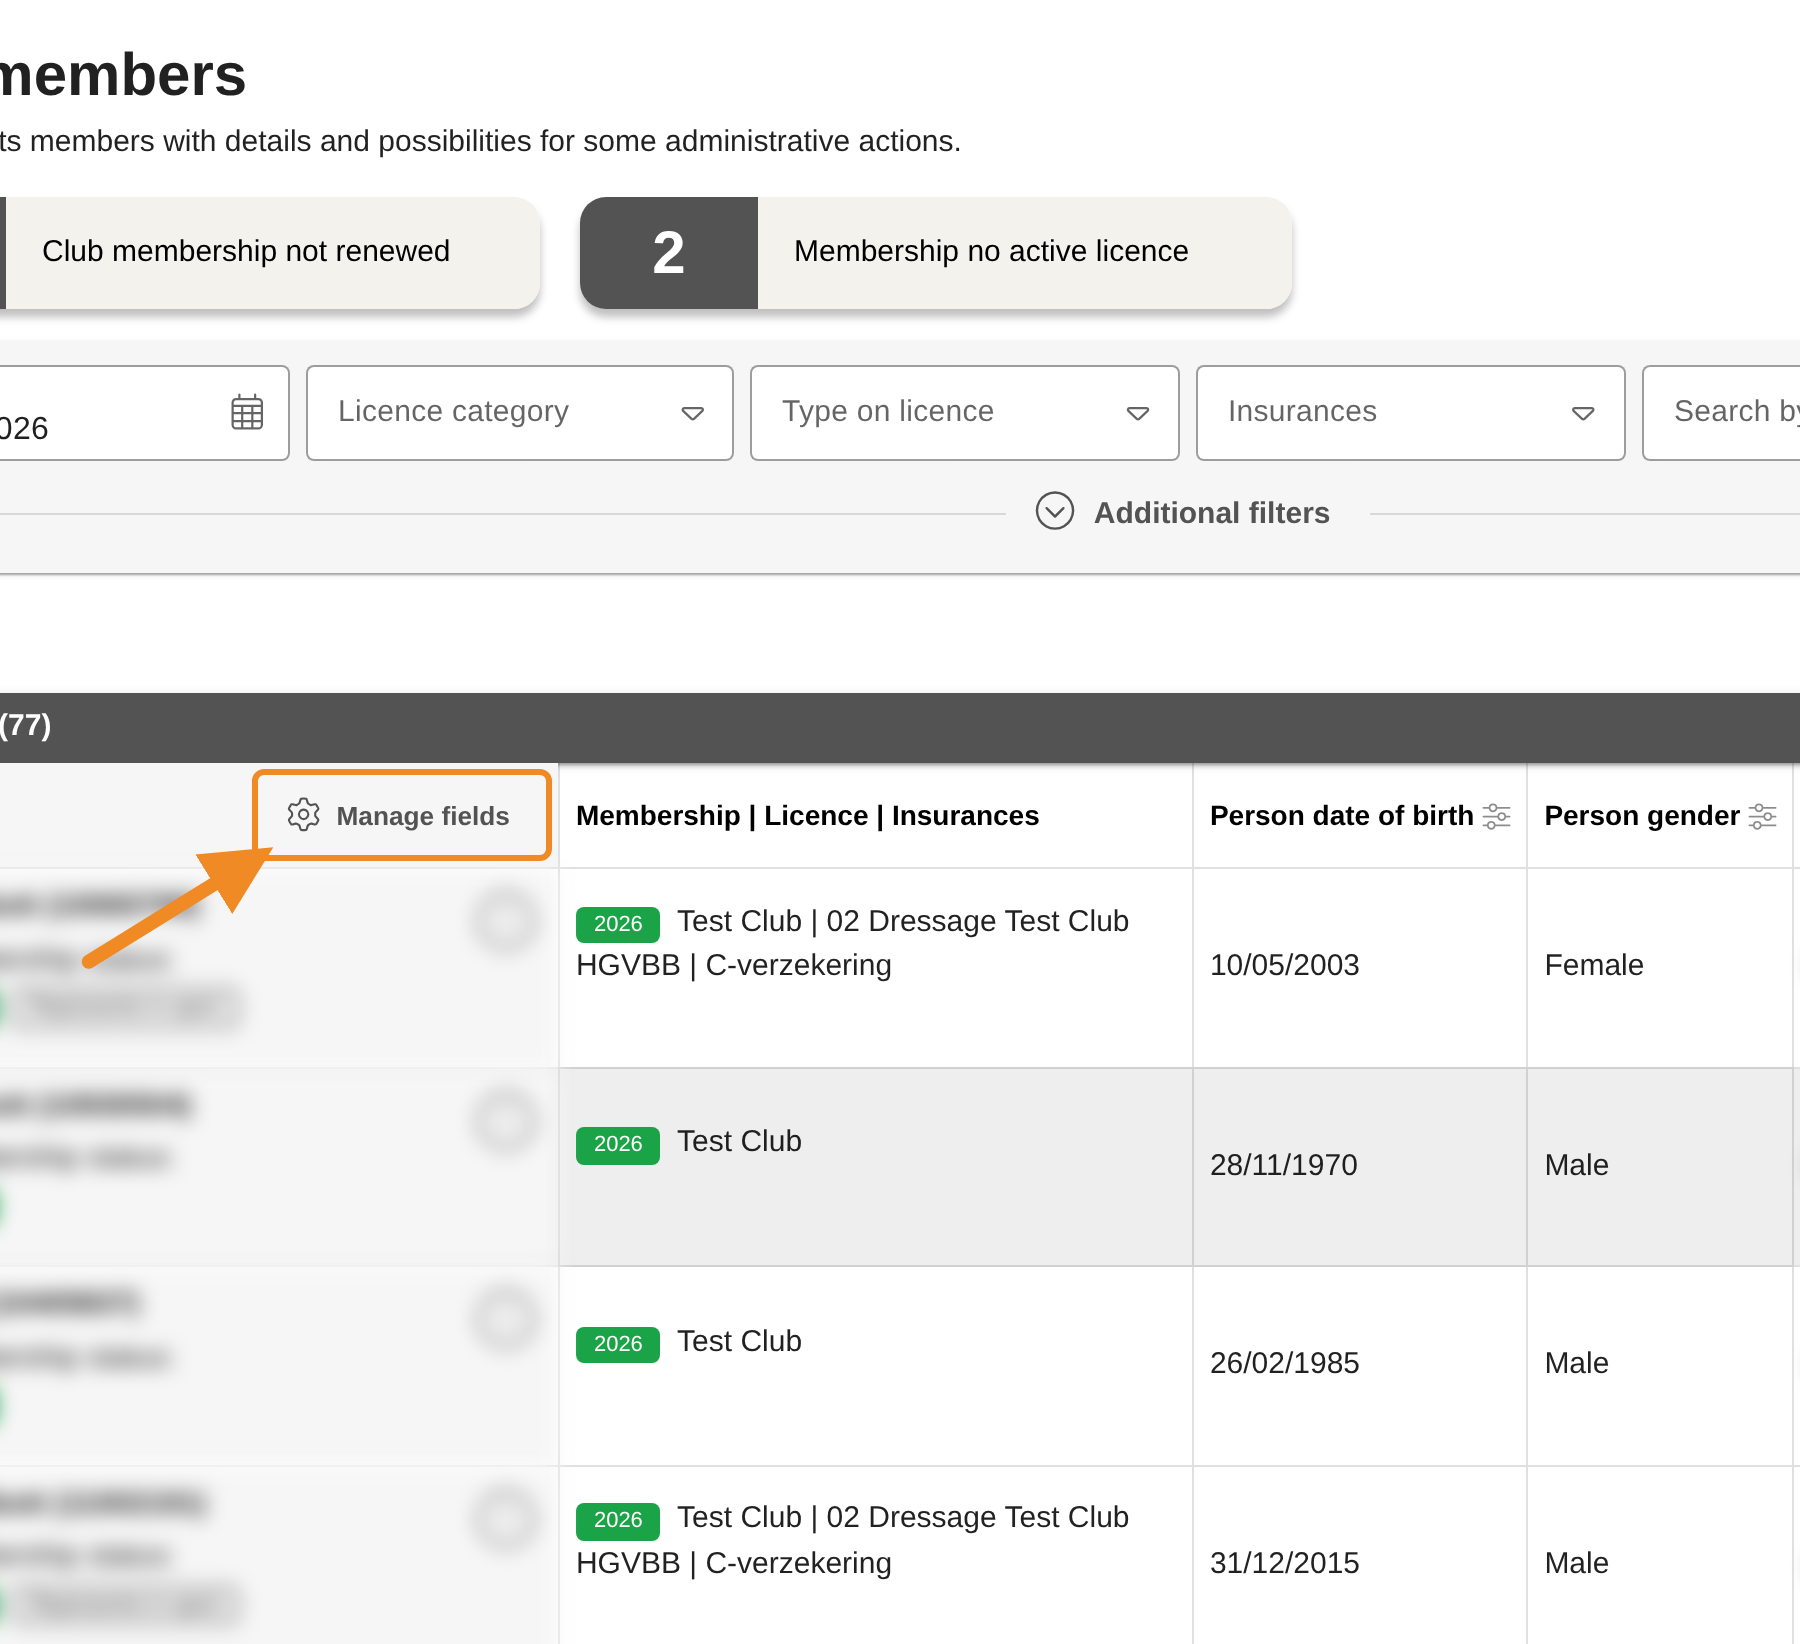
To see other details of your members in the list, click “Manage fields” in the upper-left corner of the list.
Step 11 — Add a column
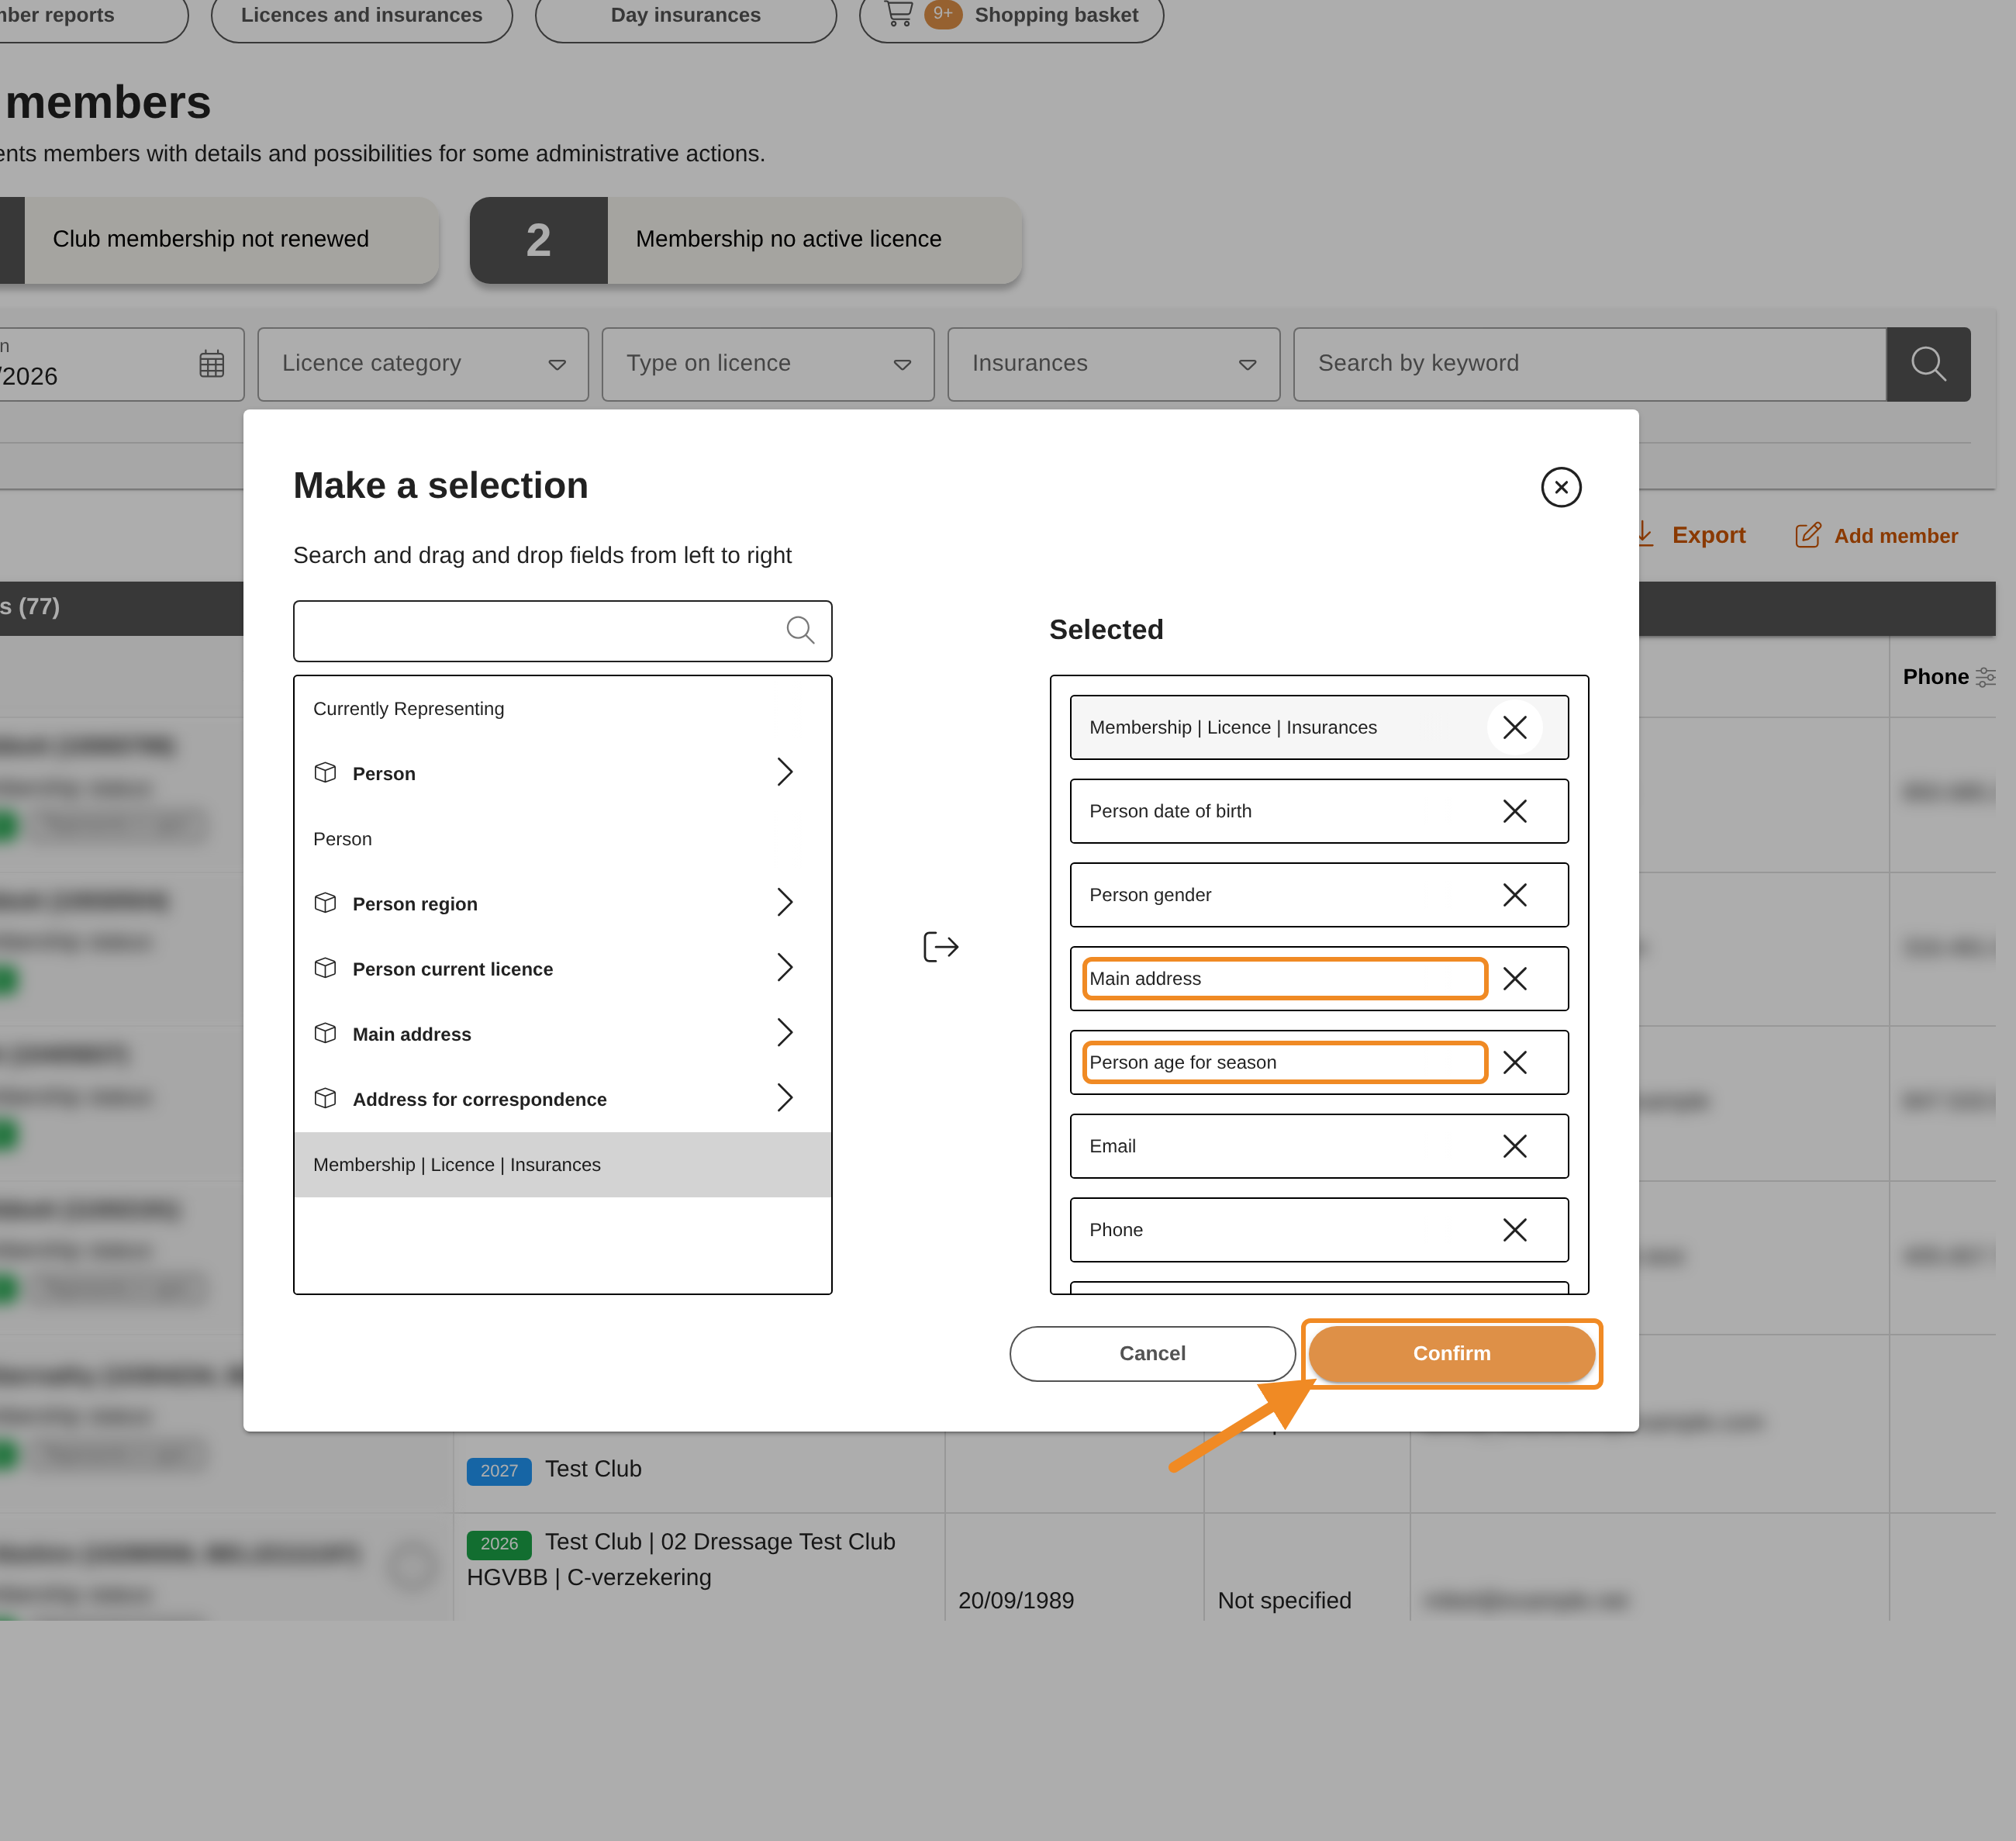
A window opens with the available fields on the left and the columns of the list under “Selected” on the right. Type in the search field to find a field — for example age for “Person age for season”, or address for “Main address”, the member’s full home address. Drag the field to “Selected”, to the place where the column should be.
To remove a column, click the × next to it under “Selected”. Then click “Confirm”.
Step 12 — See the new columns
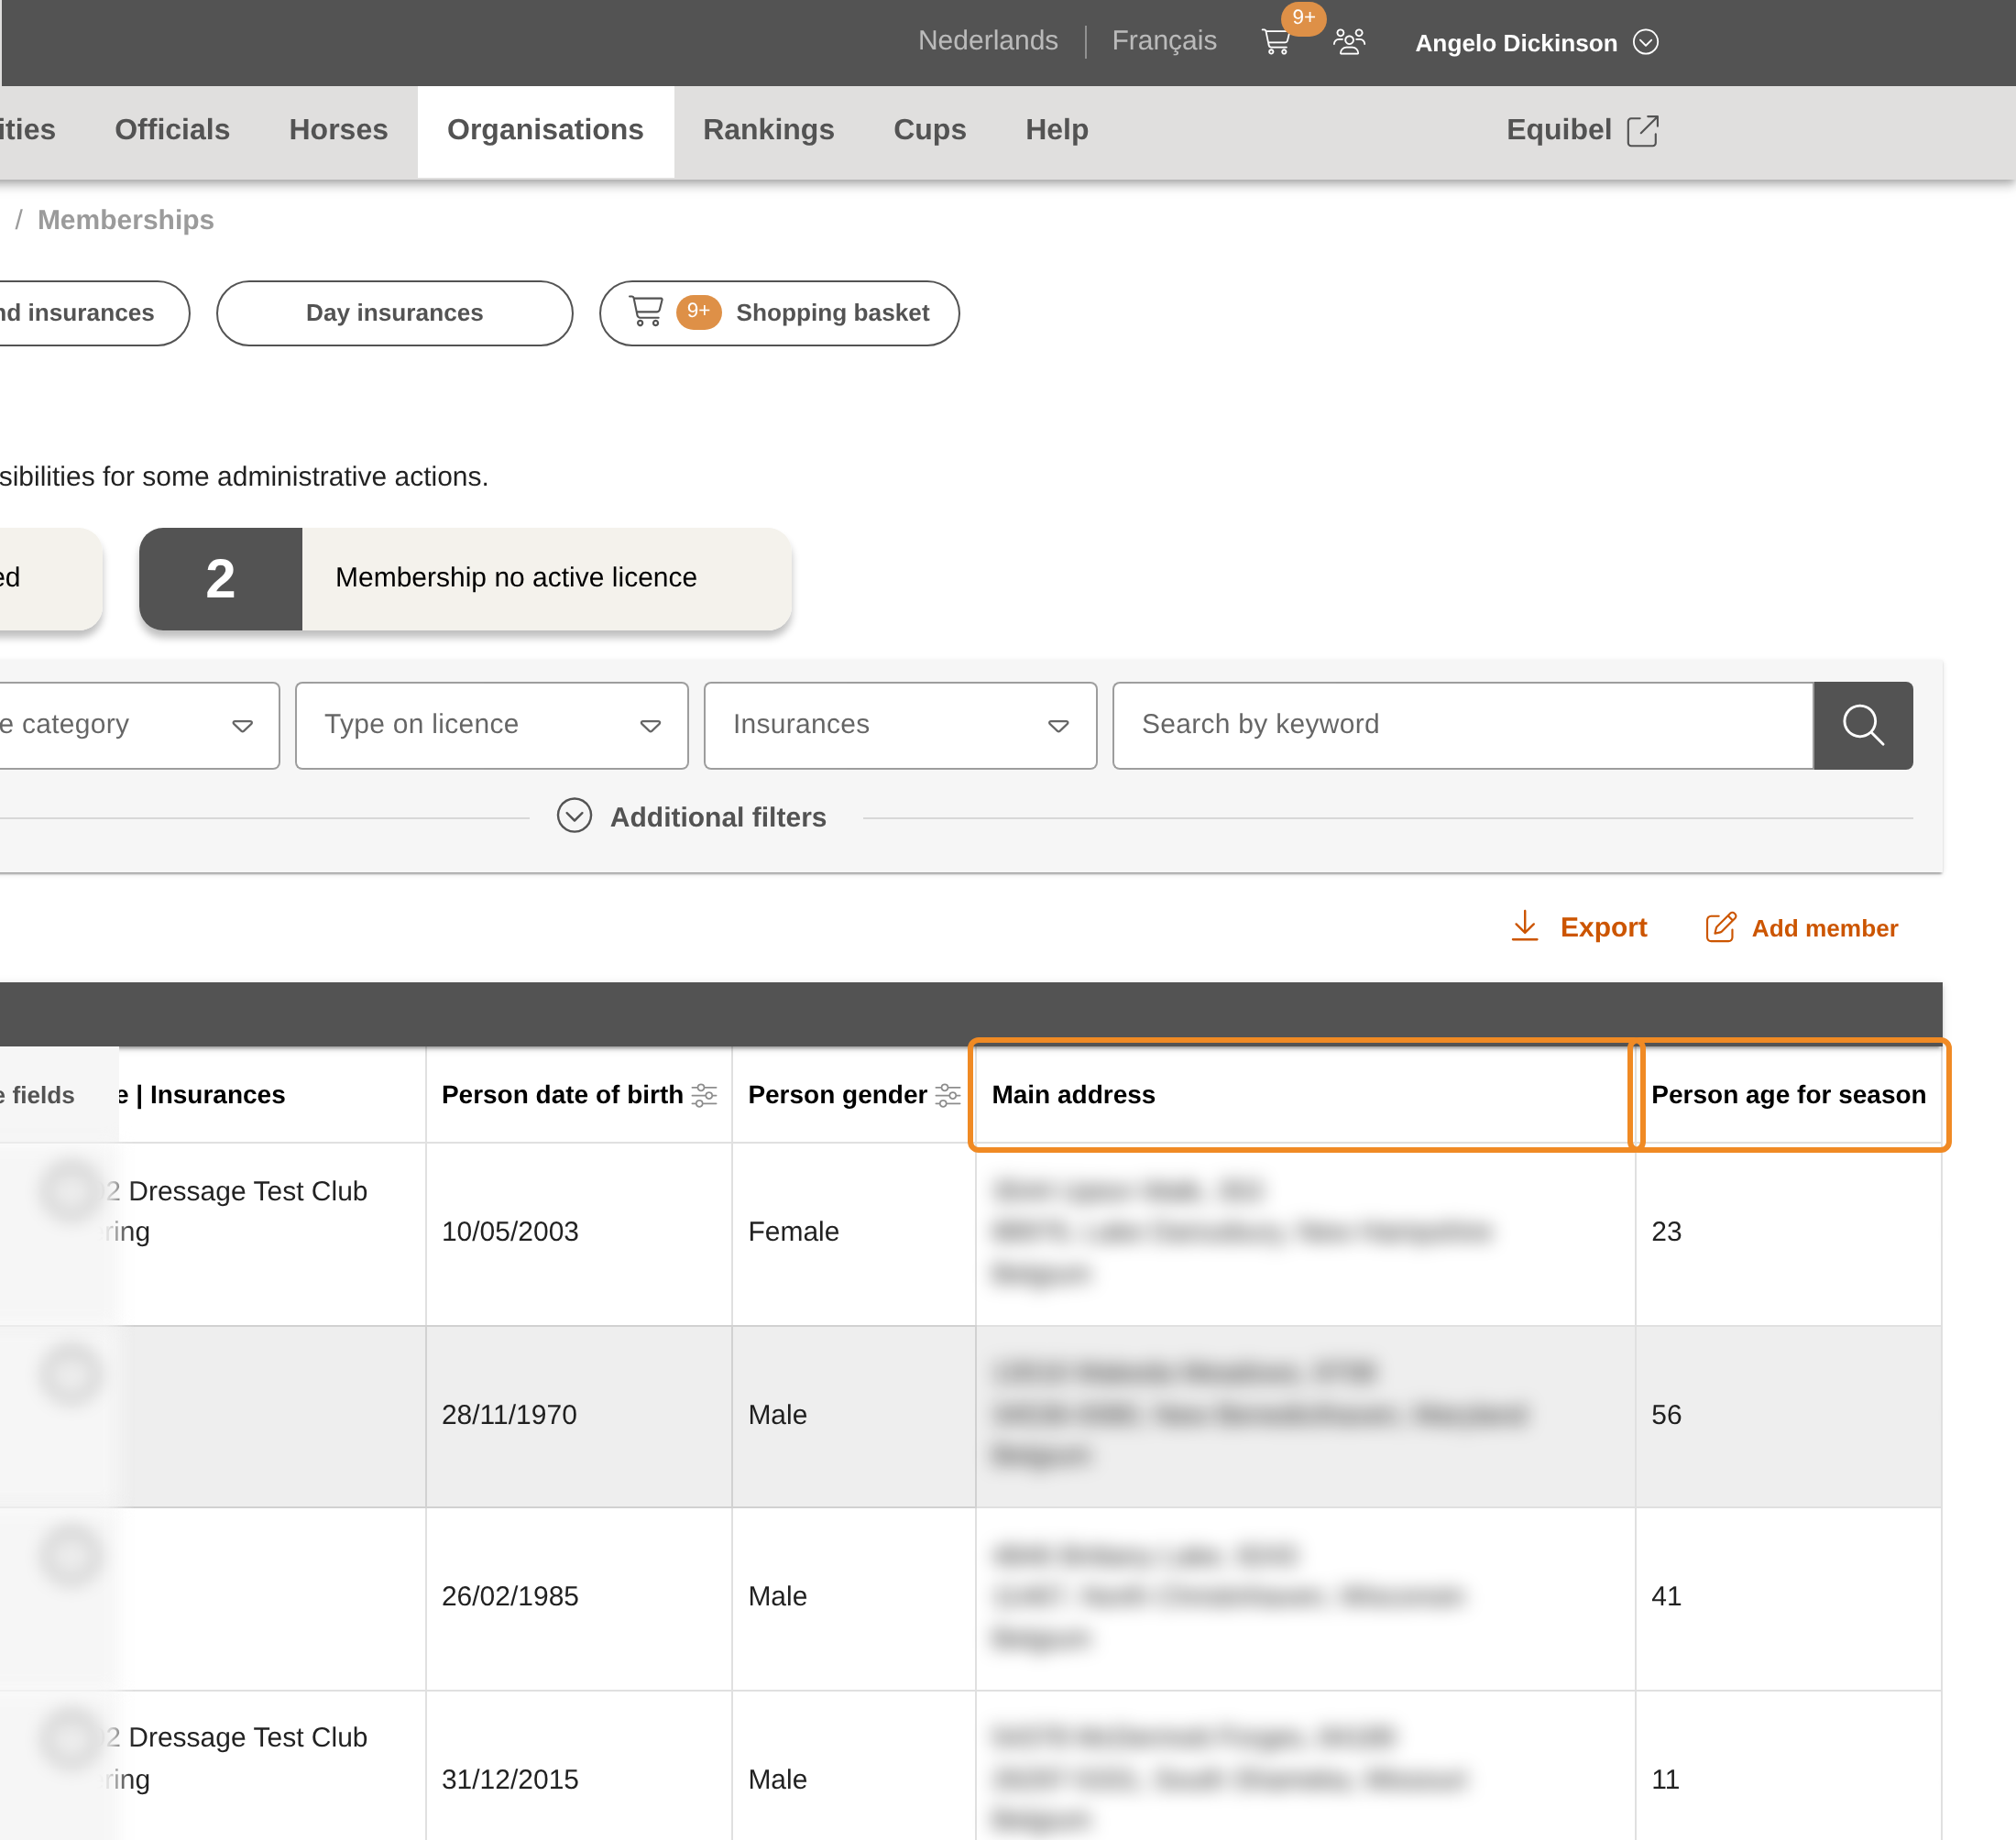
The new columns appear in the list. Your browser remembers your columns: the next time you open the list on this computer, they are still there.
Part 3 — Find the member
Step 13 — Search for the member
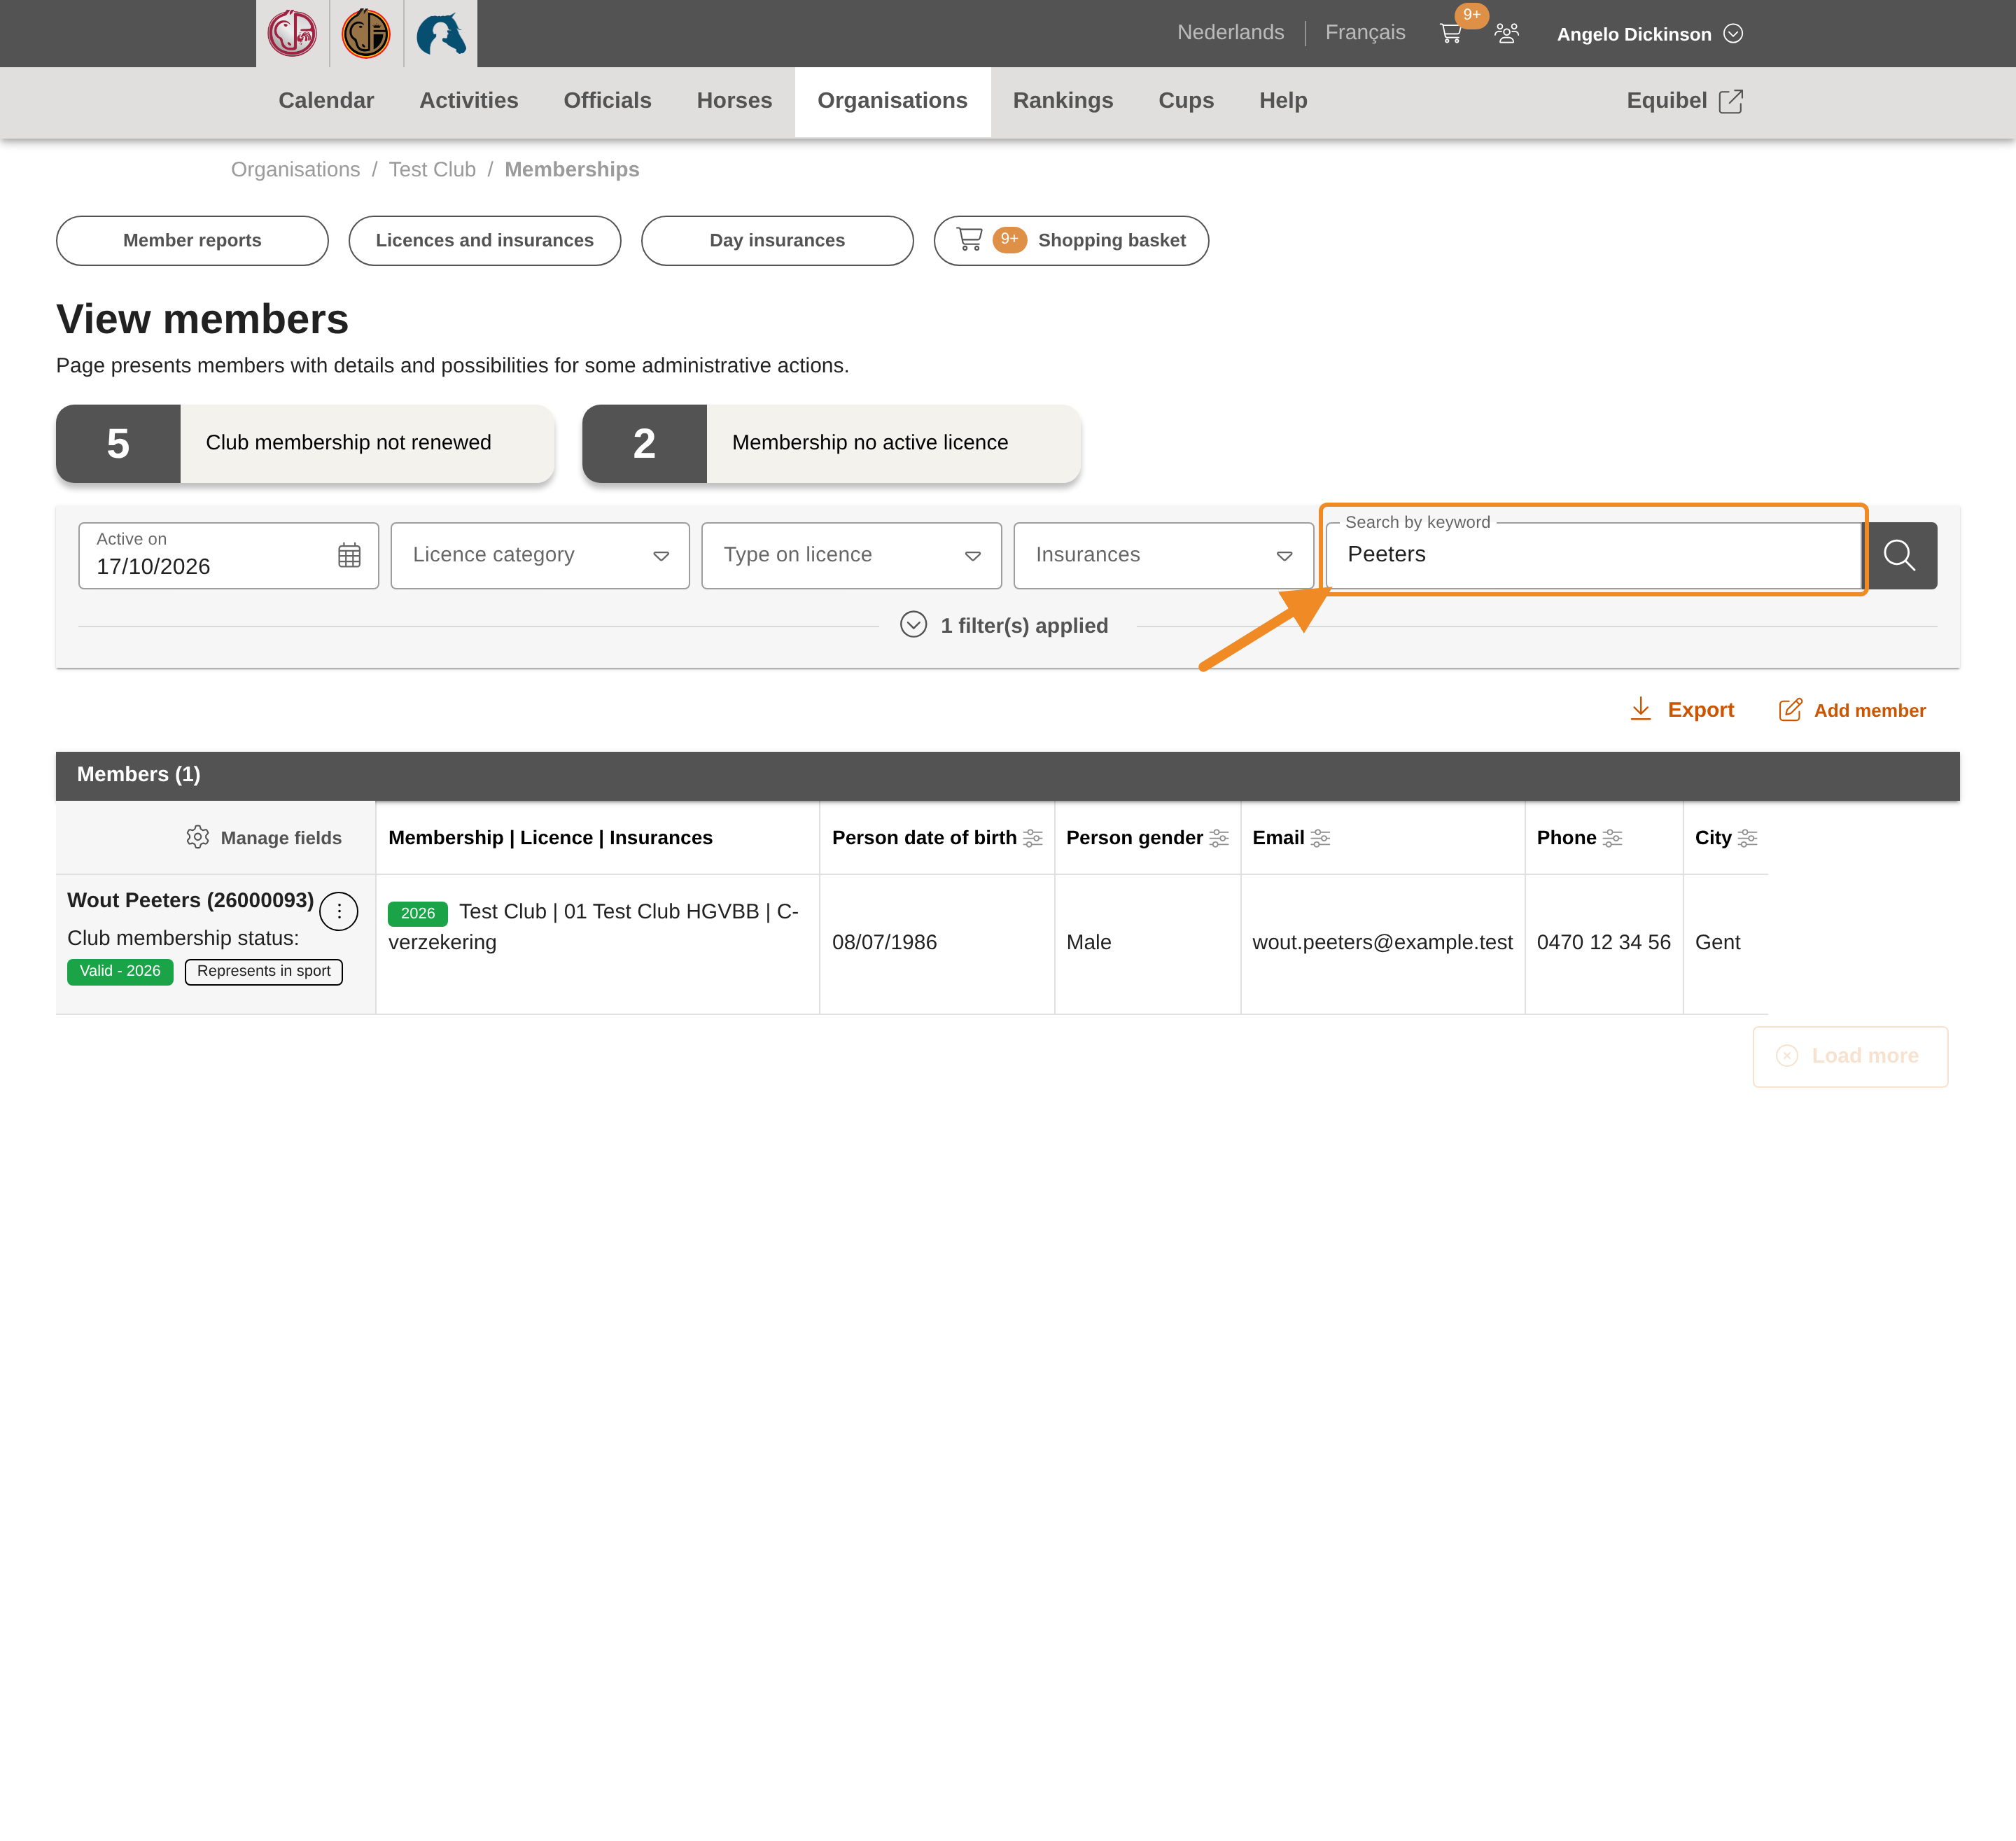
Type the member’s name in “Search by keyword” and press Enter, or click the magnifying glass. You can also search by licence number or email address.
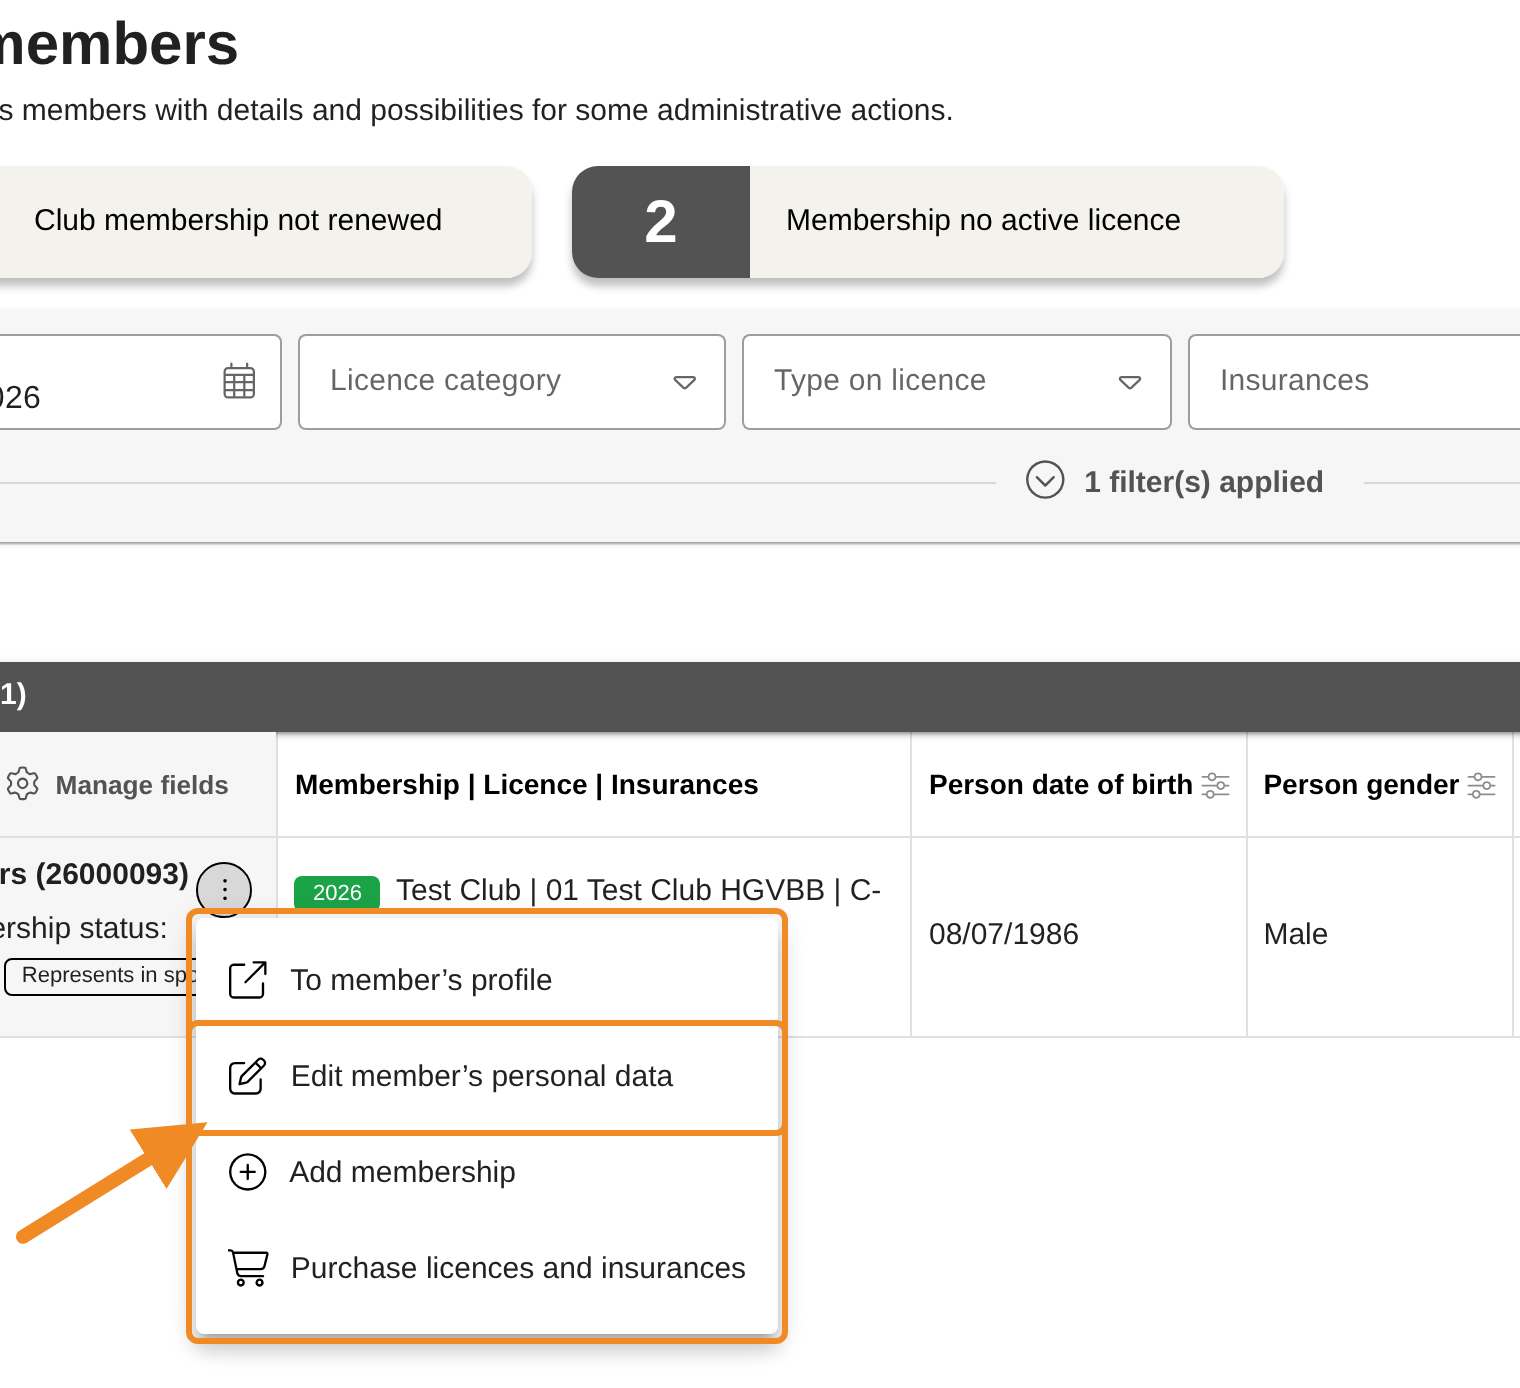
Step 14 — Open the member’s menu
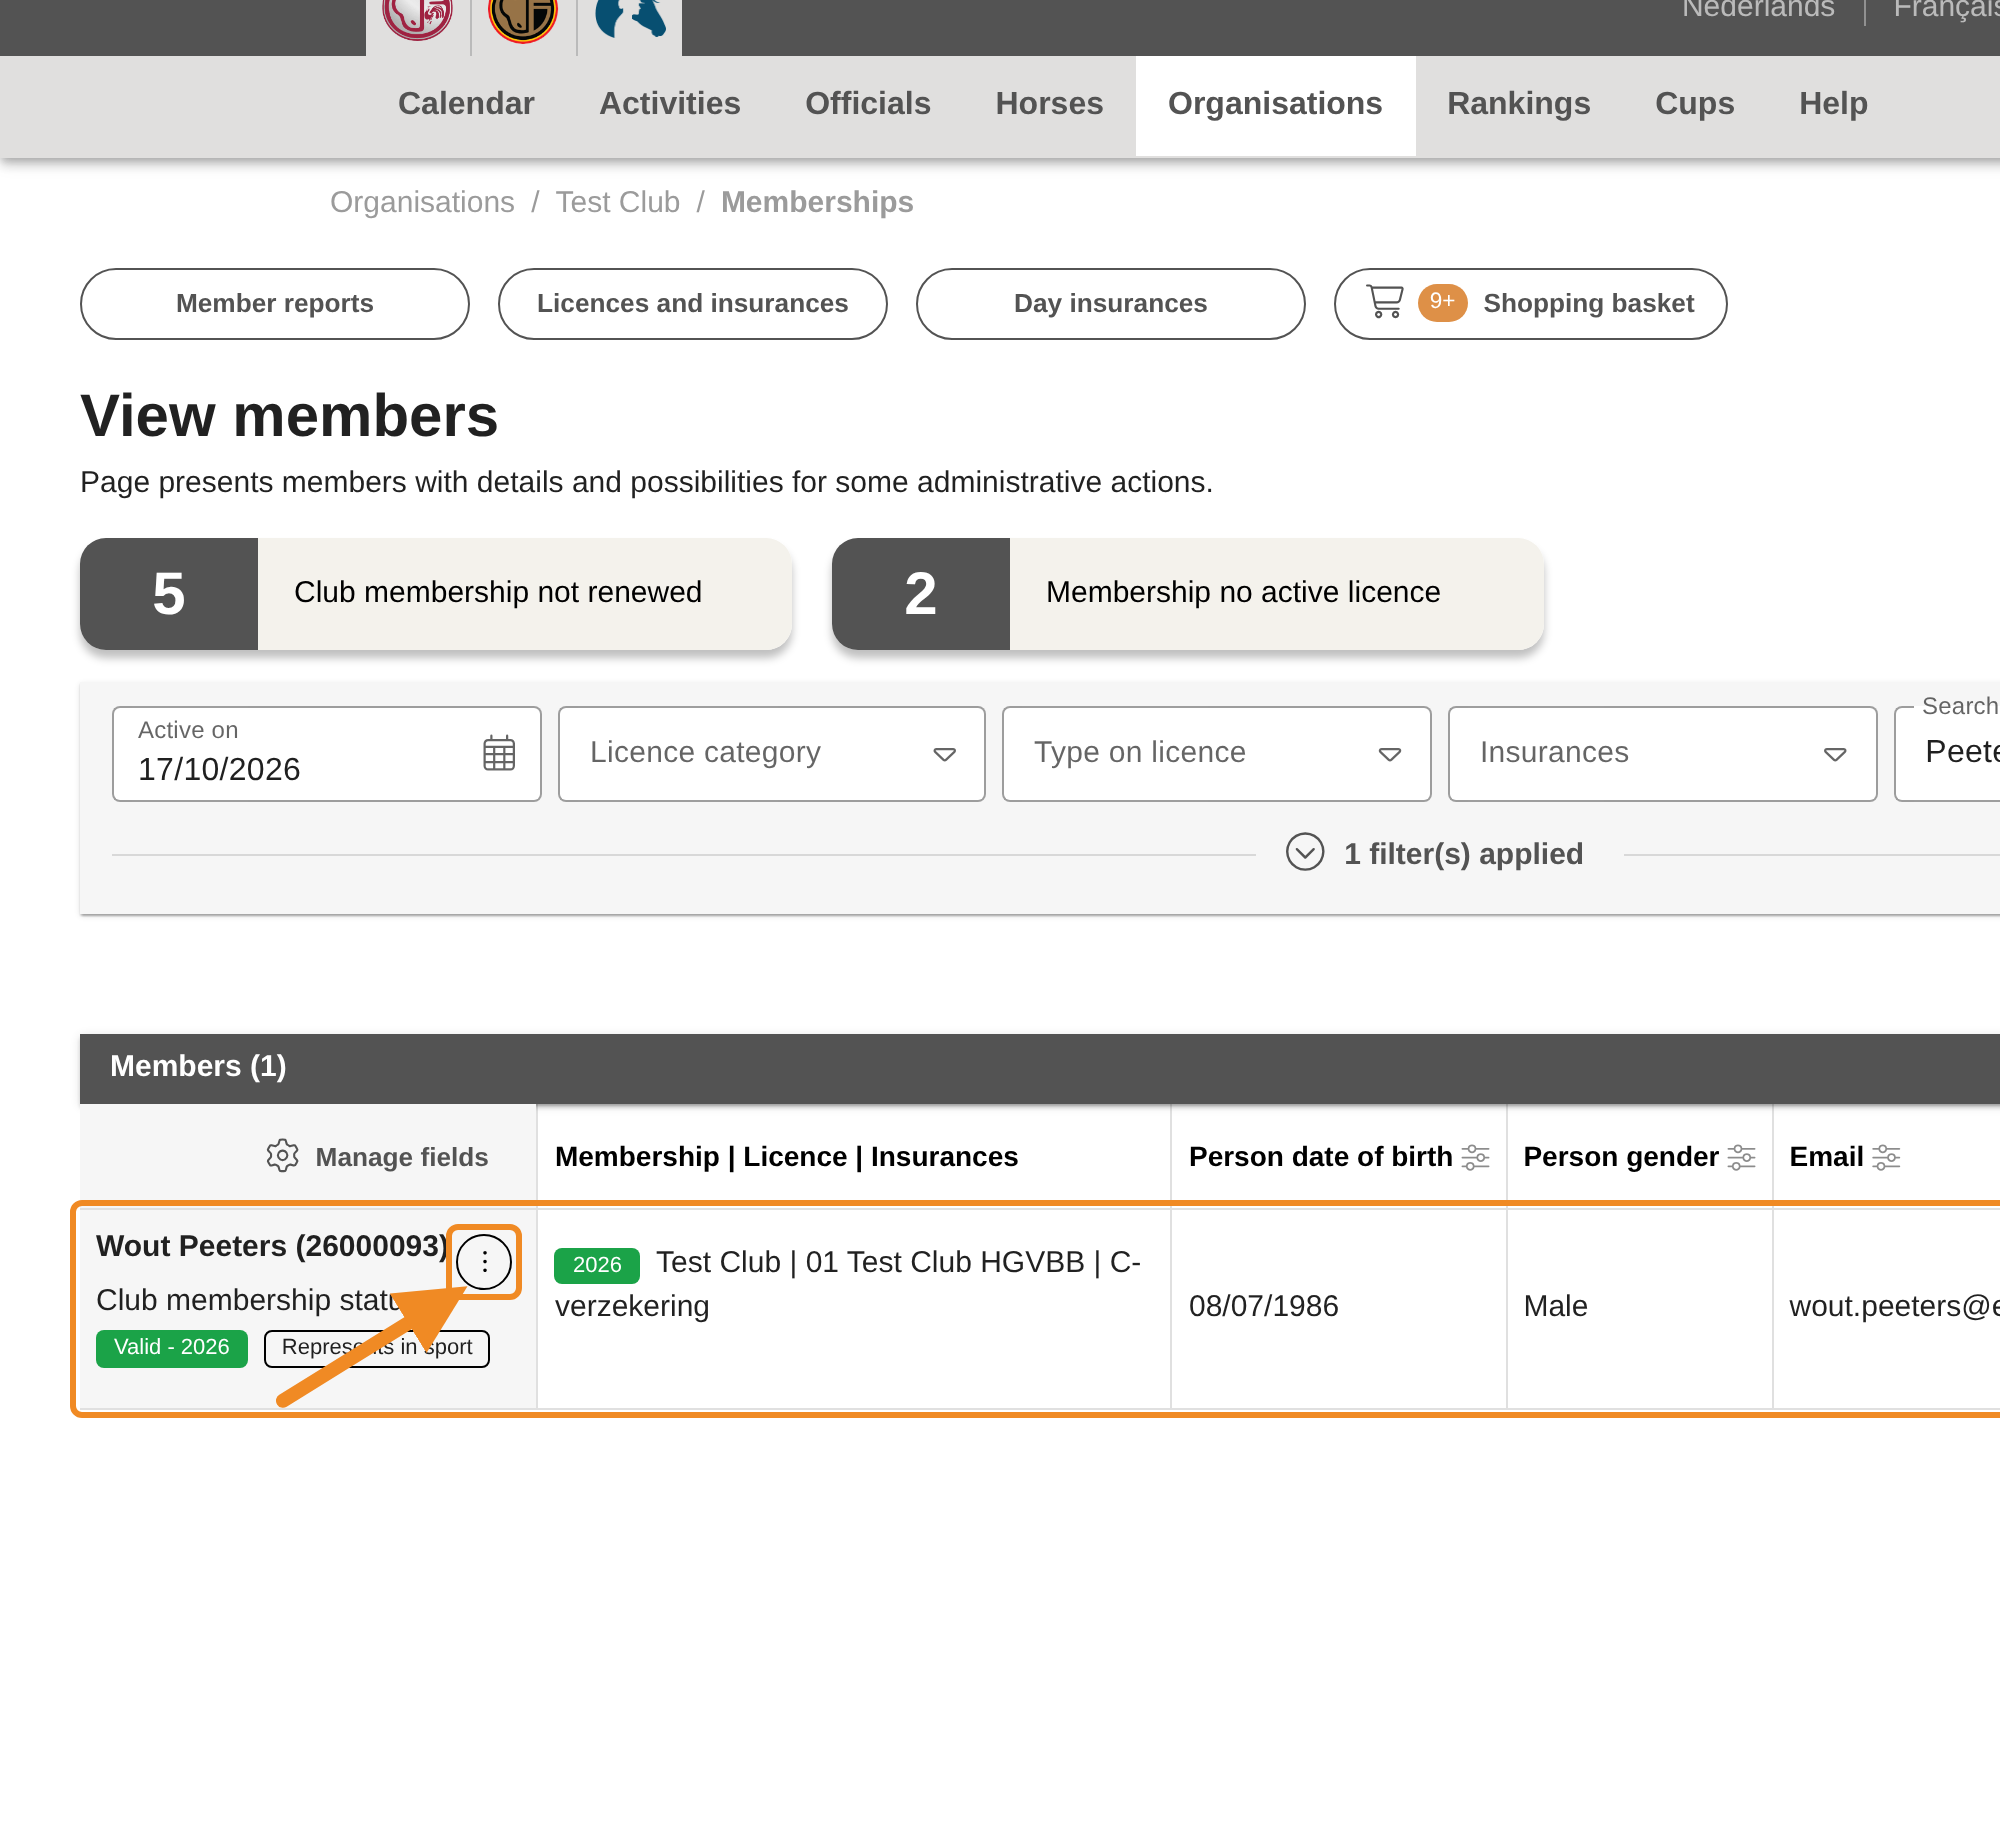
The member’s row shows their membership, licence and insurances, and their contact details. Click the three dots next to their name. From this menu you can change the member’s data in two ways: on their profile (Part 4), or in a window over the list (Part 5). Both change the same data.
Part 4 — Change the data on the member’s profile
Step 15 — Open the profile
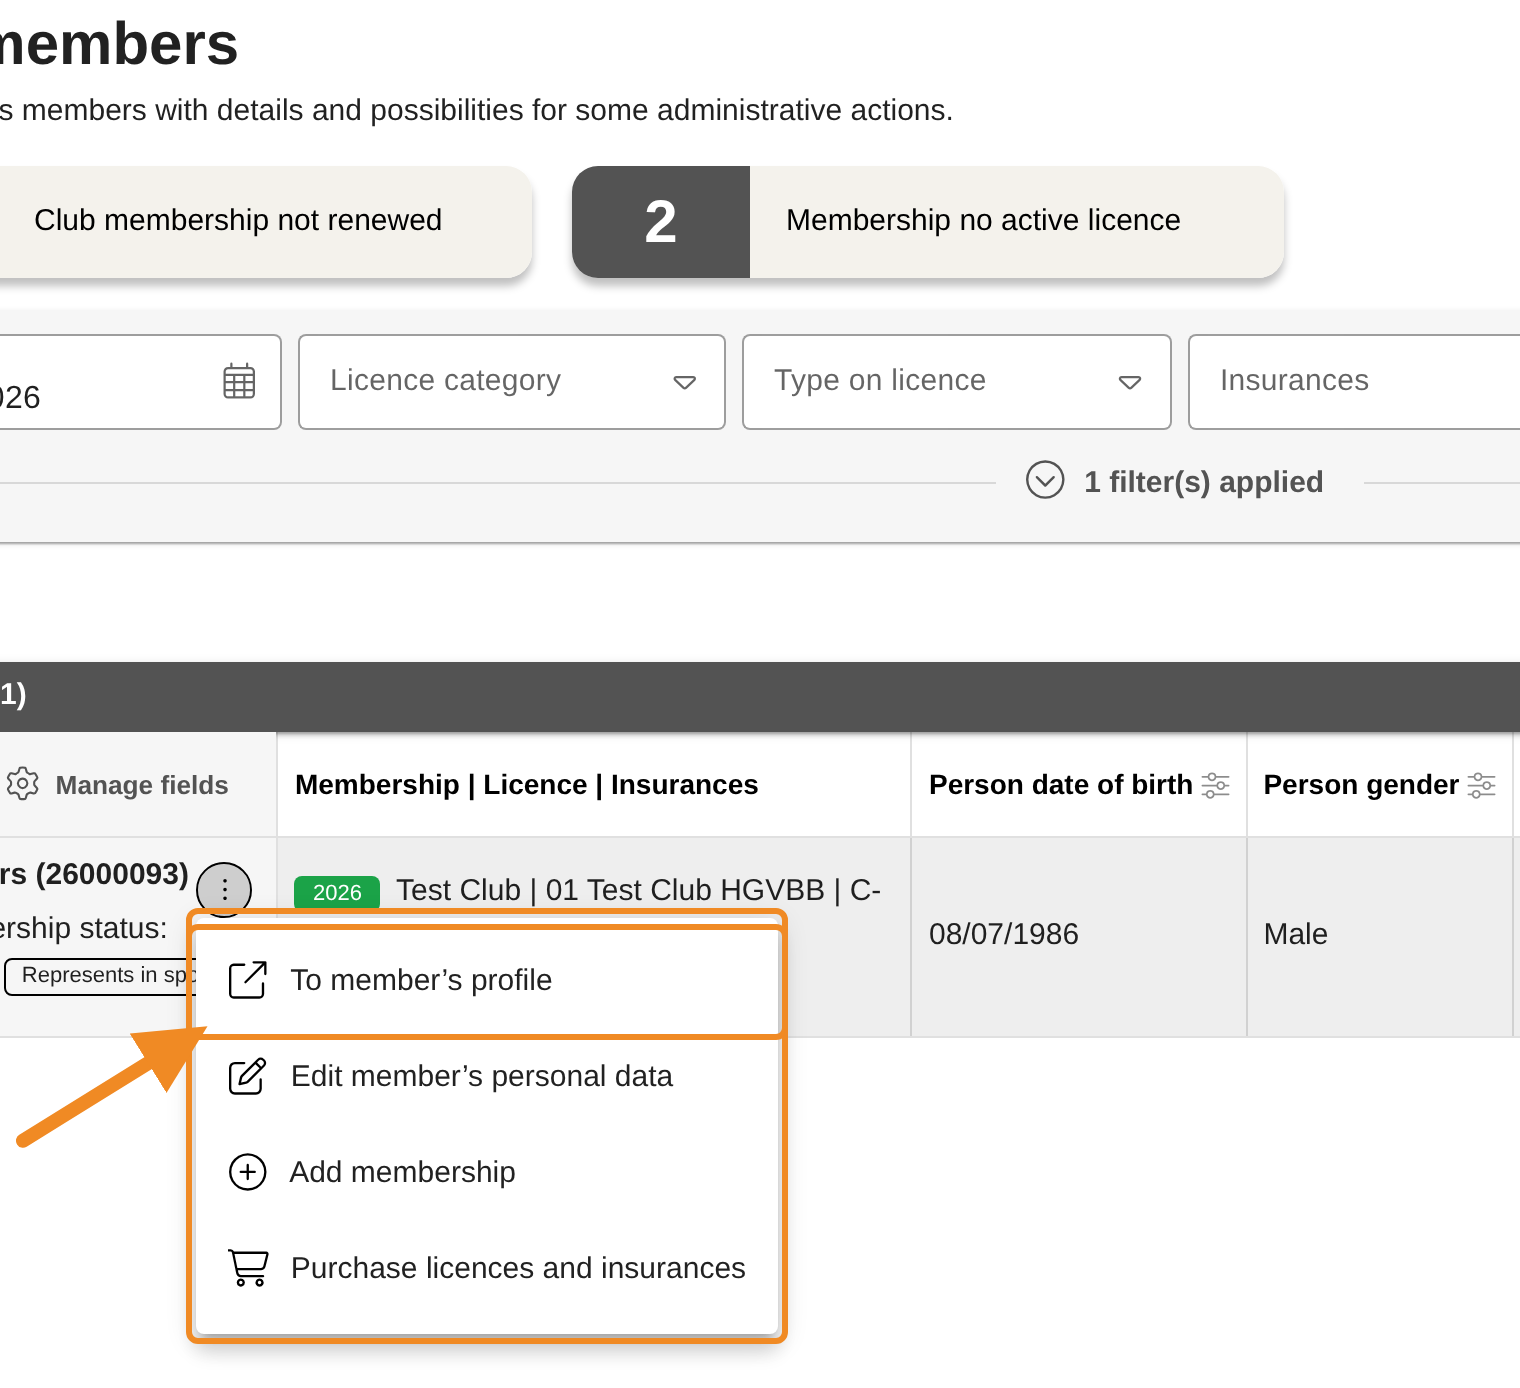
Click “To member’s profile”. The member’s profile opens in a new tab of your browser, so the members list stays open in the first tab.
Step 16 — Edit the profile
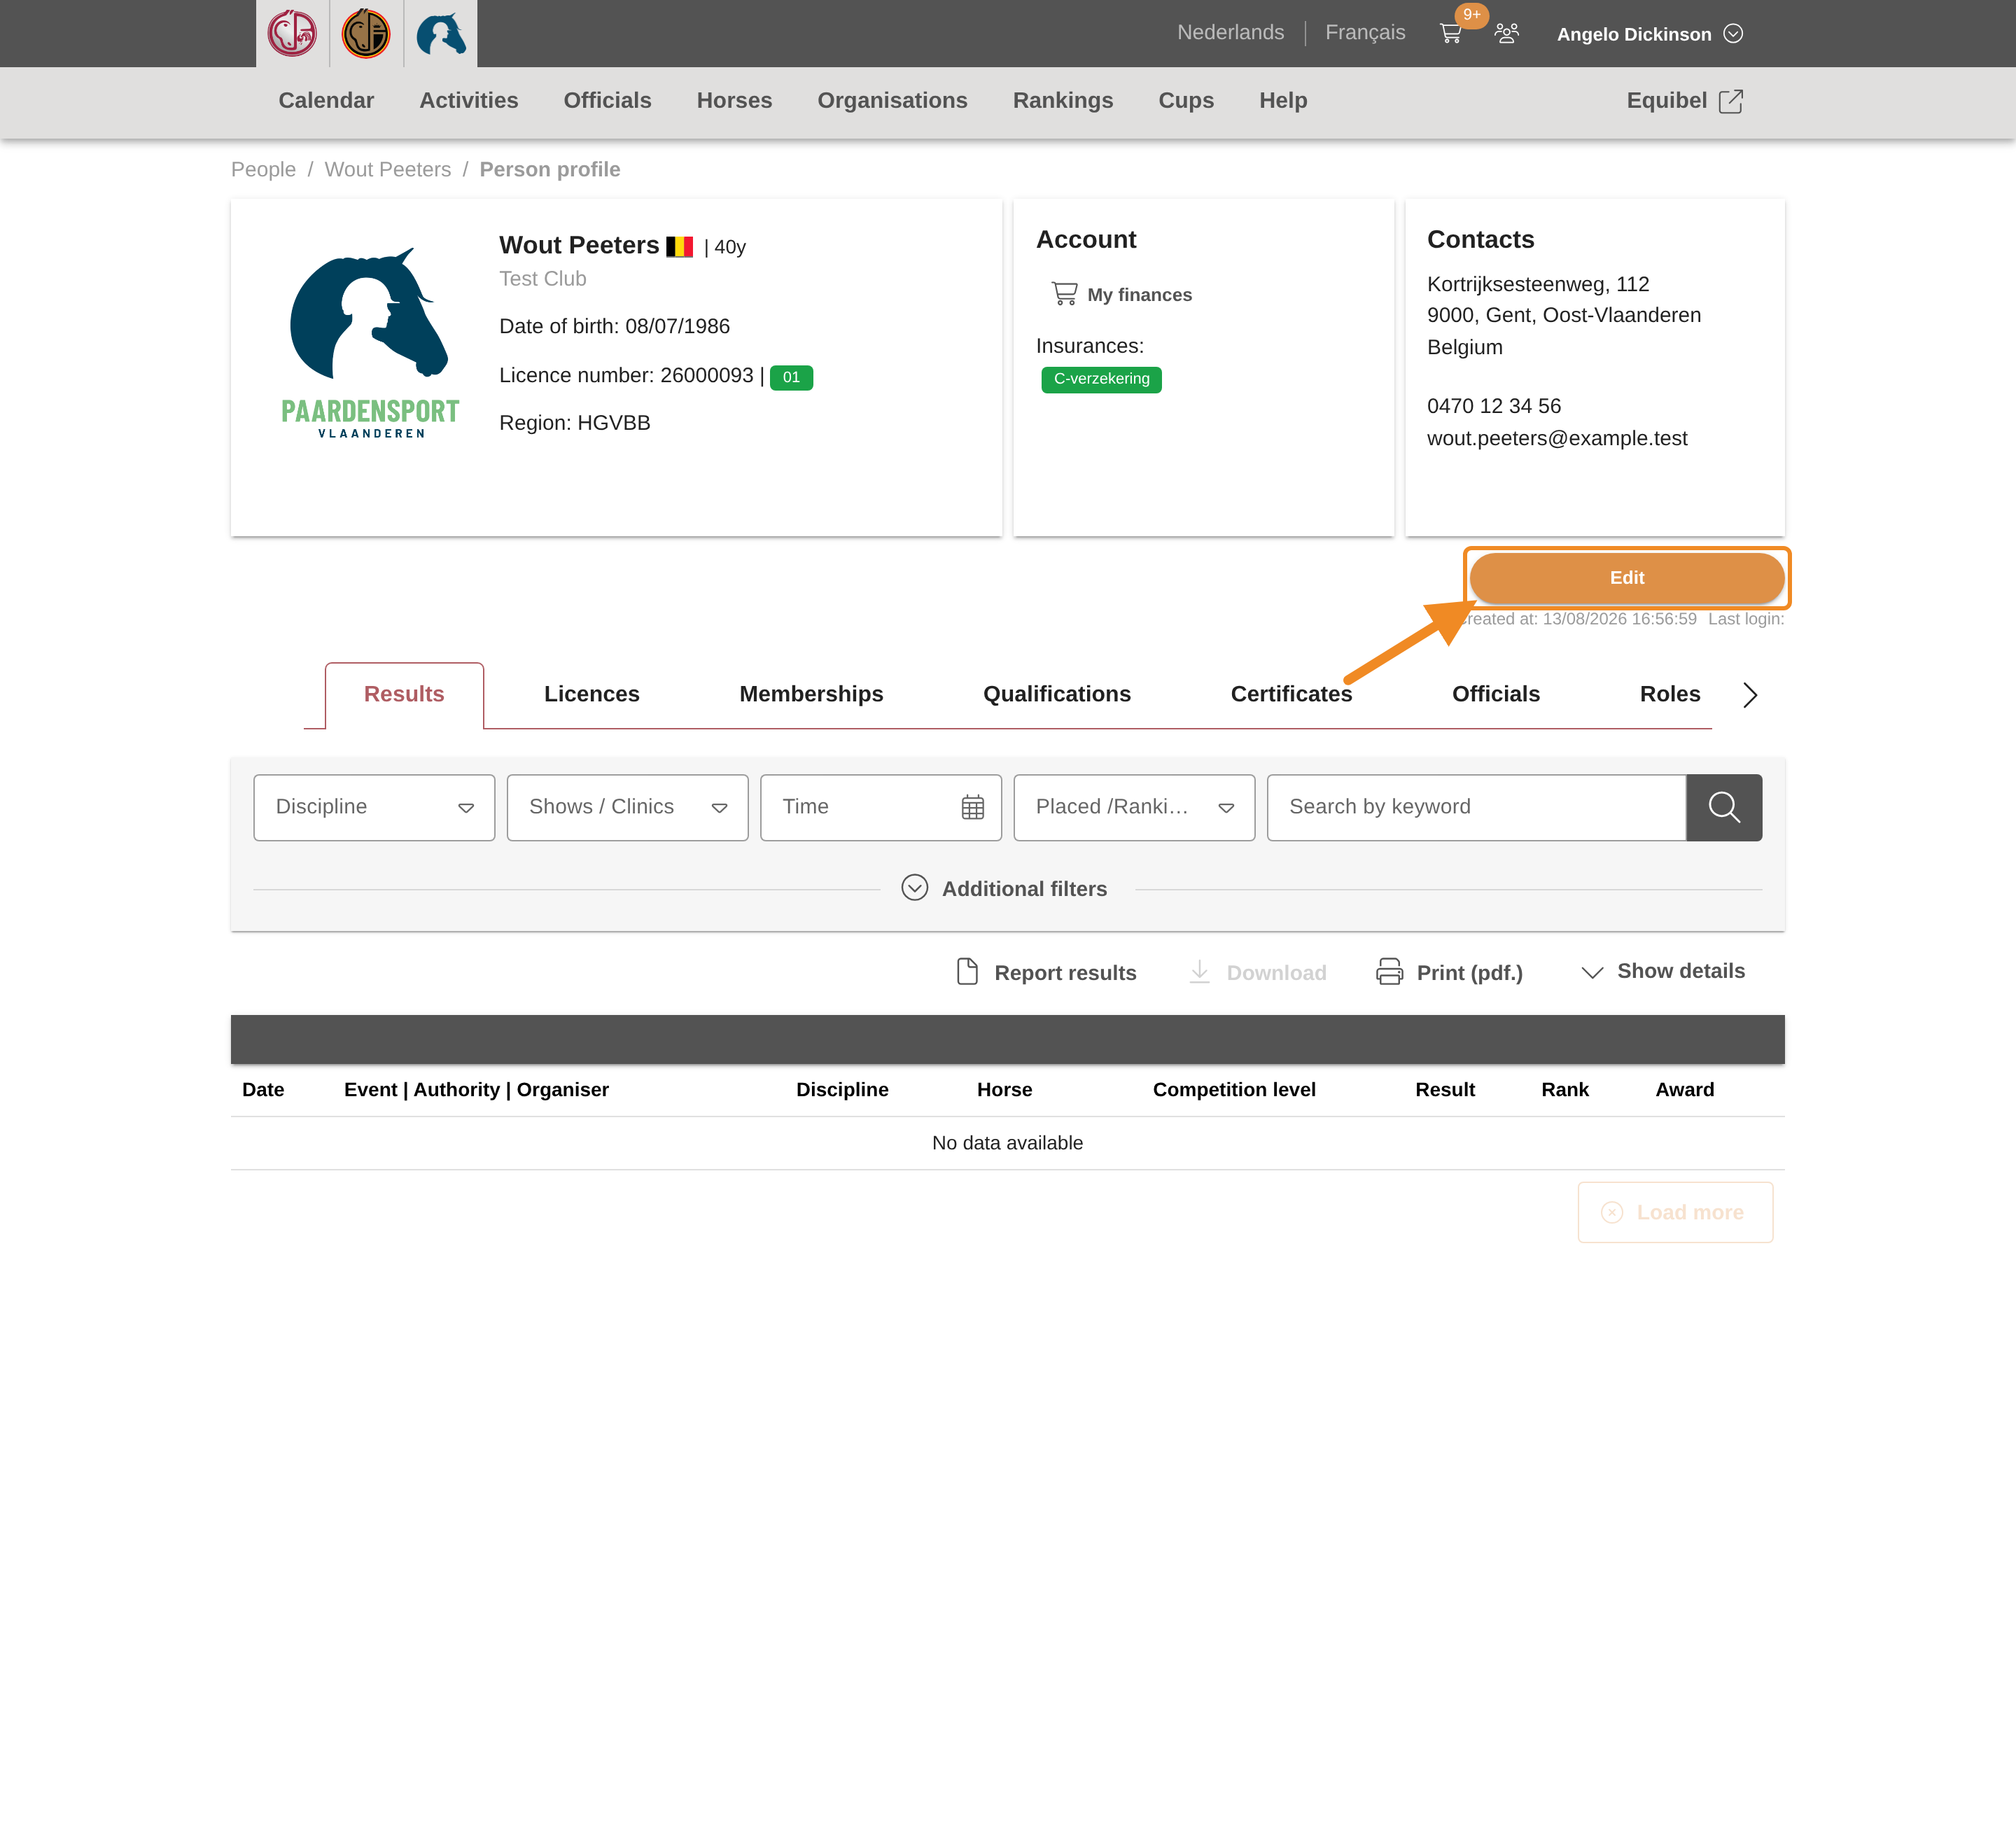
The profile shows the member’s data: at the top their personal and contact details, and in the tabs below for example their licences and memberships. To change the data, click “Edit”. A page with all the member’s data opens. Change what is no longer right and click “Save”.
Part 5 — Change the data from the members list
Step 17 — Open the window
In the members list, open the menu of the member’s row (step 14) and click “Edit member’s personal data”.
Step 18 — Change the data
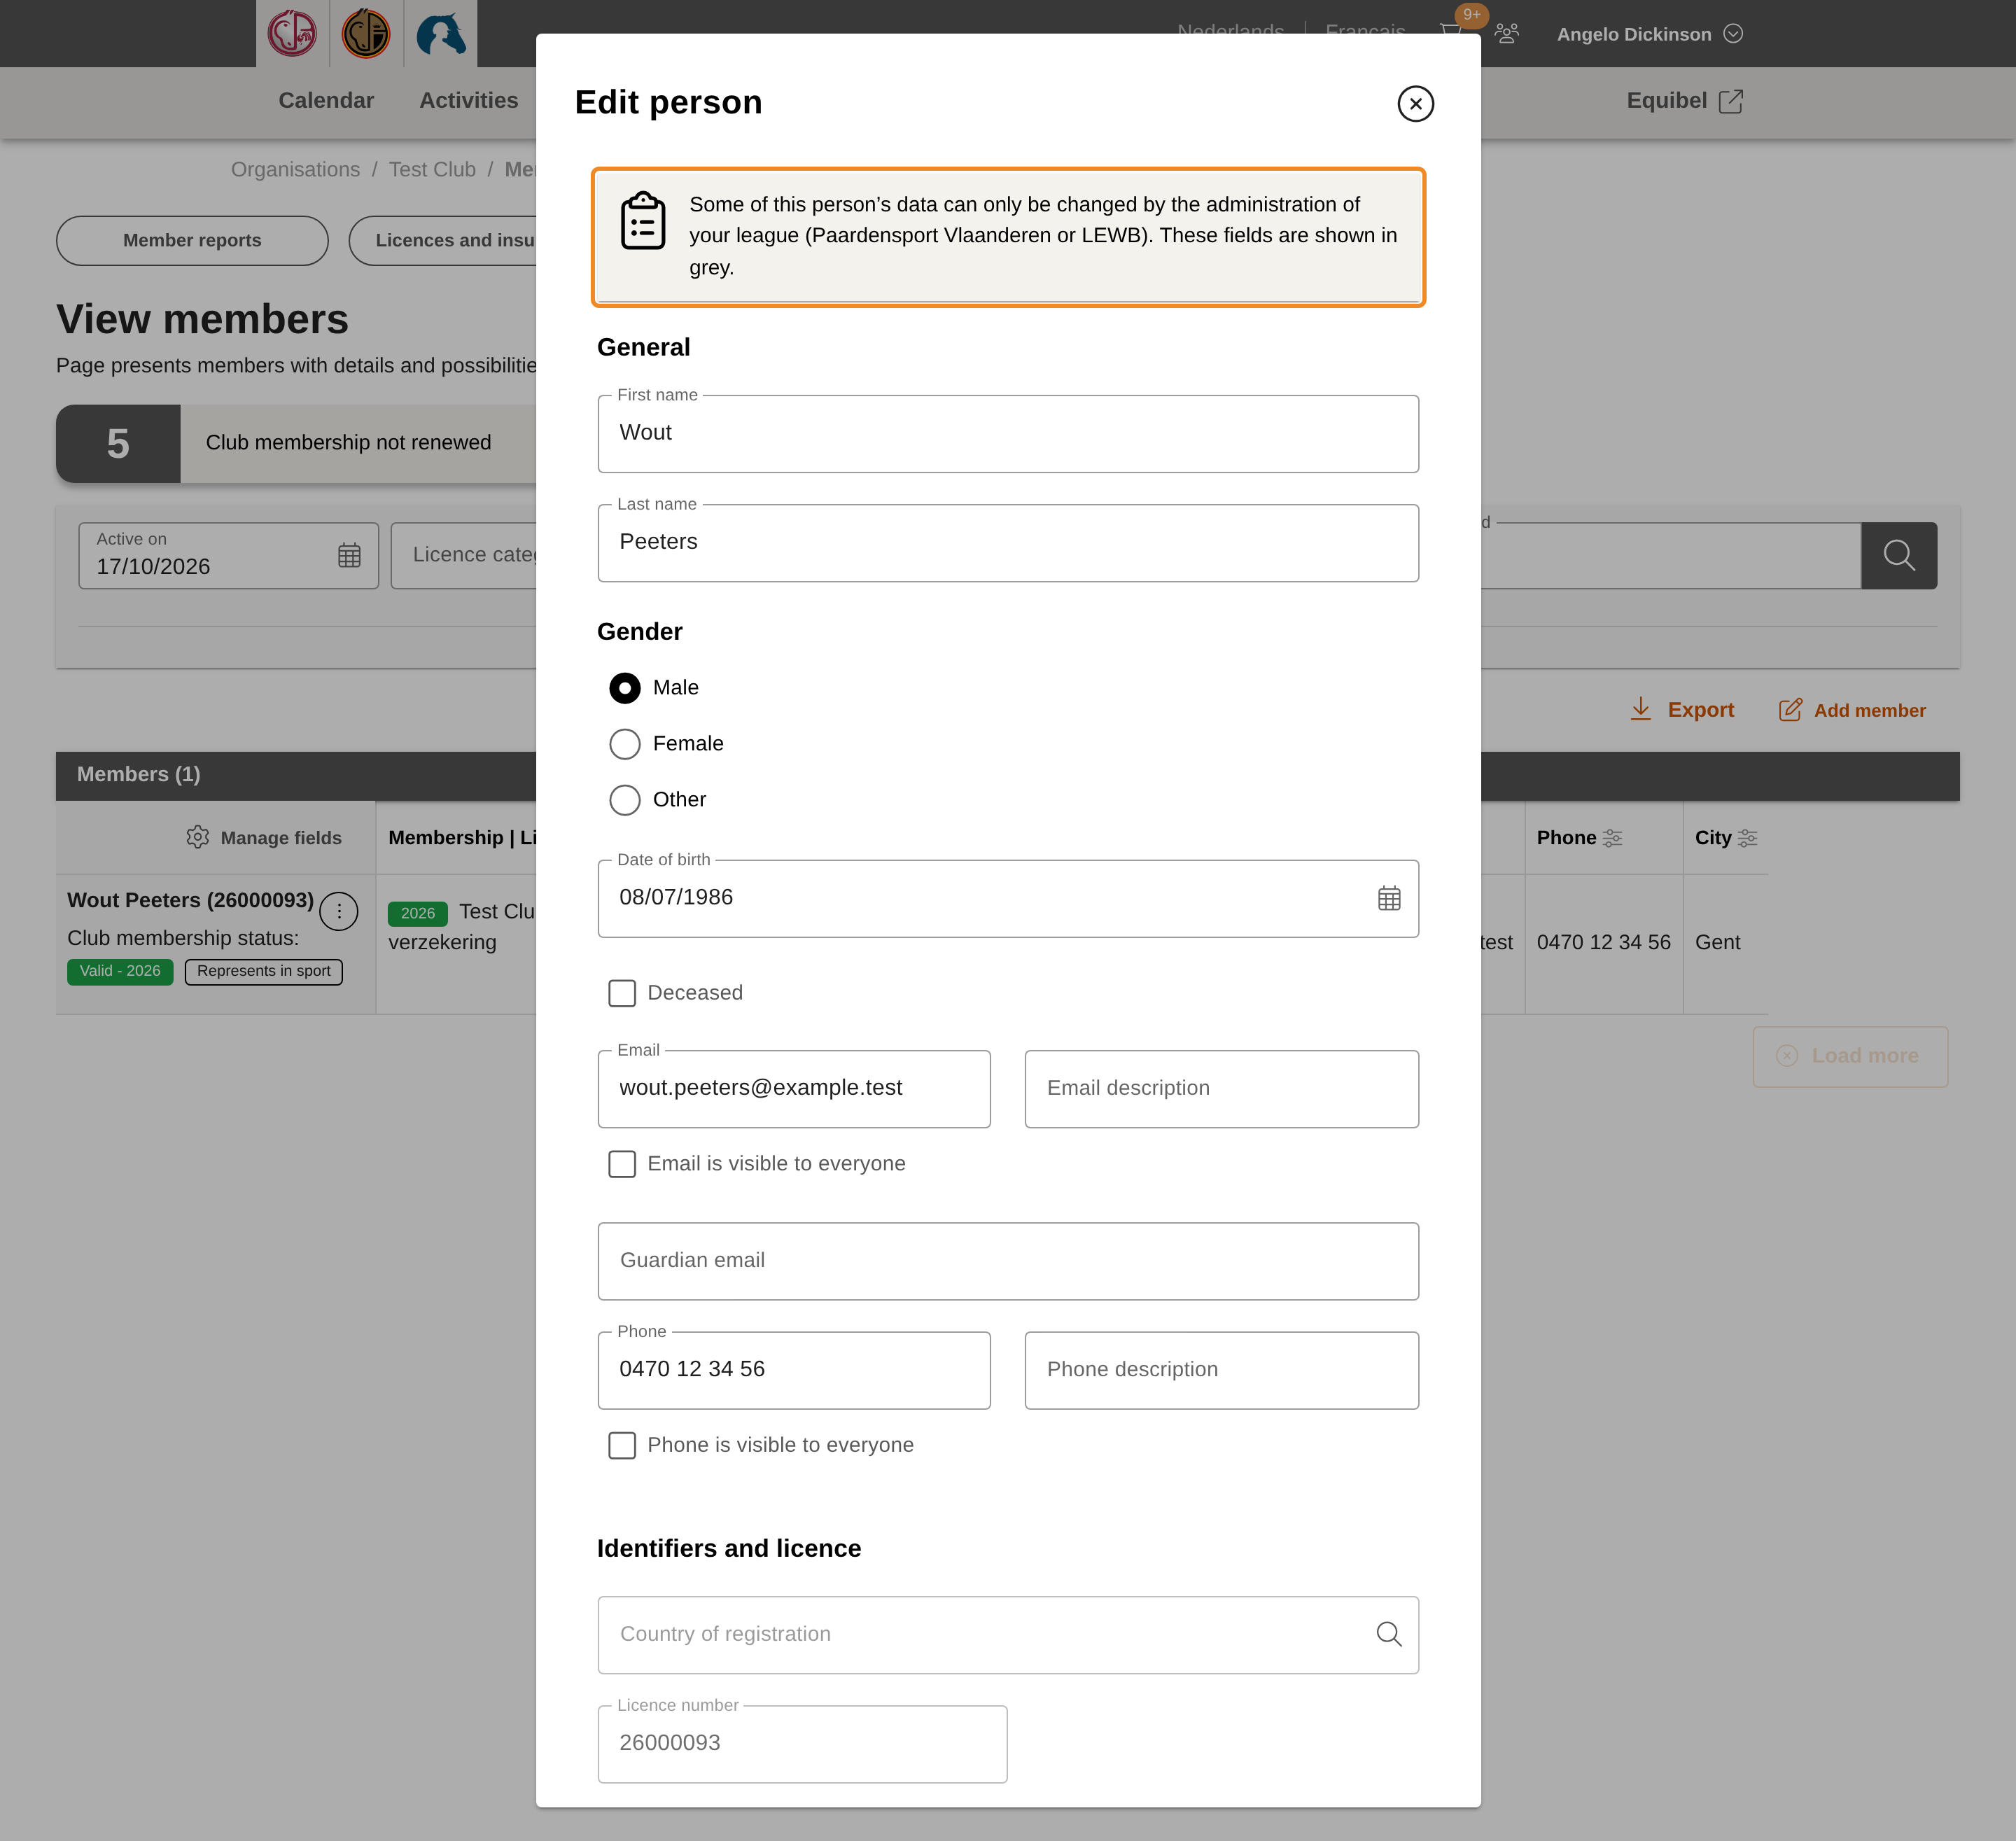
A window with the member’s data opens. Change what is no longer right.
Grey fields are frozen: only the club administration of Paardensport Vlaanderen can change them — for example the licence number and the FEI ID. If one of them is wrong, contact the club administration of Paardensport Vlaanderen.
Step 19 — Save
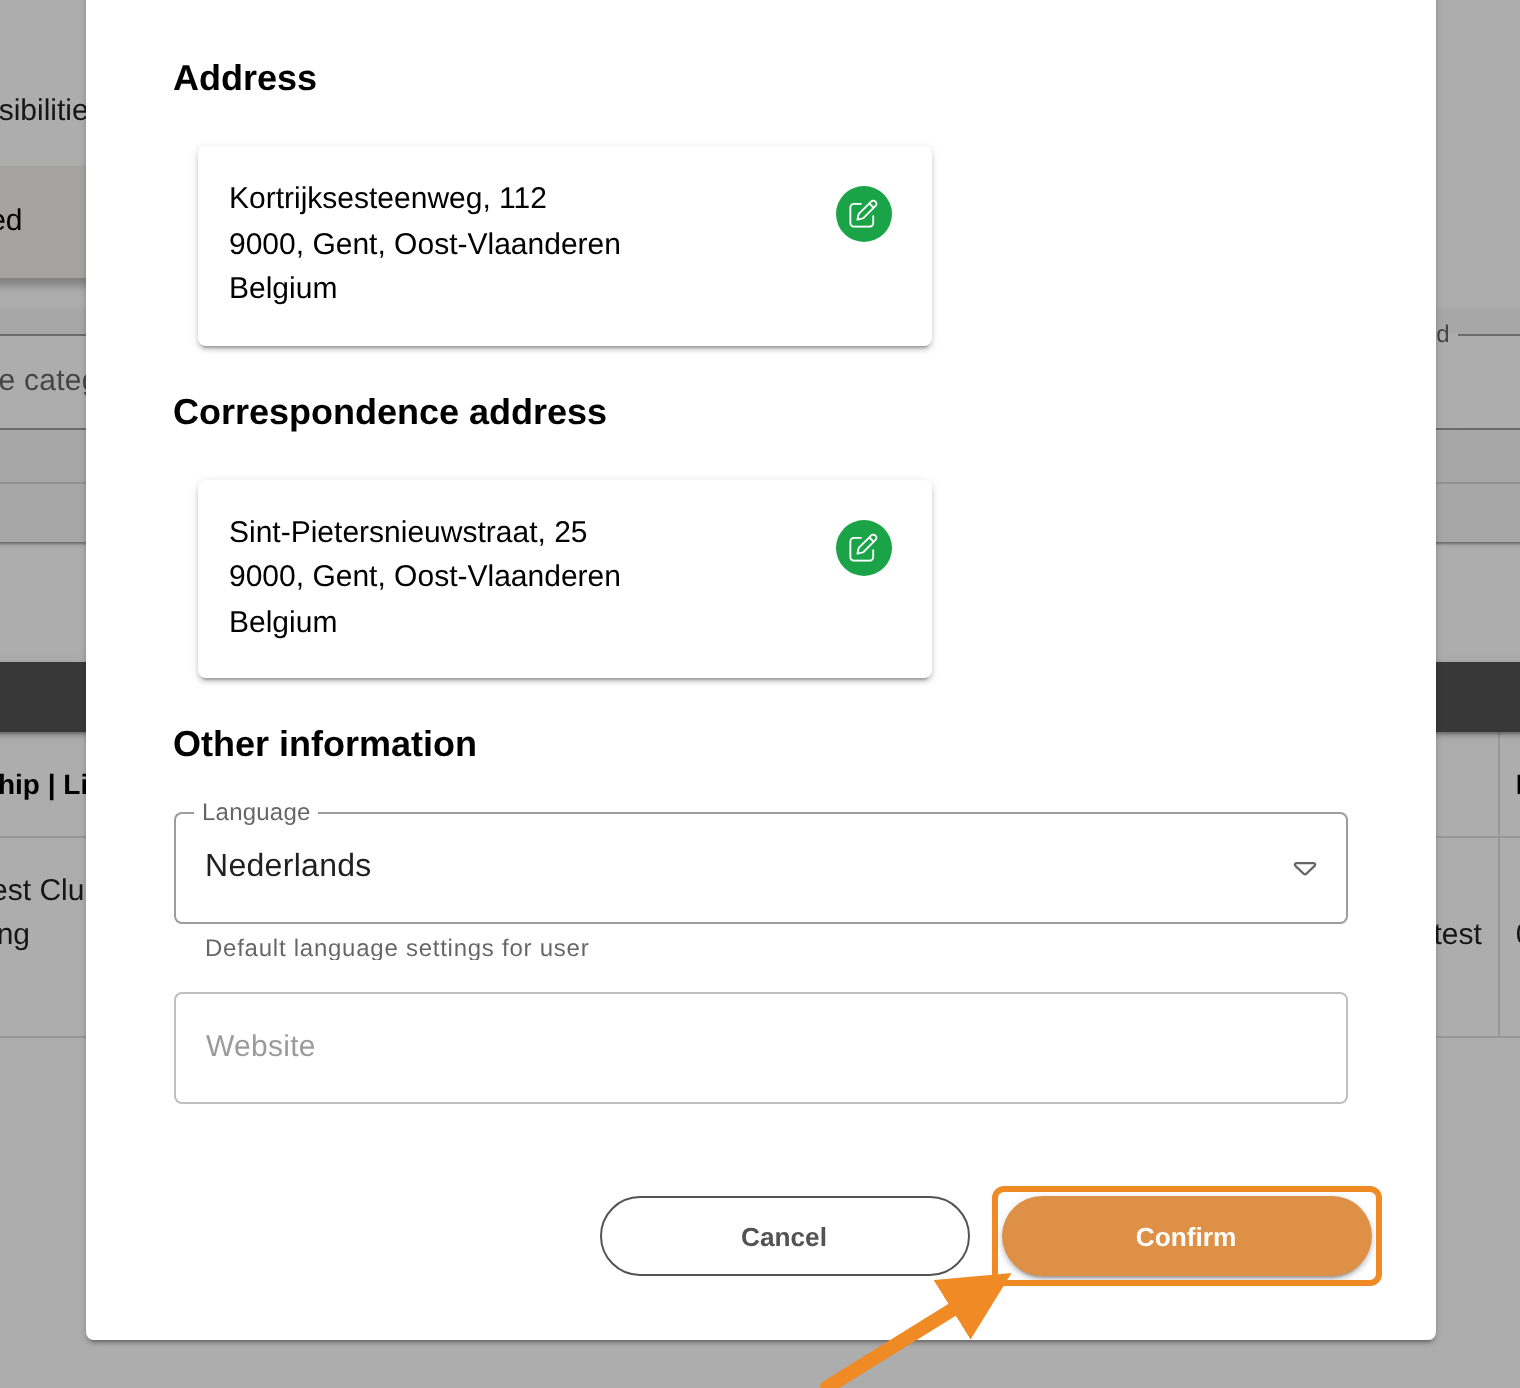
Click “Confirm” at the bottom of the window. The changes are saved and the window closes.
To stop without saving, click “Cancel” and confirm that you want to leave. Nothing you changed is kept.
Good to know
- Members can change their own data. Every member can sign in and change their own contact details, address and language. Their name and date of birth can be changed by you or by the club administration of Paardensport Vlaanderen.
- The email address is the member’s login. A member signs in with their email address, or with the guardian email. When you change it, tell the member: from then on they sign in with the new address.
- A person with two accounts. If you see that a member appears twice in the platform — for example under two licence numbers — do not change either account. Inform the club administration of Paardensport Vlaanderen and send them the name and licence number of both accounts, so they can merge them into one.
If something goes wrong
| What you see | What to do |
|---|---|
| There is no “View members” button on my club page | You are not a club administrator of this club, or the club has unpaid orders or a debt. Pay the club’s orders, or ask a club administrator of your club. |
| The member’s menu has no “Edit member’s personal data” | The person is not a current member of your club. |
| A field I need to change is grey | Only the club administration of Paardensport Vlaanderen can change that field. Contact them. |
| The window does not save and shows a message | A value is missing or not valid, for example an email address without @. Correct it and click “Confirm” again. |
Related articles: How to Register a New Member · How to Check Your Club’s Details · How to Resend the Licence Email with the Health Insurance Certificate